Table of Contents
Creating an Amazon AWS EC2 Instance
May 2017
Introduction
This guide assumes that you have created an Amazon account to be able to access the Amazon Web Services (AWS) pages, and that you have successfully logged in.
Once logged in you will see the following page (be warned, the site layout changes quite frequently, so you might have to do some digging).
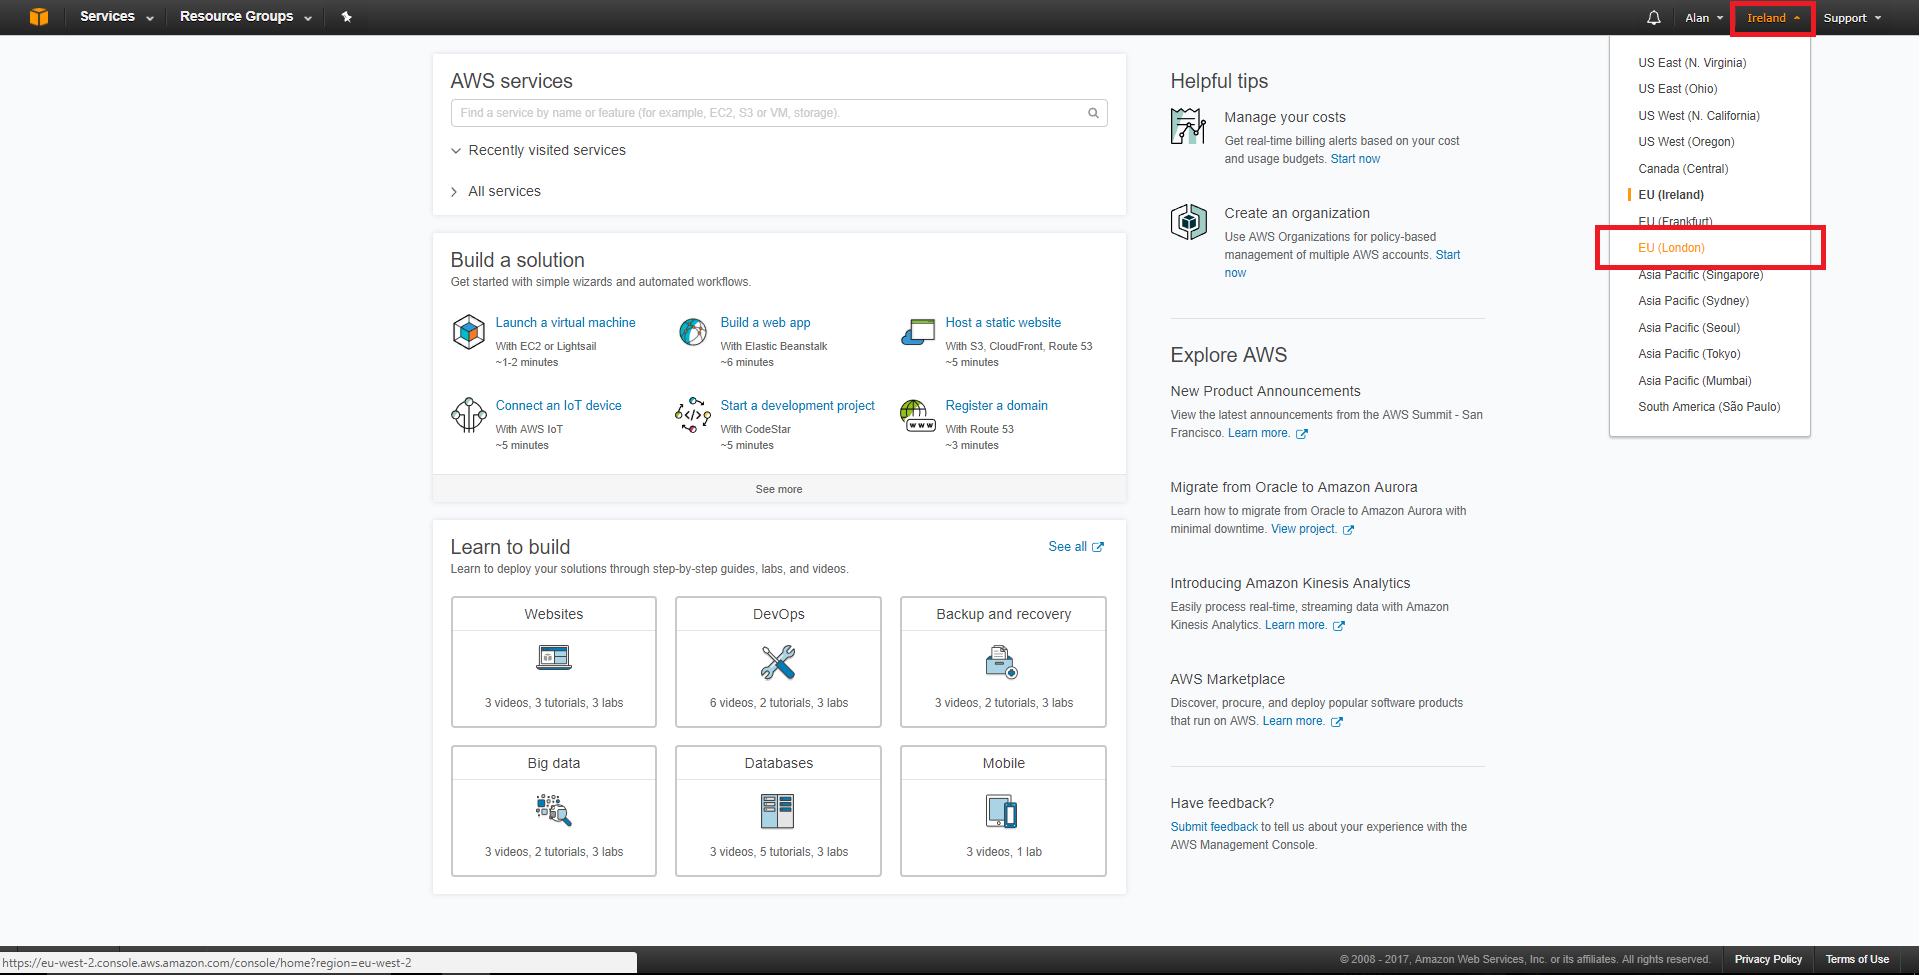
The first mistake I made was not checking the region in which I was creating my AWS instance. So I created mine in the USA. Not that this really matters for serving a few webpages, but if speed is important, ensure you select a region closest to you.
You can do this by clicking the current region in the top right hand corner (highlighted in Orange) and select a suitable local region.
We have to chose what we are going to create.
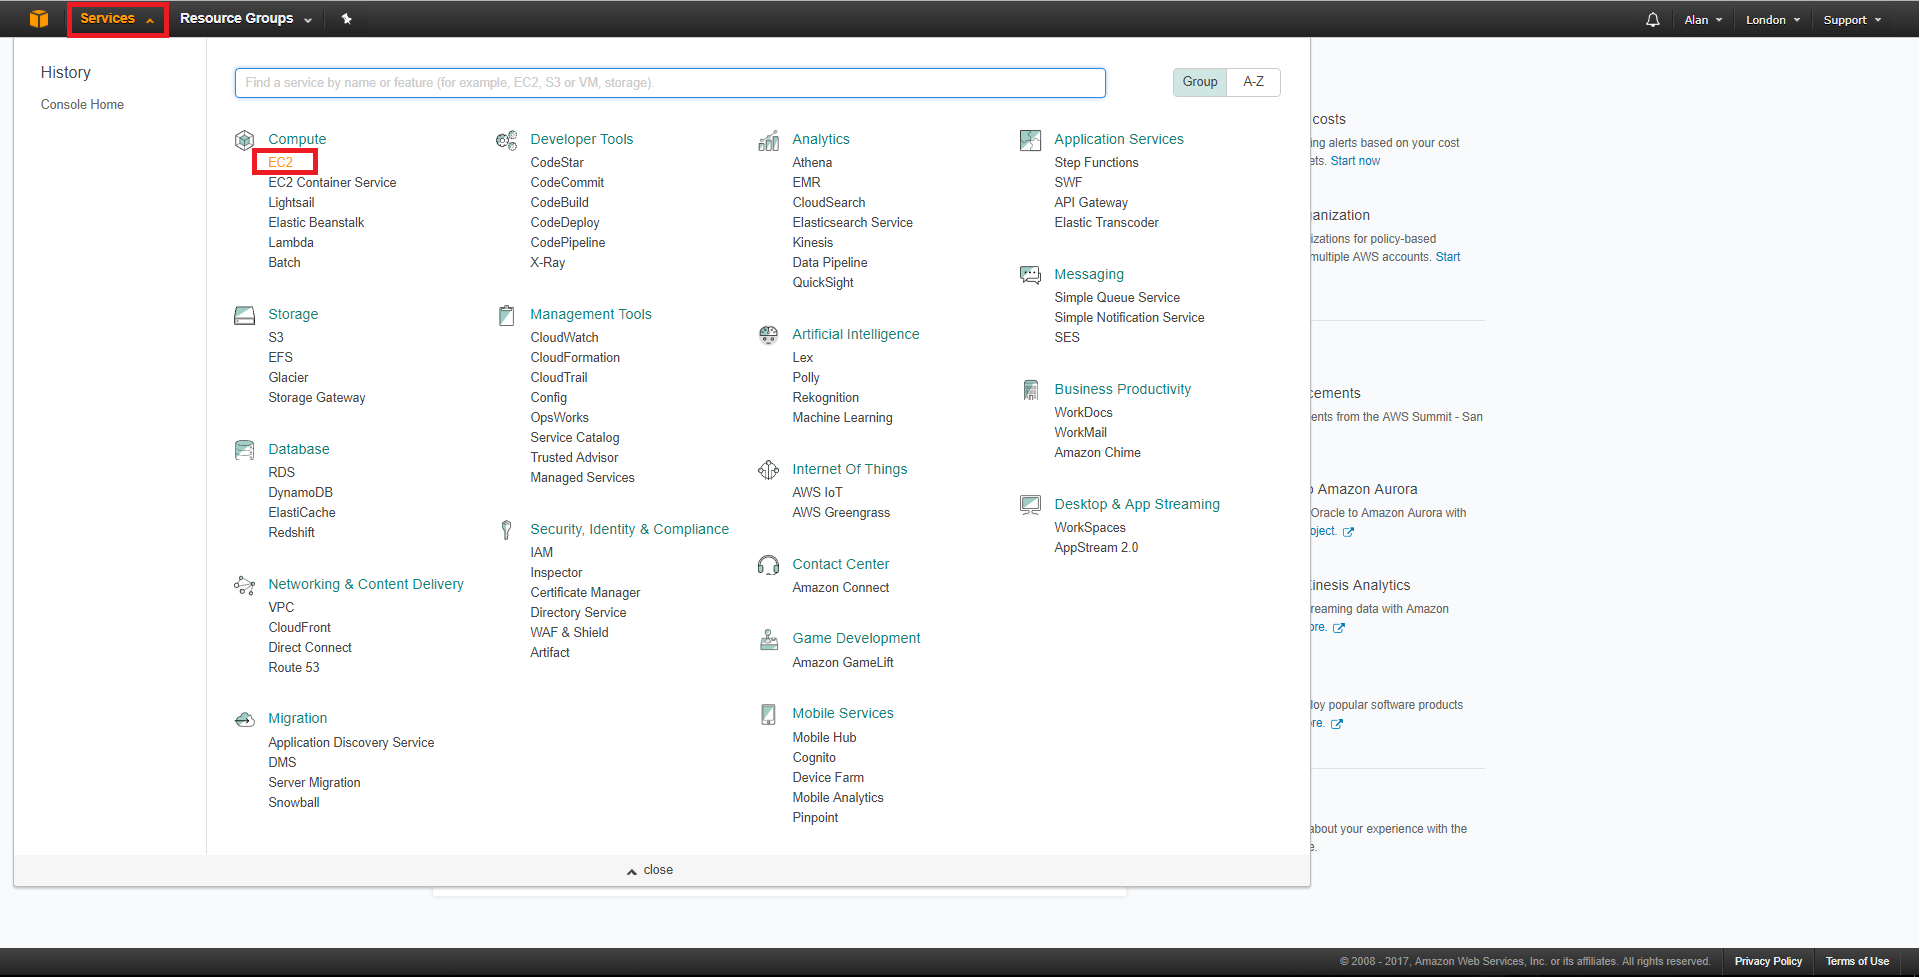
From the top left of the page, select Services, then select EC2 from the Compute section.
Now we can select some options and launch our virtual server.
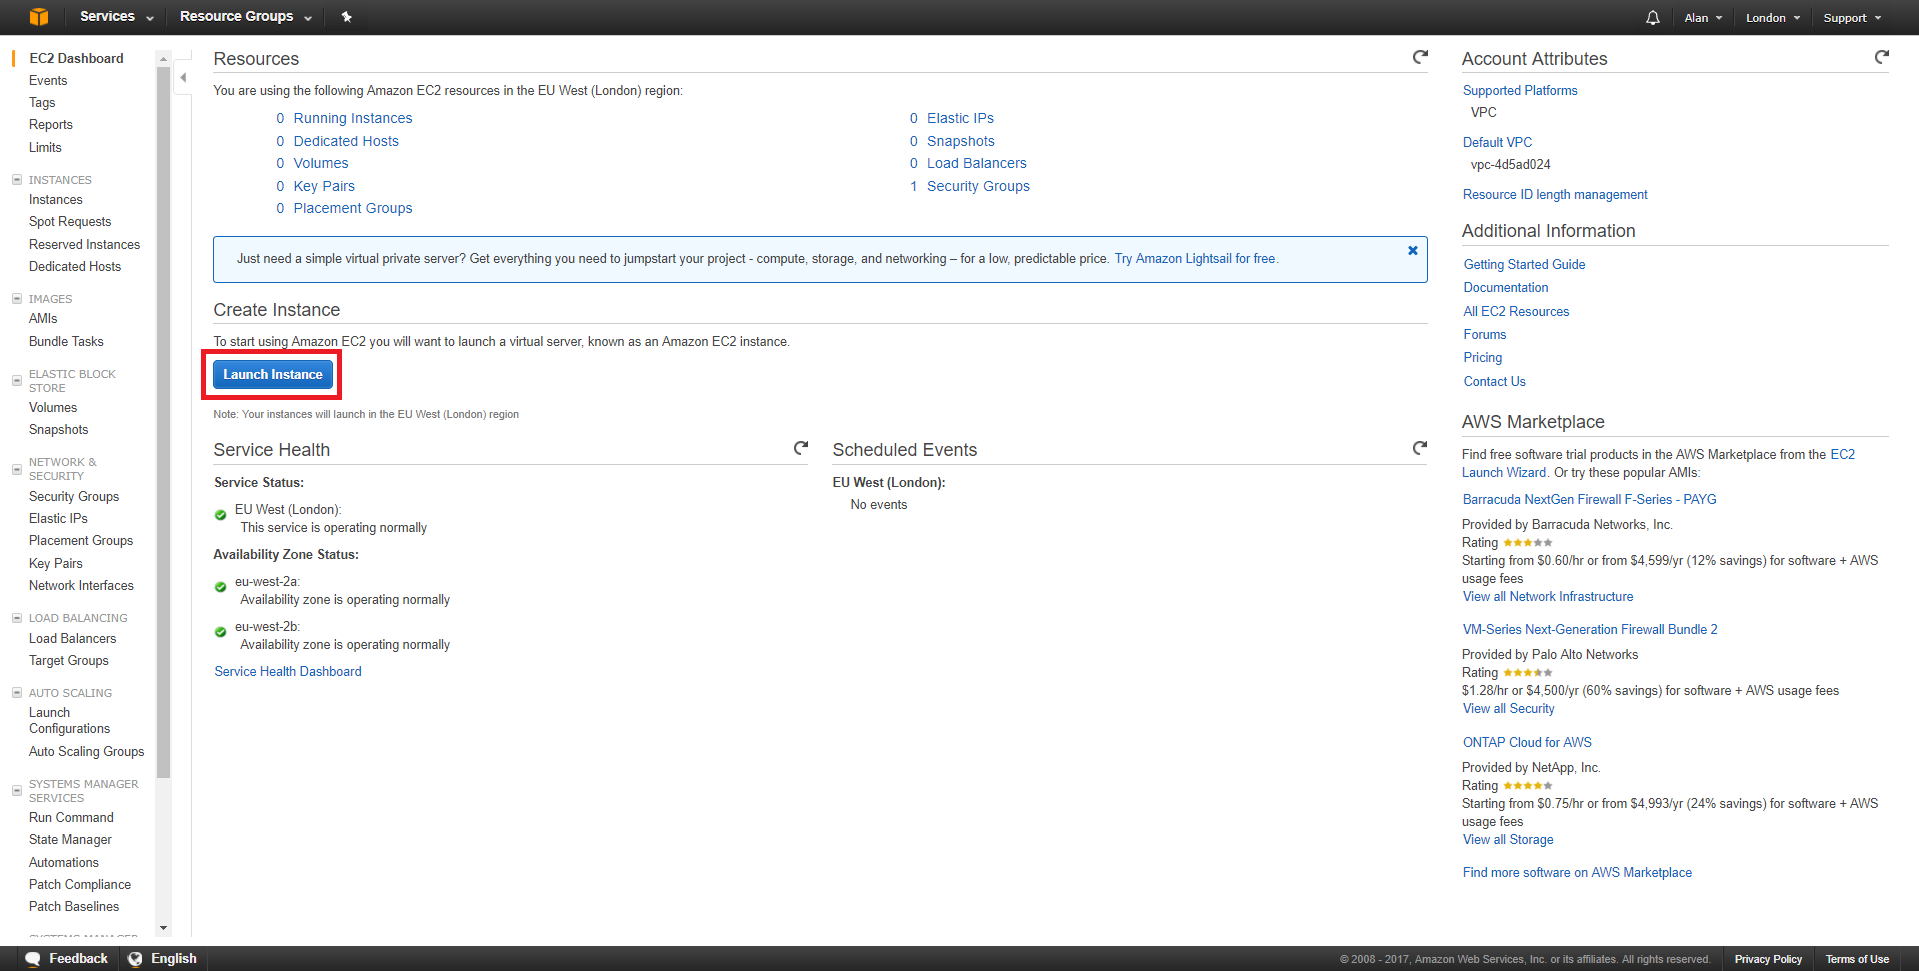
Click on the Launch Instance button.
A page with different Operating Systems will open.
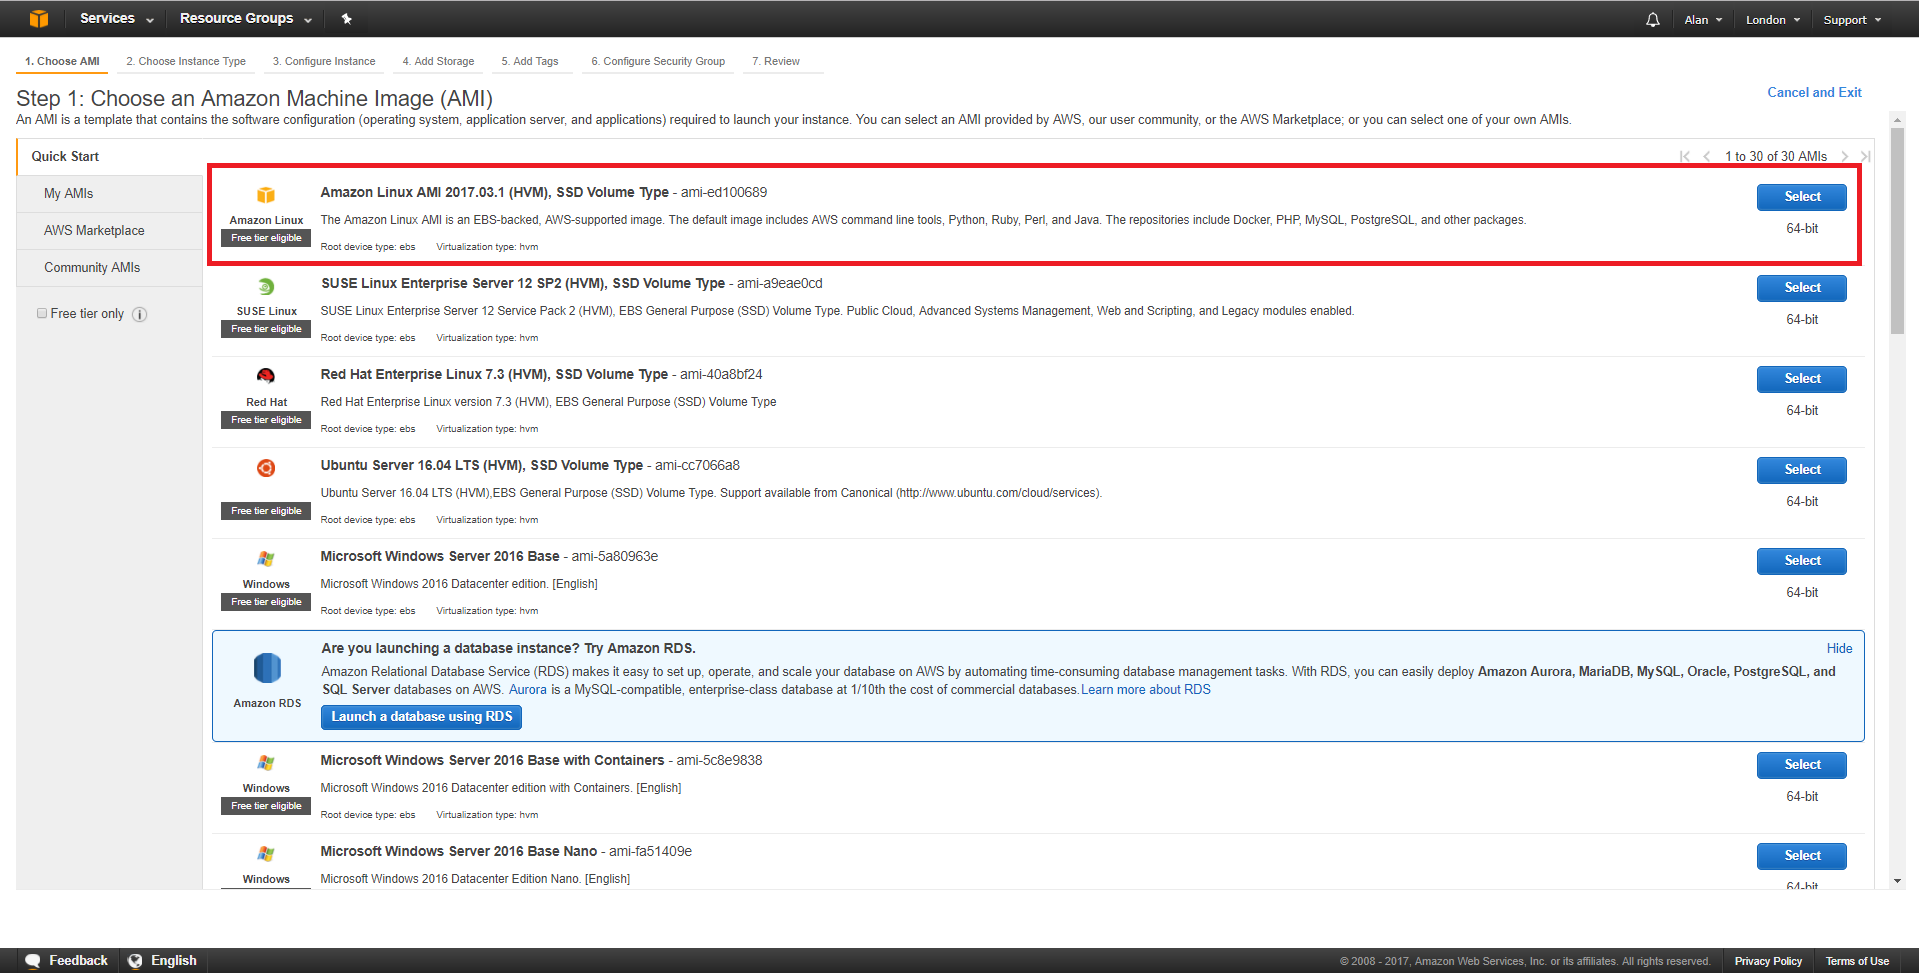
I am going to use the top option of Amazon Linux AMI. It's a Linux system similar to CentOS. There are many choices of OS here, and I have not tried many of them. My intention is to use this server for a bit of testing, and I don't want it to cost me anything, so I am unsure if picking say Windows will incur any costs (I would guess it does). As long as it has a 'Free tier Available' label you should be good to go.
Select Amazon Linux AMI 64bit (Blue button on the right hand side of the page.)
Next we have to chose our instance type. This is setting up how many processors (vCPUs) memory, hard disk space etc that we want.
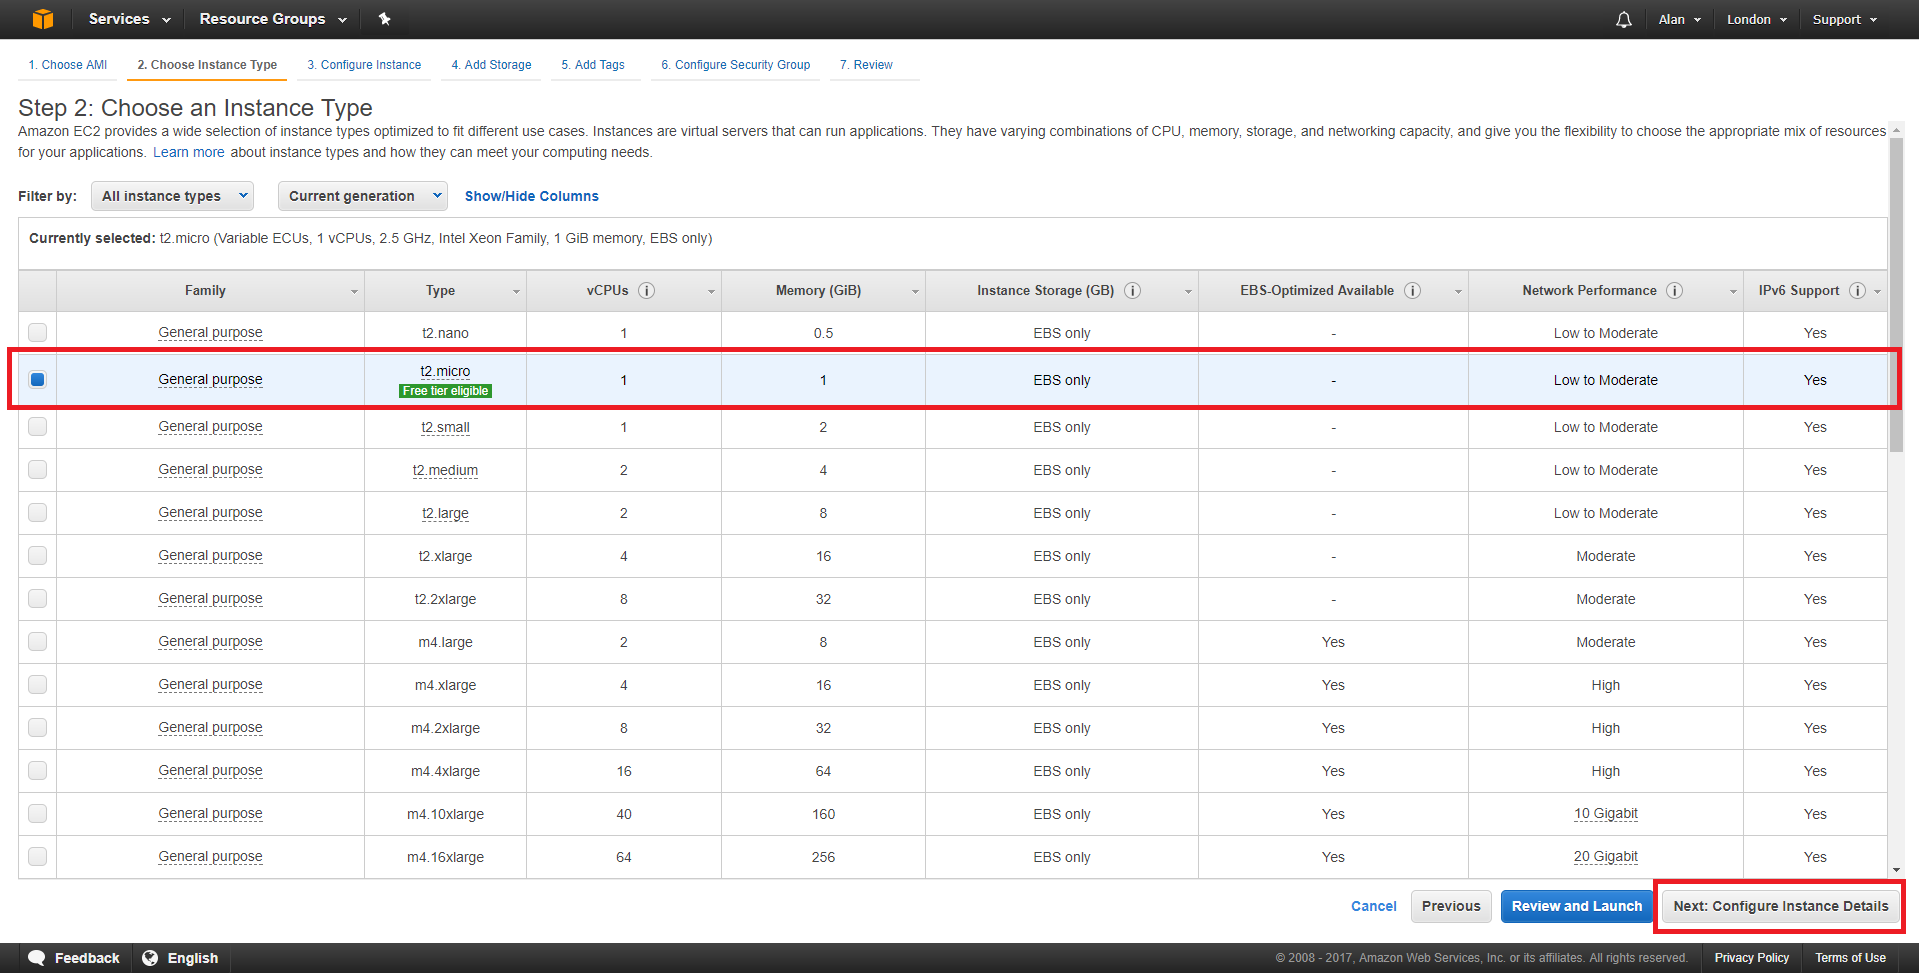
* DO NOT CLICK Configure and Launch * There are a lot of options here, but for those of use wanting a free server, there is only one, the t2micro (Fee tier elegible) so that makes our decision process pretty simple.
Select Configure Instance Details from the bottom right of the page.
Before we launch our instance, we can make some changes. Click the Add Storage tab.
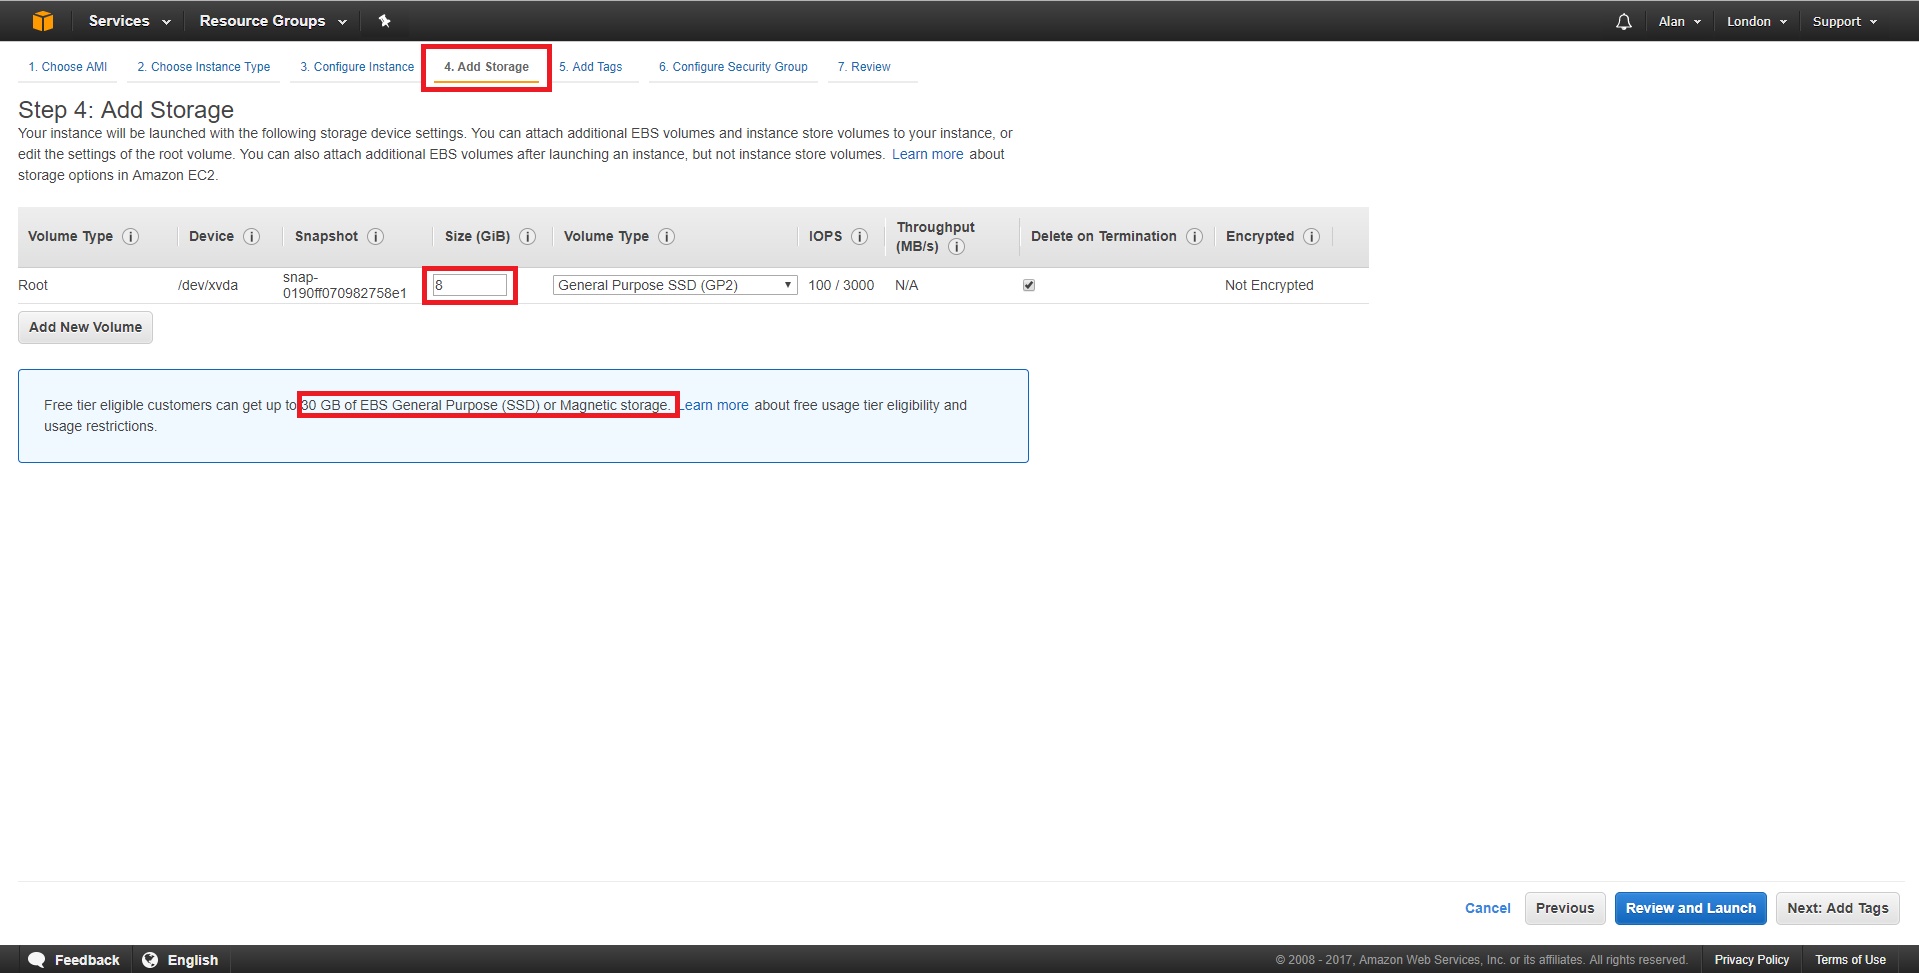
By default you get a storage area of 8GB, if this is not enough then you can increase it. There is an information box that states (at the time of writing) you can have up to 30GB free. Remember, if you pan to have more than one EC2, you have to split that across them.
I left my configuration at 8GB.
Click the Add Tags tab.
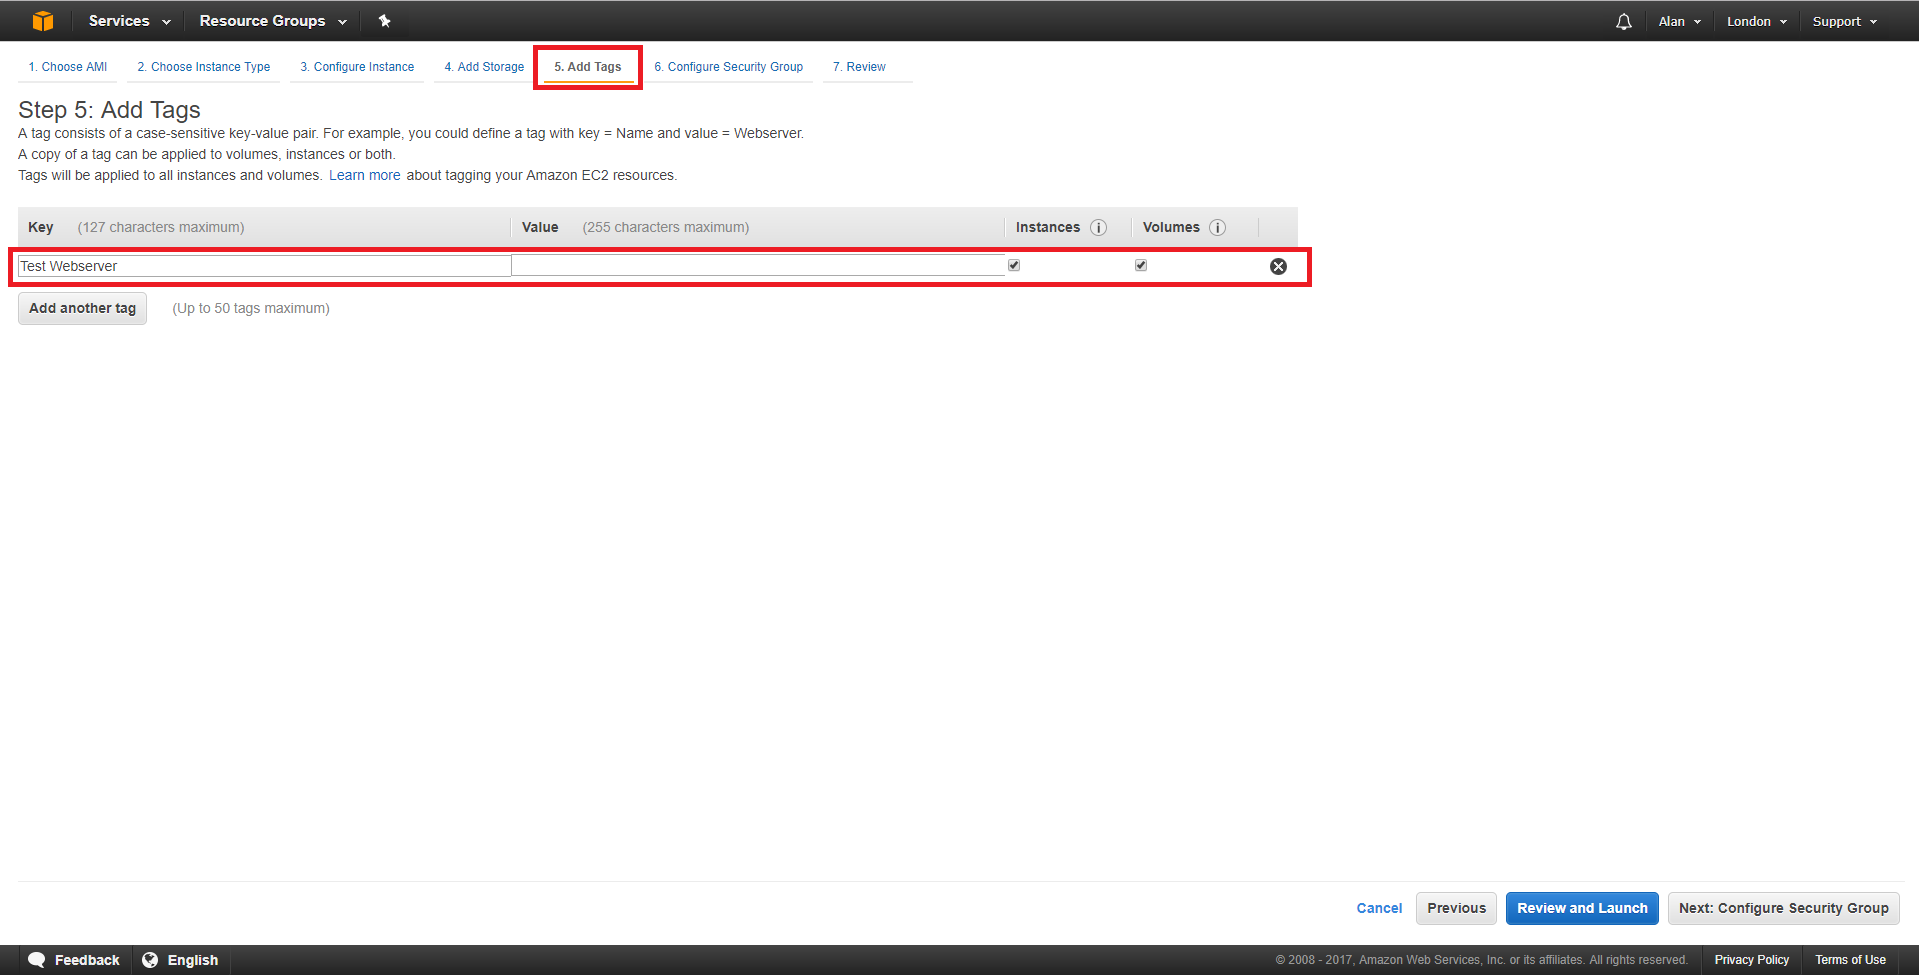
You don't have to do this, but if you are going to have a lot of instances, it does become necessay. Just add a name for this instance (I used Test Webserver.)
Click the Configure Security Group tab.
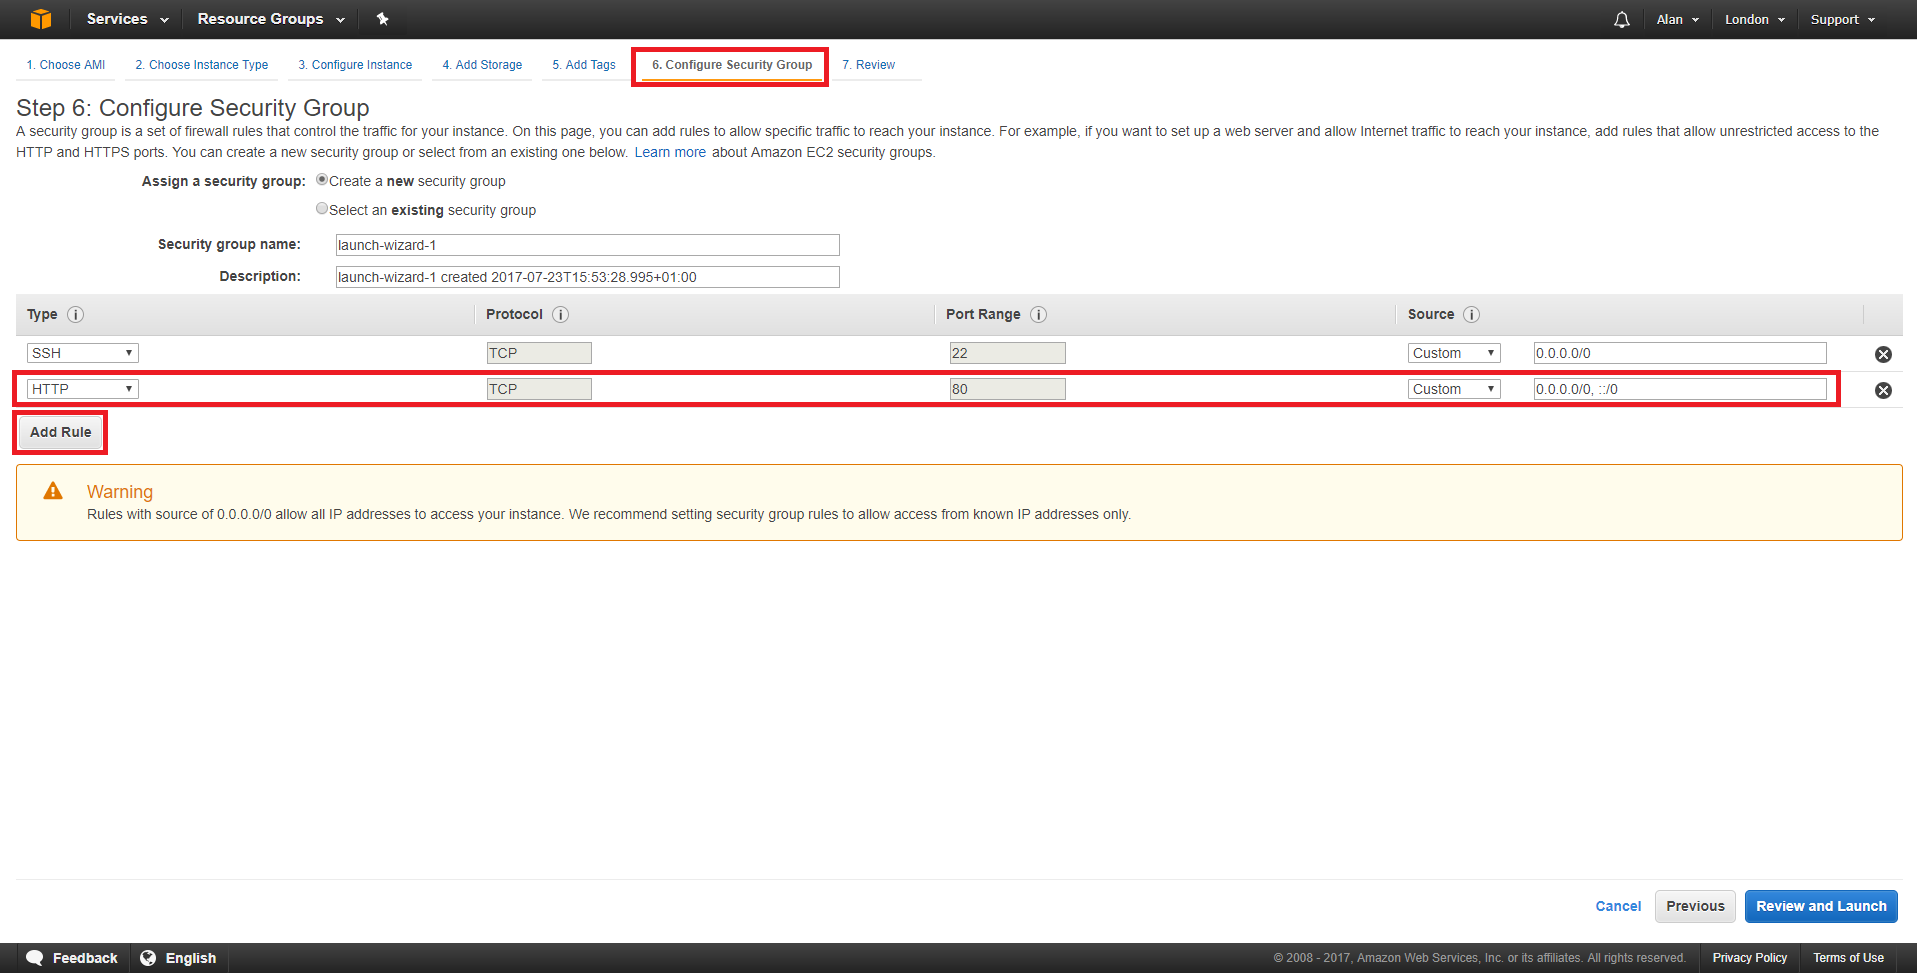
You can look at security groups as a firewall. All ports are closed unless you open them. By default port 22 (SSH) is open, or you would have no access to your OS. As this is going to be a web server, I will also open Port 80.
Click Add Rule and select HTTP as the type. 0.0.0.0/0, ::/0 means accept traffile from any IP Address. For the SSH I would limit that to your own IP (say your work or home IP).
Now you can select Review and Launch.
You will be shown a review screen of your selected settings.
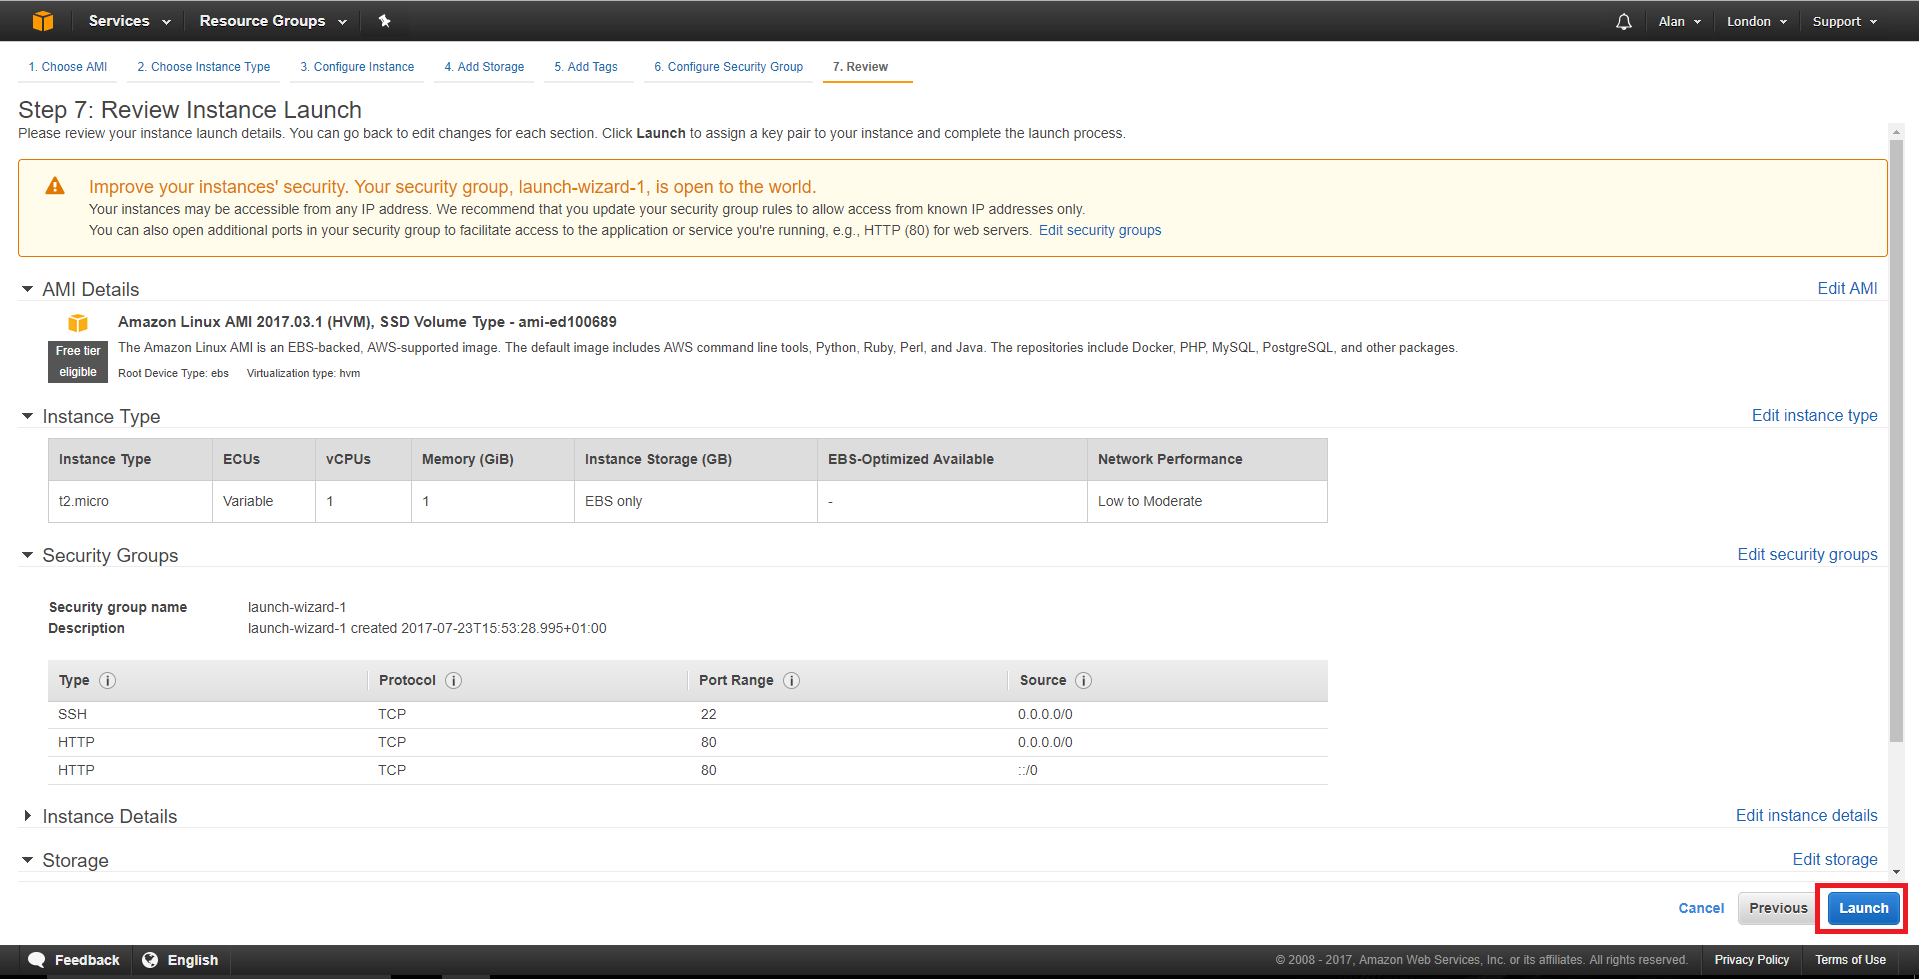
If you are happy, select Saunch in the bottom right hand corner of the page.
You will be presented with a pop up that is asking about Key Pairs. When using SSH, key pairs are used rather than a simple username and password as key pairs are much more secure.
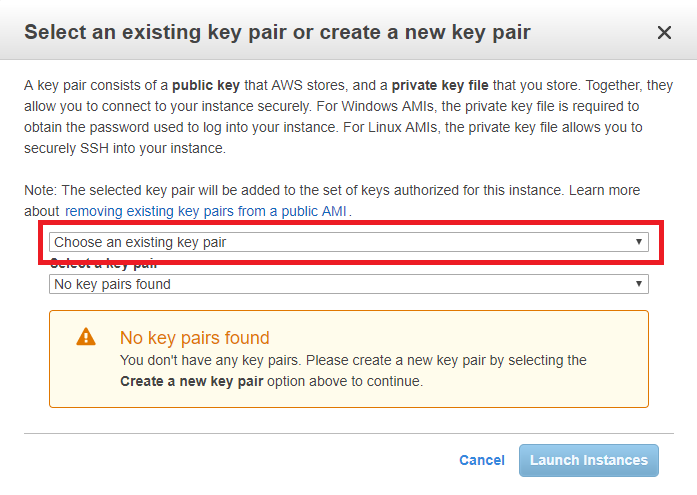
Where you see Choose an existing key pair, you need to change this to Create a new key pair.
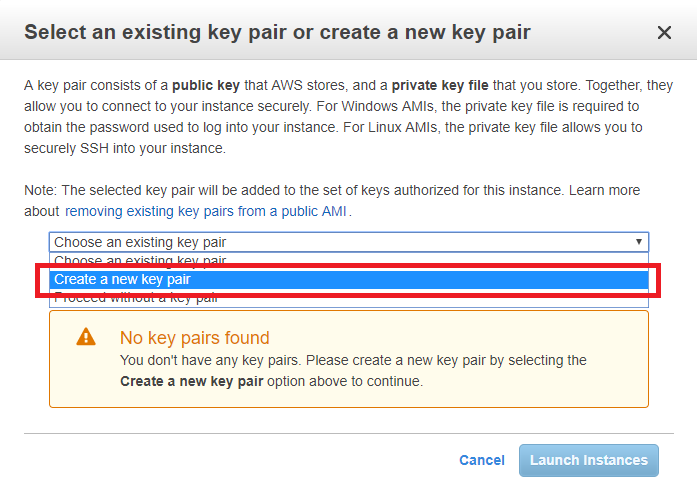
Select a new for the new key pair, and click the Download Key Pair button.
You will see the .pem file download (this is browser specific).
Click the Launch Instances button.
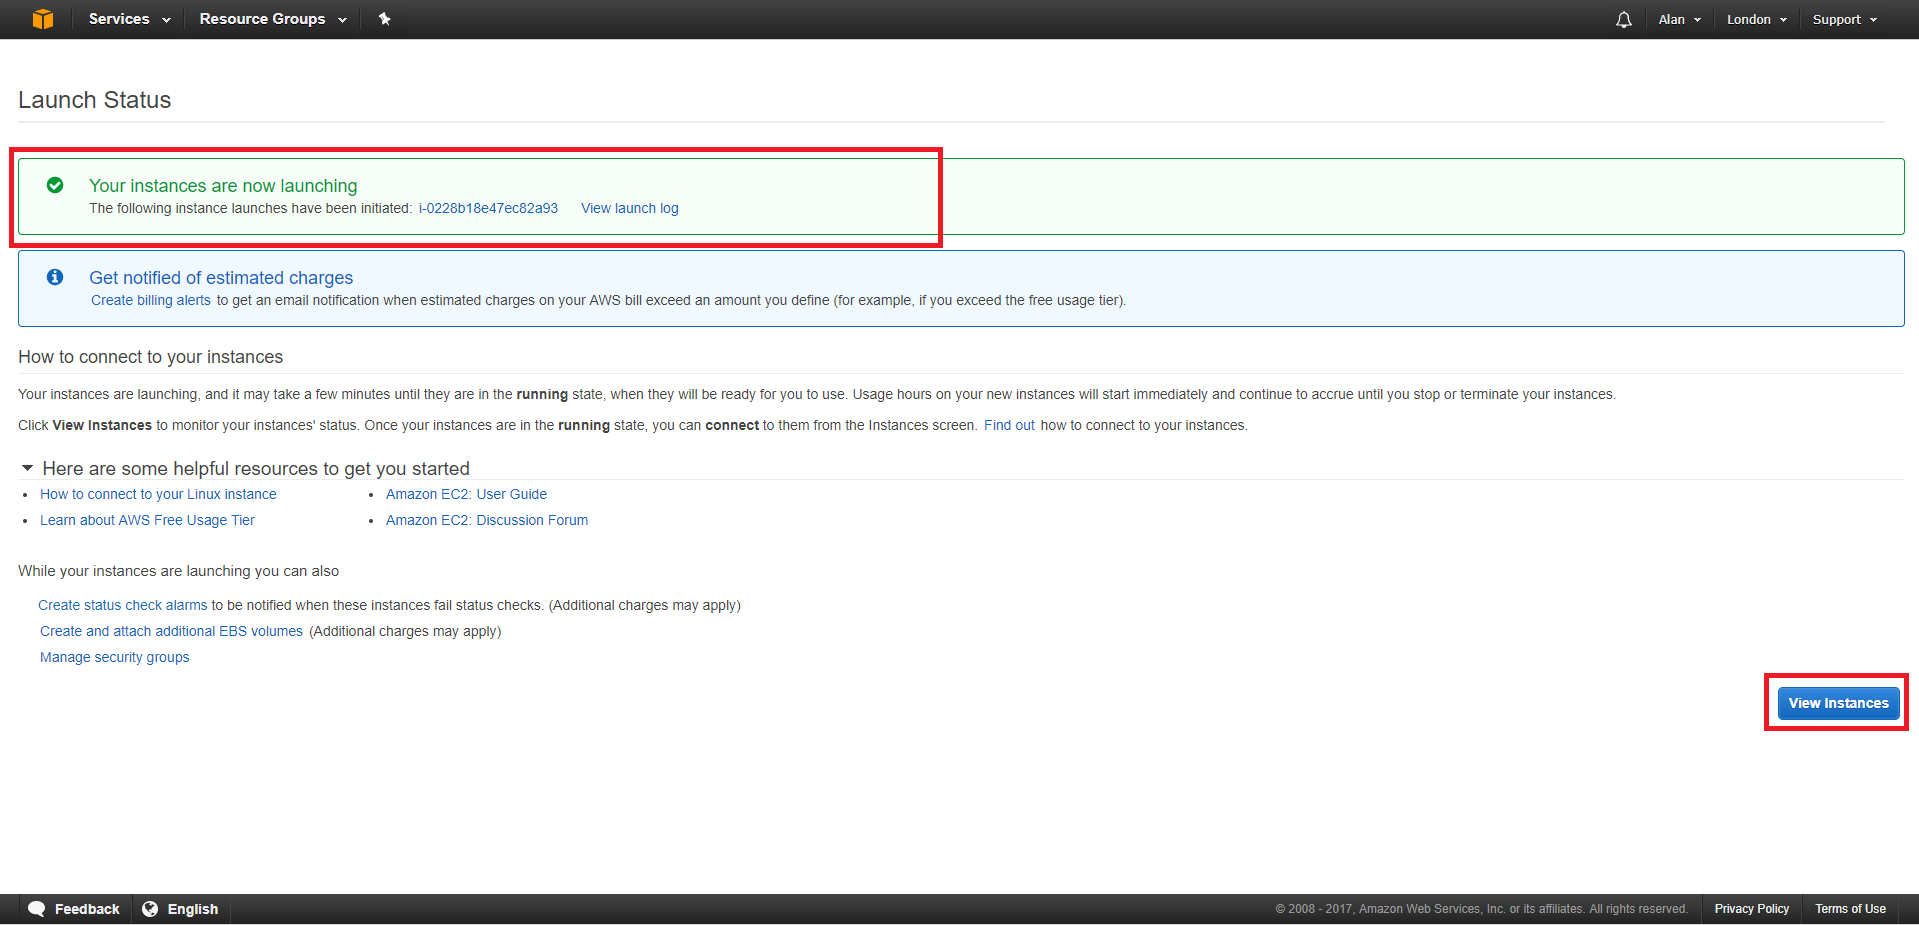
The next page confirms that your instance is launching.
Click the View Instances button.
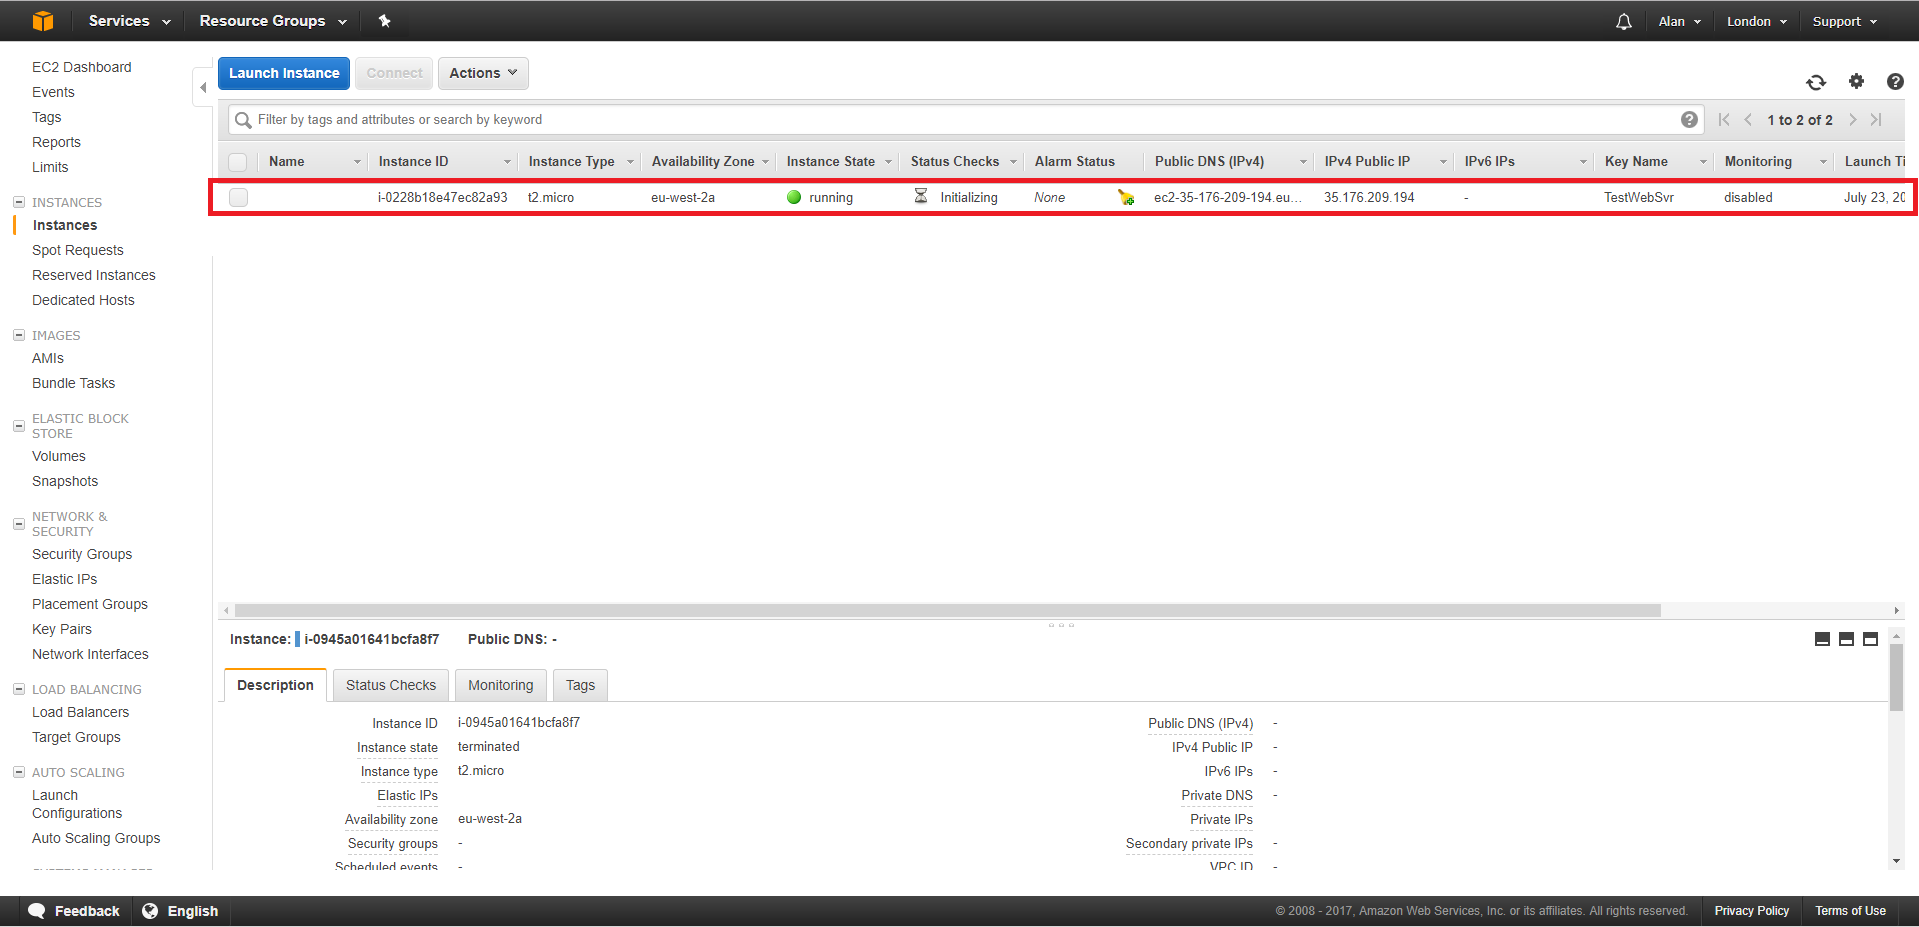
On this page we can see the information about our instance. The part we will need initially is the IP Address.
Connecting to the EC2 Instance
To connect to the EC2 instance you will need your IP Address (obtained from the EC2 Status Page) and you will need the .pem key pair file you downloaded.

If you have neither of these, please read the entire guide.
To be able to connect you will need a suitable SSH program, of which there are many. The most popular is probably Putty, however to use putty you need to use Puttygen to convert the .pem key first. So I am using another free application called MobaXterm which you can download from HERE:
Once installed, run MobaXterm.
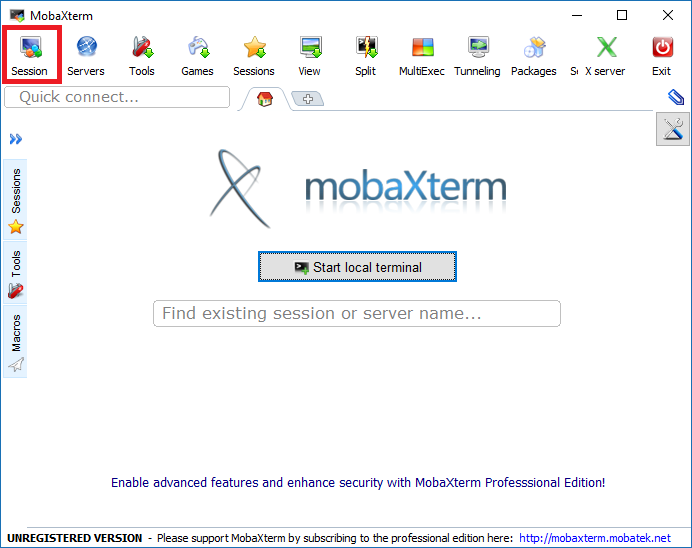
At the top of the page, select Session.
Then select SSH.
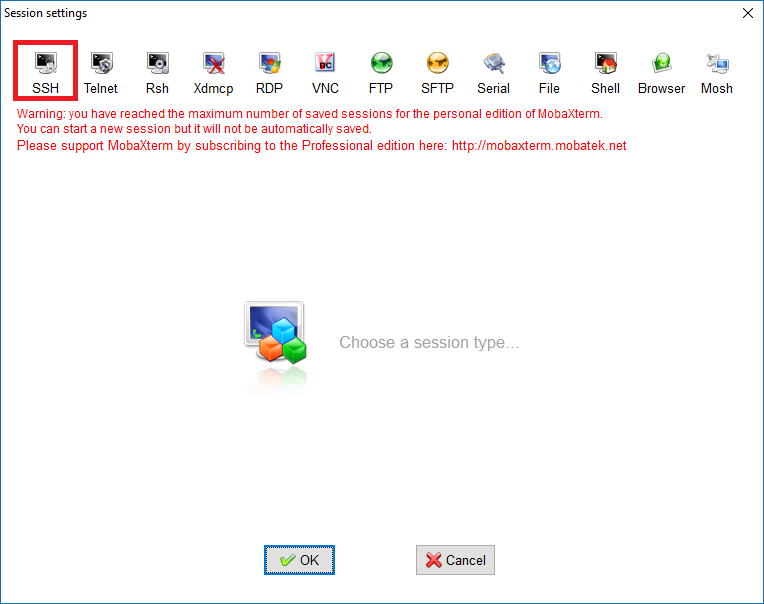
The SSH Page will open and we have to enter the following information.
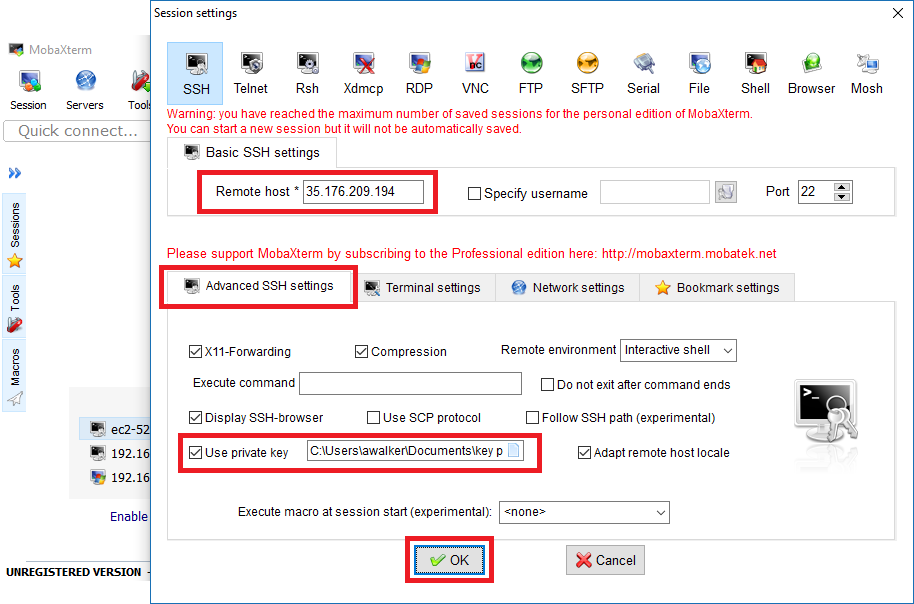
Remote Host: This is the IP Address of your EC2 Instance.
Advanced Settings: Click this tab, select Use Private Key and navigate to where you saved your key pair.
Click OK.
MobaXterm will now connect to your EC2 instance, using your key pair to authenticate.
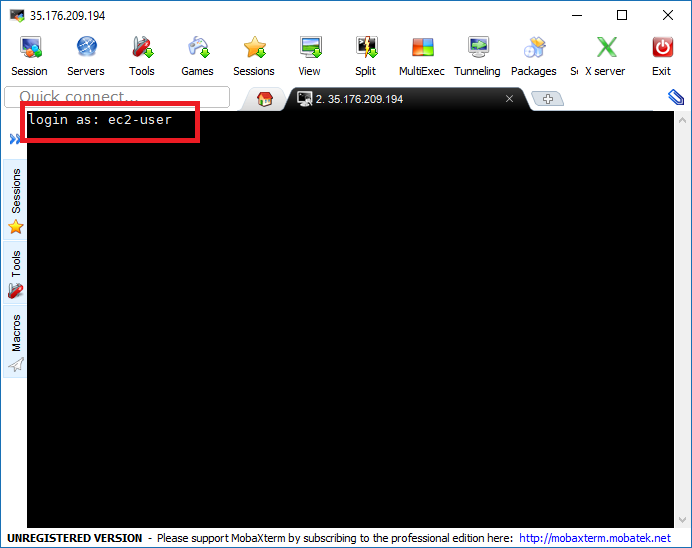
You will have to enter a password. The default password is ec2-user (case sensitive)
Once you enter the password you should be at the console.
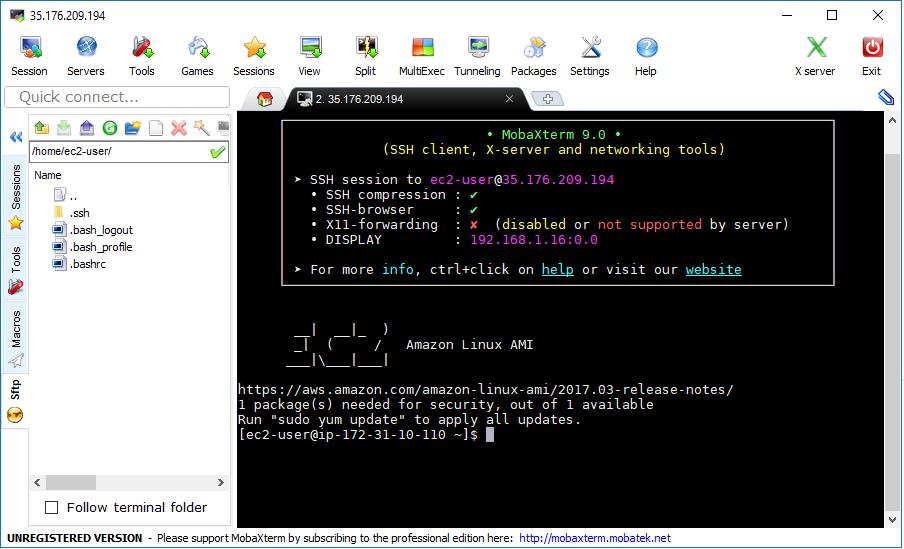
You can now enter standard Linux commands, that's it, you are now connected to your EC2 instance.
Install the Web Server
As this example is a simple web server, lets install a web server and give it a little test.
First thing to do is to navigate to the IP Address of you EC2 instance, to ensure there is nothing already running.
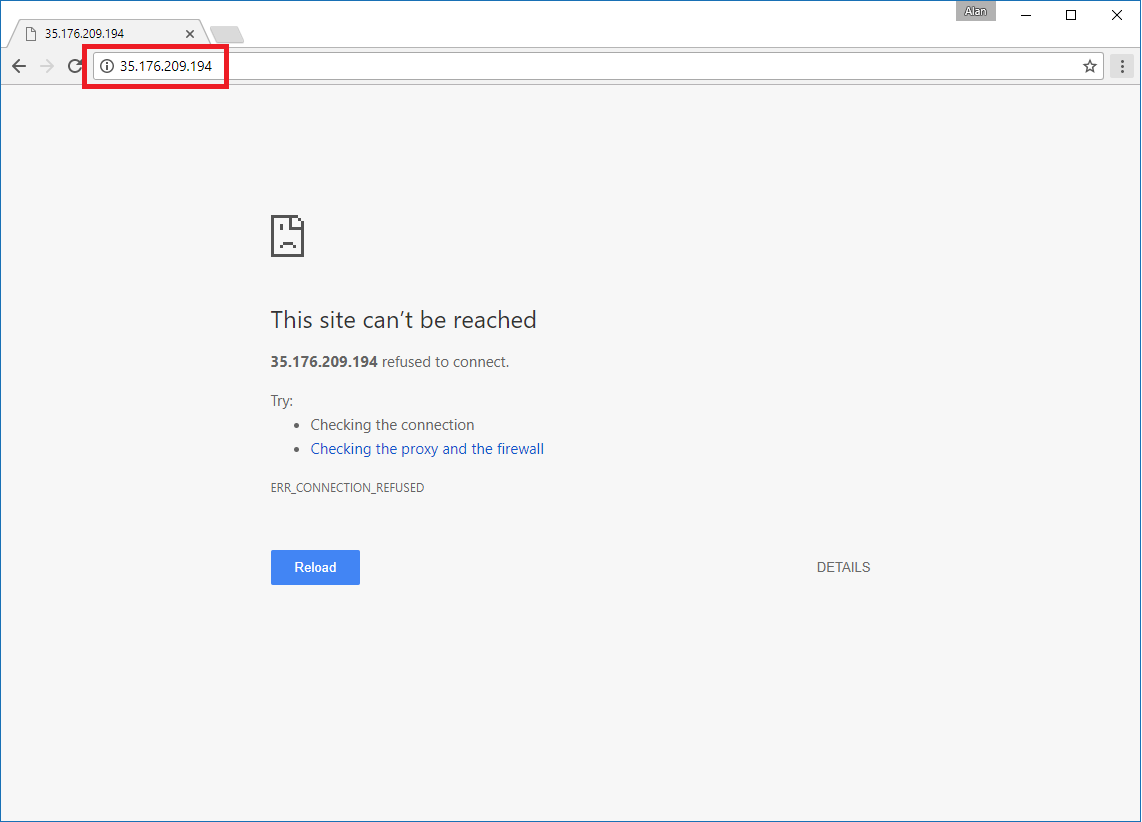
You should see that there is nothing on this IP Address.
So we can install a web server. Open MobaXterm and from the command line enter:
sudo yum install httpd -y
This will install Apache web server, and configure the basic system files required for it to run.
Once installed, you will have to start the Apache service. You can do this with:
sudo service httpd start
You should see a confirmation that looks like: Starting httpd: [ OK ]
Now you can retest your connection from a web browser.
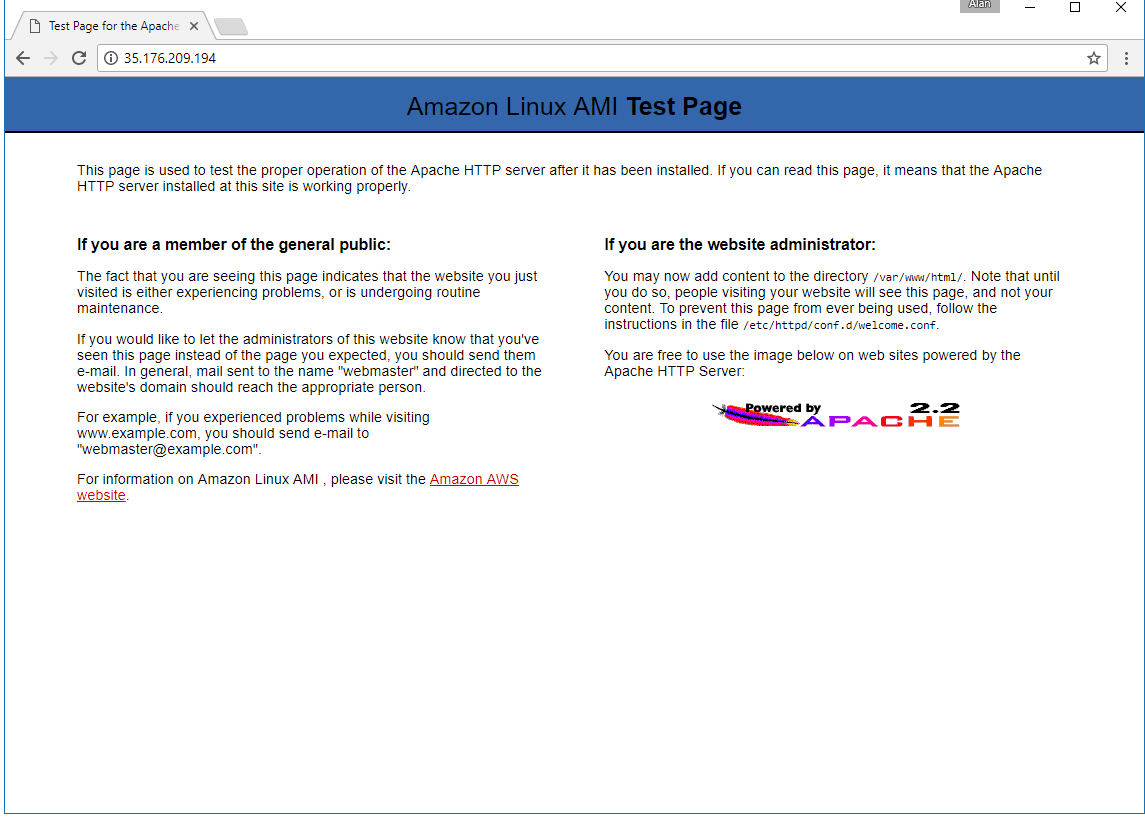
You should see an Apache test web page, this means your server is running and you can start to build and upload your test website.
