Table of Contents
Copy Larger SD Card to Smaller SD Card
Jan 2017
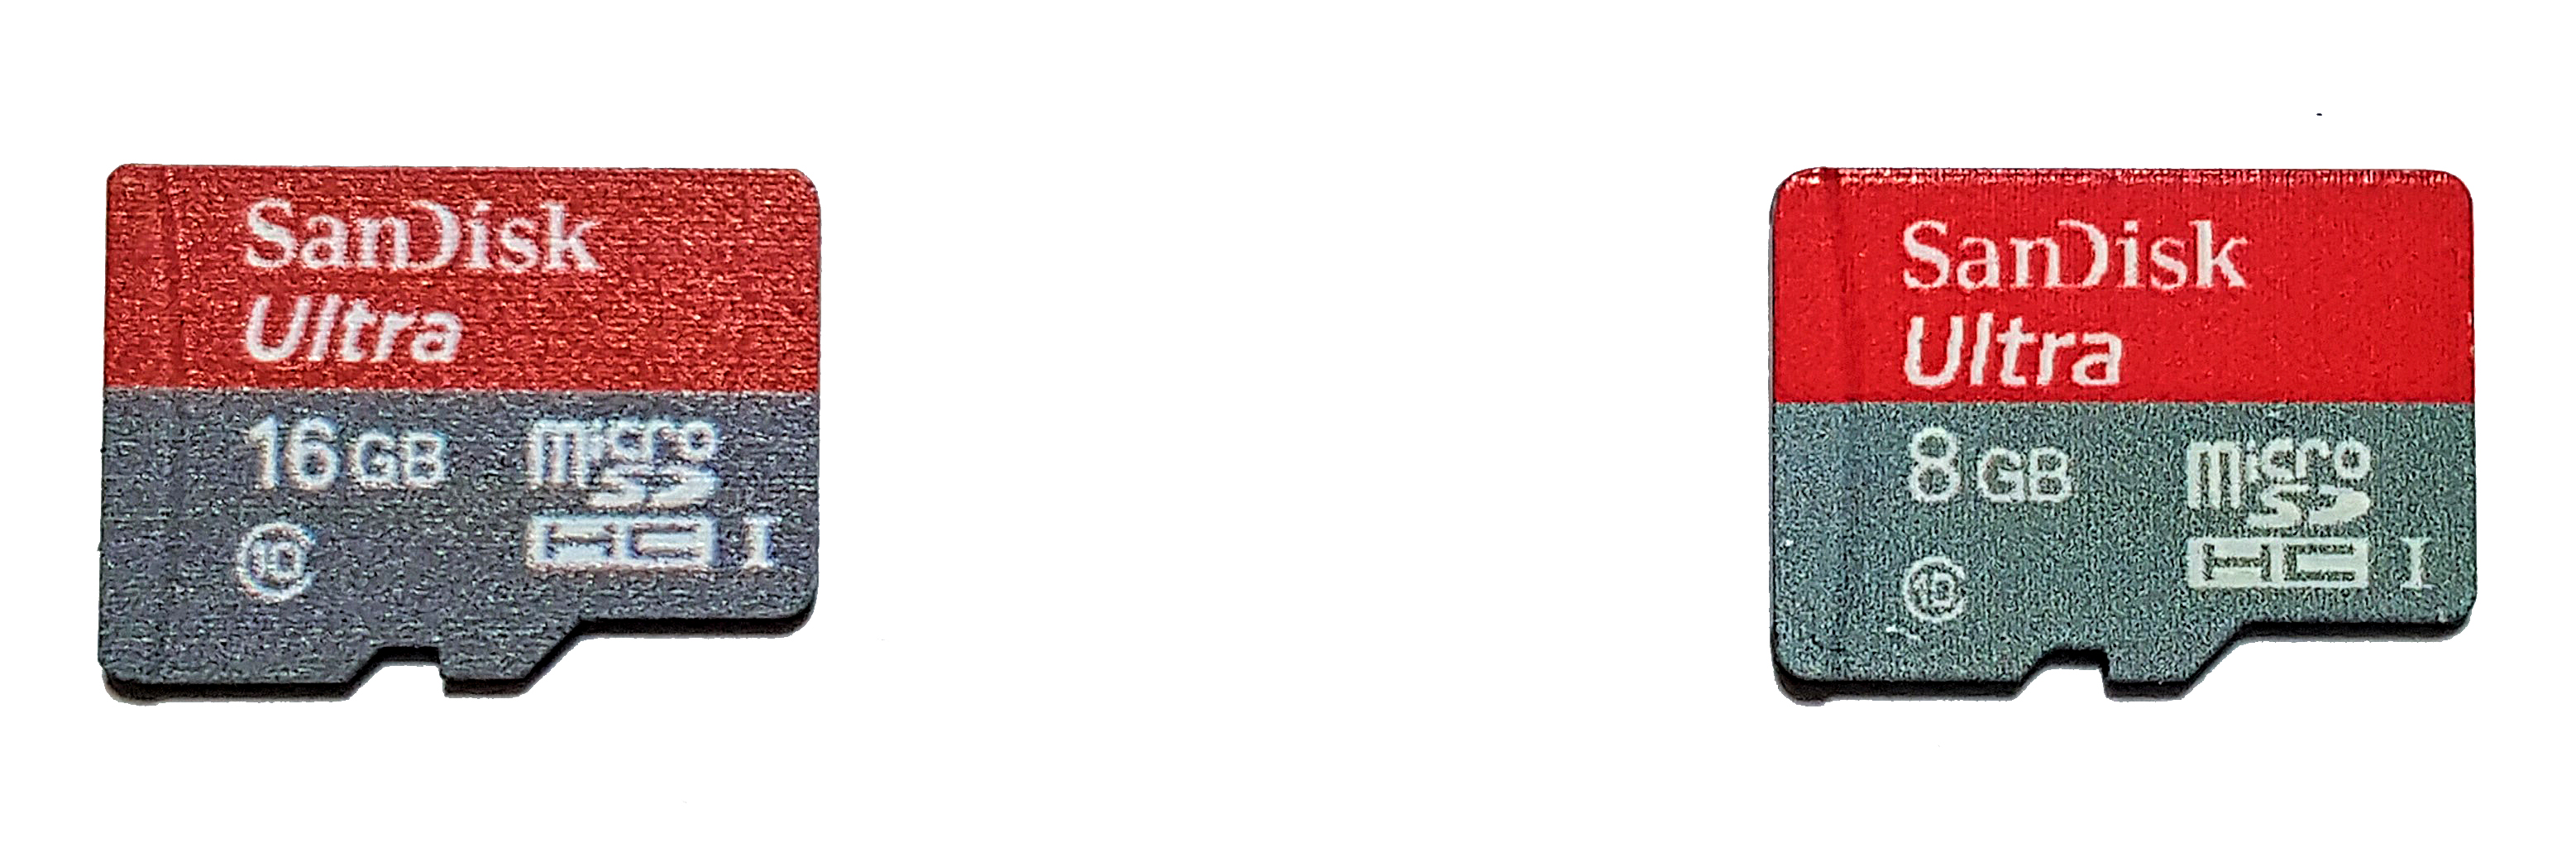
After initially thinking this would be a really simple task, I soon learned that no, it is not. And the worst part of it is, if you have for example a 16GB SD card, that you want to copy to another 1GB SD card, the destination card might be slightly smaller, and it will fail. This is very frustrating. If you are in this position, then read on.
In this example I am going to copy the contents of a 16Gb SD Card, to an 8Gb SD Card. This will of course only work if your 16Gb SD card has at least 8Gb of free space.
I had a situation where I had created a project, using a 16Gb card and realised that even a 4Gb SD Card was enough, so after many frustrating hours I managed to get the contents to another smaller card, and thought I would document the process.
What you will require
For this process, I used the following:
A Windows PC with SD Formatter and Win32 Disk Imager (see this link here )
A Linux PC (had Linux Mint on, so still Debian based) with gparted.
Larger and smaller SD Cards and a reader.
You can mix and match your own method and hardware using this guide. This is not necessarily the best method, but it is the first method I found that worked for me.
— — — — — — — — — — — — — — — — — — — — — — — — — — — — — — — — — — — — — — —
BEFORE YOU START use the tools on this page here to BACKUP YOUR SD CARD so you don't lose any data.
— — — — — — — — — — — — — — — — — — — — — — — — — — — — — — — — — — — — — — —
Check Source SD Card
While in your Raspberry Pi, check how much free space you have on your SD Card. Remember, my example is copying a 16Gb card to an 8Gb card, so I need at least 8Gb free.
From the command line, use the following:
df -h


This gives the output:

Filesystem      Size  Used Avail Use% Mounted on
/dev/root        15G  1.1G   14G   8% /
devtmpfs        214M     0  214M   0% /dev
tmpfs           218M     0  218M   0% /dev/shm
tmpfs           218M  4.4M  213M   3% /run
tmpfs           5.0M  4.0K  5.0M   1% /run/lock
tmpfs           218M     0  218M   0% /sys/fs/cgroup
/dev/mmcblk0p1   63M   21M   43M  34% /boot
As we can see from the line /dev/root 15G 1.1G 14G 8% / this SD Card which is a reported size of 15Gb has 14Gb free. So I have plenty of space to shrink this card by.
Shrink Existing Partition
Most Pi Raspbian SD Cards that I have seen contain two partitions:
  Boot - Contains the boot files
  Ext4 - Contains the OS and Data files
It is the Ext4 partition that we need to shrink. Unfortunately, there is no tool that I know that will shrink this partition while it is mounted. When I say shrink, I mean move any data that exists there and shrink. My first attempt to shrink the partition I used 'parted'. But this just shrank the partition without preserving any data.
If you had another RPi SD Card, you could do this from the Pi, but I just found it simpler by using a Linux PC. If you don't have a computer with Linux on it, just use one of the live CD/USB images to temporarily boot your computer to Linux.
On the Linux computer, you need to run gparted (you may have to install it, you will have to google that because it's not covered here, suffice to say that will take you around 60 seconds).
Once gparted is up and running, with your source SD Card inserted check the following:
Ensure that the correct storage device is selected (don't delete your hdd partitions, or it's going to be a long day).

Ensure that the partitions are un-mounted before you start, or you won't have the option to resize.
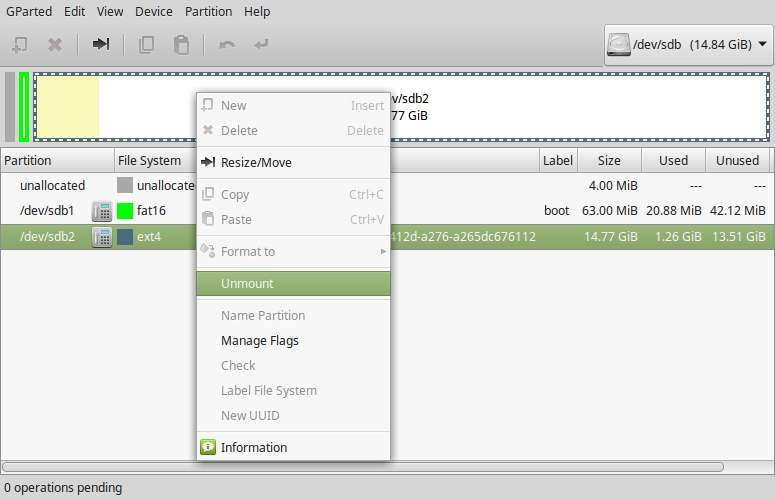
Now it's time to resize your partition.
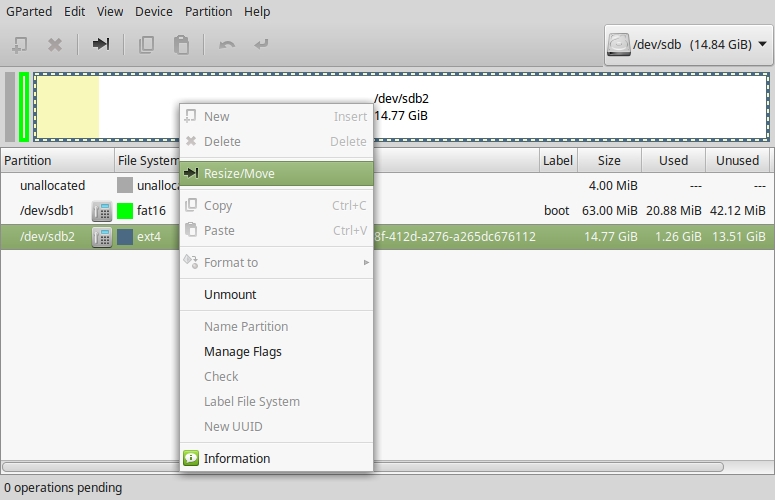
On the EXT4 partition (we won't do anything to the boot partition) right click and select the Resize/Move option.
Now we have a resize window for our partition. You can set the size by dragging from the right (don't drag from the left) or by typing in the value of the new size (say 2GB = 2048). I am reducing my partition to 2GB because then it will fit on almost any card.
Even if you are writing the partition back to say an 8Gb card, it's worth using as little space as possible as this makes your backups smaller and faster, and the restore process is quicker too.
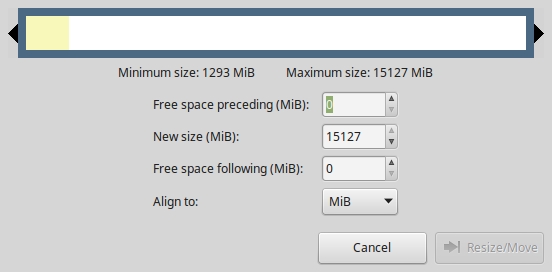
Below you can see where the partition has been dragged down to 2GB.
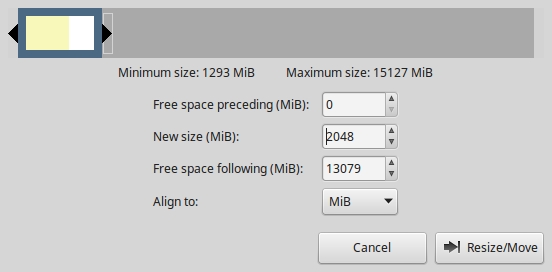
Click Resize/Move to set the changes.
Before the changes are committed, you have to click the Apply All Operations arrow at the top of the gparted interface.
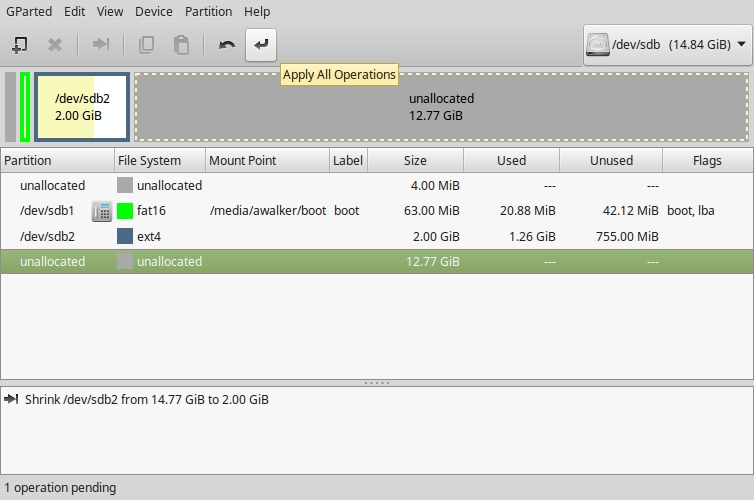
Accept the confirmation and the changes will be made.
Backup the SD Card
Now we can backup the SD Card. For this we will use a utility called 'dd' which is installed on Linux by default.

By default, dd will backup the entire SD card, whether it is part of a partition or not (so a 16Gb SD Card will produce a 16Gb file, that won't fit on my 8Gb destination SD Card).
We can tell the dd tool to only partition so far, but we need to know how much space we have used on the card. We know that our partition is 2048Mb, and the boot partition is nearly 700Mb, so for safety, I am going to use 2200Mb.
From the command line, use the following:
sudo dd if=/dev/sdb of=~/rpi_all.img bs=1M count=2200


for me this gives the result:

2200+0 records in
2200+0 records out
2306867200 bytes (2.3 GB, 2.1 GiB) copied, 137.197 s, 16.8 MB/s
sudo dd if=/dev/sdb of=~/rpi_all.img bs=1M count=2200
Where /dev/sdb is the SD Card (don't use the SDB1, SDB2 etc)
rip_all.img is the output file
count=2200 is telling dd to stop after 2200Mb.
~/ means folder you are in (PWD) to save you typing the entire path.
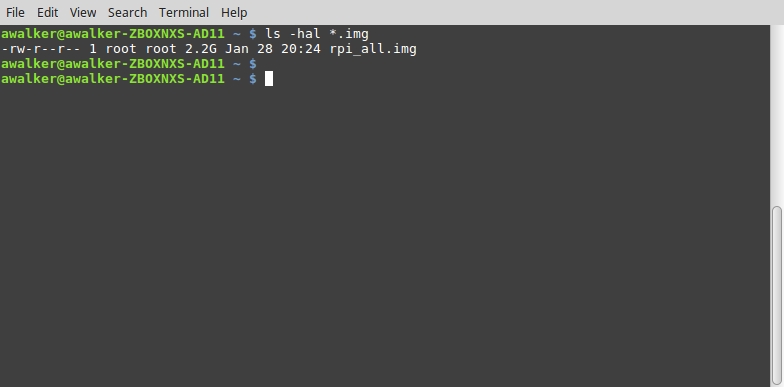
From the command line, use the following to check the file size.
ls -hal *.img
You should see the file you created called rpi_all.img. The filesize should be 2.2GB (2200Mb)
Restore the SD Card
Remove your original SD Card from the Linux PC and insert the smaller size SD Card you wish to use. Before writing to it we need to remove any partitions that it contains.
Open gparted (select the correct storage device remember).
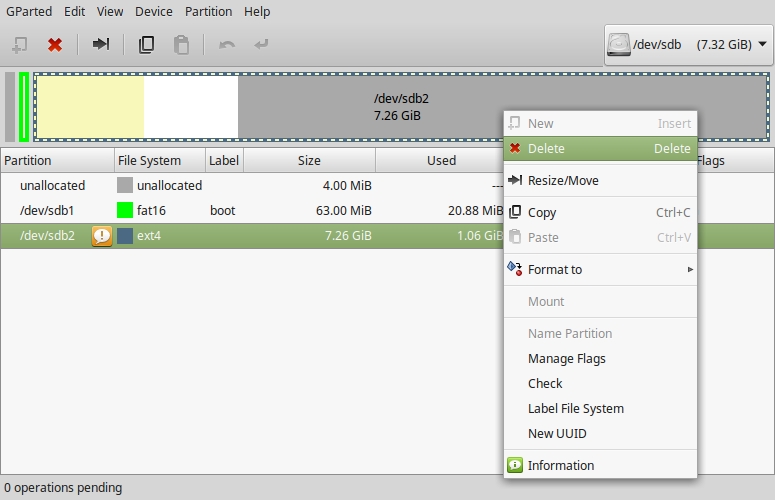
Right click on all the partitions and remove them (Select Delete).
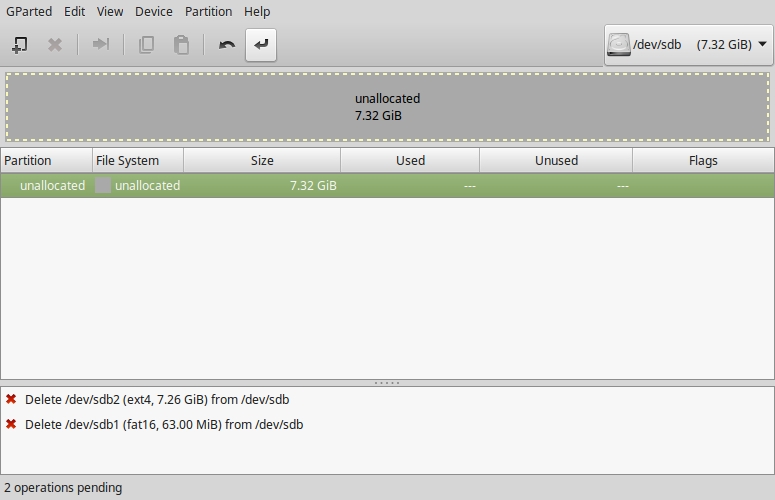
Once all of the partitions are removed, we have to click the arrow at the top of the gparted interface to accept the changes (just under the word Help in the above image).
Accept any warnings and proceed. You now have a blank SD Card.
To restore your image, use the following from the command line:
sudo dd if=~/rpi_all.img of=/dev/sdb bs=1M

This gave me the output:

2200+0 records in
2200+0 records out
2306867200 bytes (2.3 GB, 2.1 GiB) copied, 460.966 s, 5.0 MB/s
Note the time taken: 2306867200 bytes (2.3 GB, 2.1 GiB) copied, 460.966 s, 5.0 MB/s. This process took nearly 10 minutes, it's very slow so be patient.
Remove the SD Card from the Linux PC and put it in to the Raspberry Pi.
The Raspberry Pi
If all has worked, the Raspberry Pi should now boot up. Once booted and logged in, we can check the partition sizes.
From the command line, use:
df -h
This will show the following:

Filesystem      Size  Used Avail Use% Mounted on
/dev/root       2.0G  1.1G  880M  54% /
devtmpfs        214M     0  214M   0% /dev
tmpfs           218M     0  218M   0% /dev/shm
tmpfs           218M  4.4M  213M   3% /run
tmpfs           5.0M  4.0K  5.0M   1% /run/lock
tmpfs           218M     0  218M   0% /sys/fs/cgroup
/dev/mmcblk0p1   63M   21M   43M  34% /boot
We can see from the /dev/root line above that the size is reported as 2.0G and that 880M is available. This is an 8Gb SD Card, and we need to reclaim that extra space. To do this, from the command line enter:
sudo raspi-config
From the menu, select No1. Expand Filesystem.
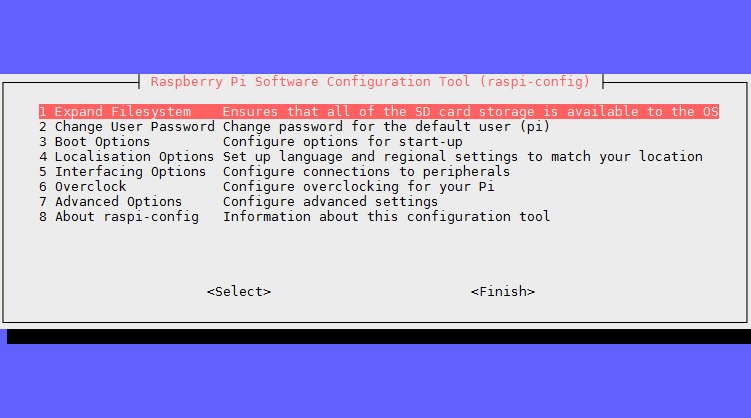
Once completed (takes just a few seconds) Select Finish and let the Raspberry Pi reboot.
Now log back in and re-run the df -h command.
df -h
Filesystem      Size  Used Avail Use% Mounted on
/dev/root       7.2G  1.1G  5.9G  15% /
devtmpfs        214M     0  214M   0% /dev
tmpfs           218M     0  218M   0% /dev/shm
tmpfs           218M  4.4M  213M   3% /run
tmpfs           5.0M  4.0K  5.0M   1% /run/lock
tmpfs           218M     0  218M   0% /sys/fs/cgroup
/dev/mmcblk0p1   63M   21M   43M  34% /boot
Now it can be see that the partition (/dev/root) is 7.2GB in size, with 5.9Gb free.
That's it, all done.
As a footnote, I would copy the rpi_all.img to your PC, and the you can use this to create new SD Cards using Win32 diskimager as it's a lot less hassle. But only do this once you have proved the process works.
