Table of Contents
Test WebDav Connection
Introduction
Having setup our Apache Webdav server, we now need to ensure that we can access it, and can read and write to it (so that we can be sure it will work with our packager).
There are three tests we will cover here:
- Using a Web Browser
- Using the CyberDuck Application
- Using a HLS Capable Player
If all three of these tests are successfull, then you can be confident that you have a fully functioning Origin Server for HLS.
Using a Web Browser
Using a web browser is a very simple test, it doesn't tell us a lot, but it does tell us very quickly if we have any access to the WebDav folder (or not).
Open up any Browser, and navigate to your webdav location:
http://yourip/webdav

e.g.
http://192.168.27.234/webdav
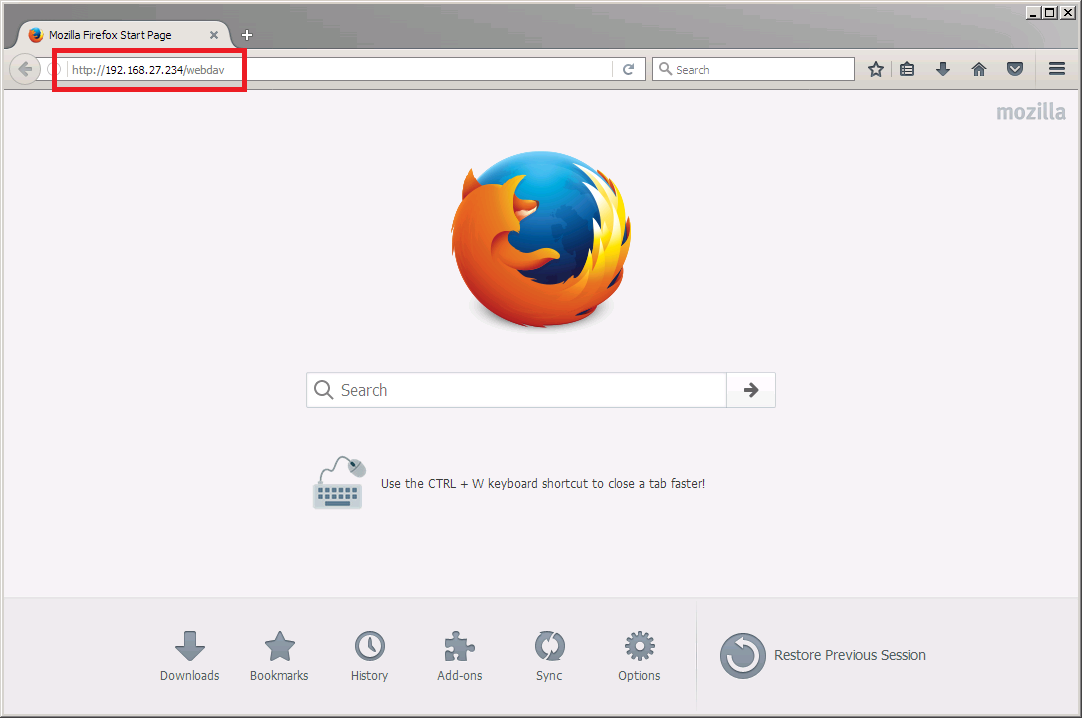
You should see a window prompting you for some credentials.
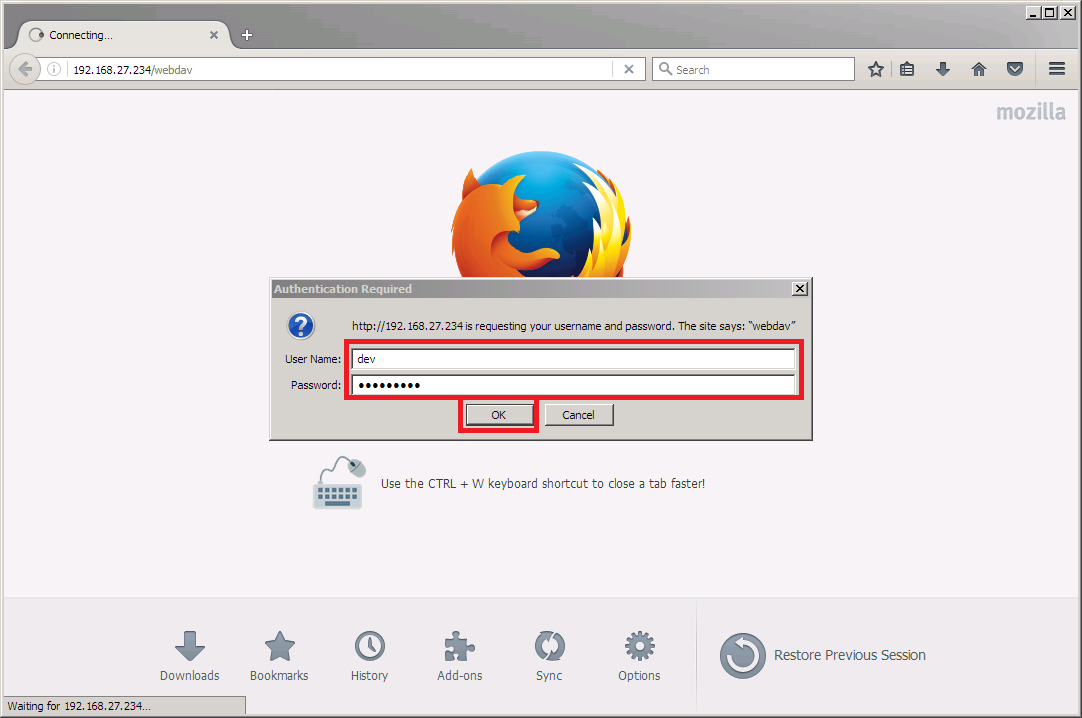
Enter your username and password
Username: dev
Password: 3nvivio_! (Enter the password you configured when you setup the Origin Server)
Once you have entered your credentials, the browswer will display the contents of the webdav folder, remember, this folder might still be empty.
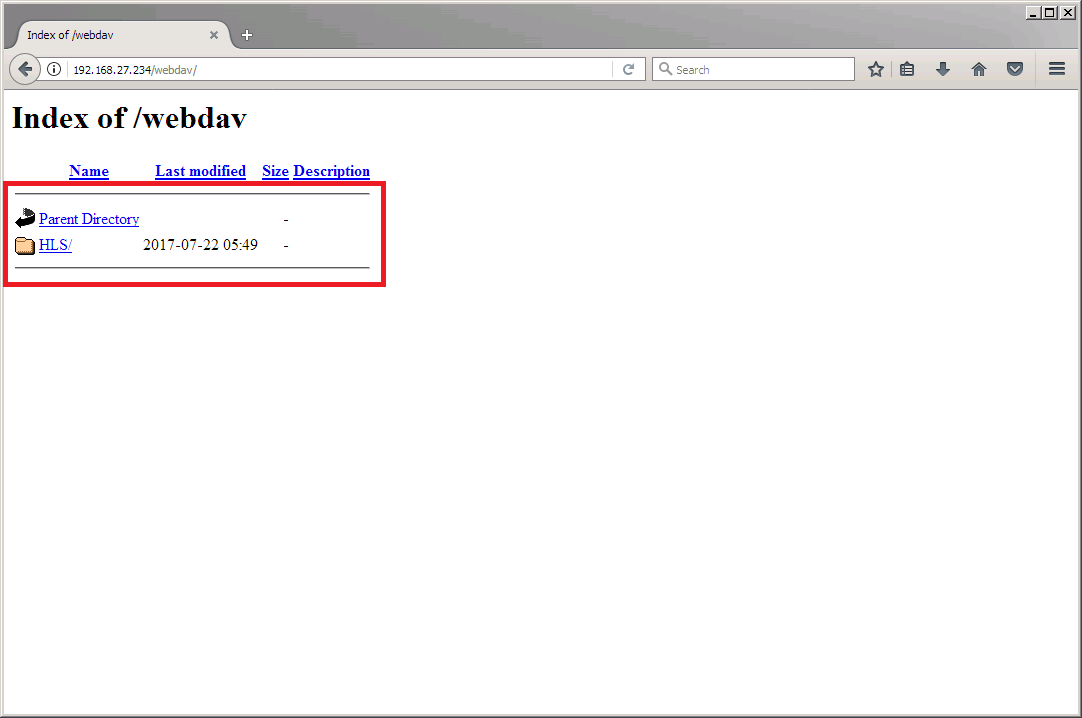
Above we can see that their is a single folder in my example called HLS.
Using Cyberduck
Cyberduck is a Windows application that can test all sorts of Internet based systems, Webdav, FTP, Dropbox, Cloud etc. The advantage Webdav has over a simple browser test is that Cyberduck can write to Webdav as well as read from it.
You can download Cyberduck from HERE: Once installed, Run Cyberduck.
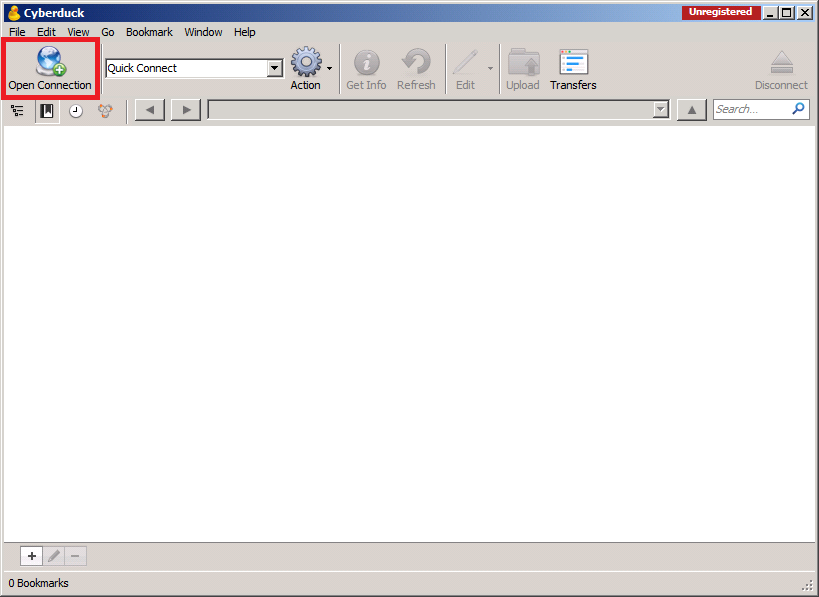
Once running, click the Open Connection button (top left)
This will open the connections page.
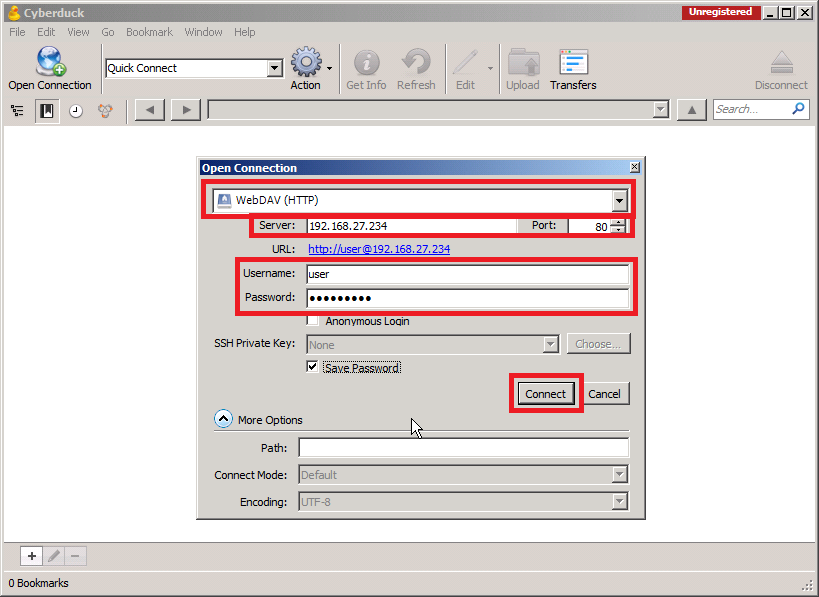
Now we have to configure our connection:
Set WebDAV (HTTP)
Server is your Origin Server IP Address
Username: dev
Password: 3nvivio_! (or whatever password you used when you configured Webdav)
Click Connect.
You may get an Unsecured WebDAV (HTTP) connection warning.

When the connection is made, if this is a new server you wont see anything as we have not used the WebDAV location yet.
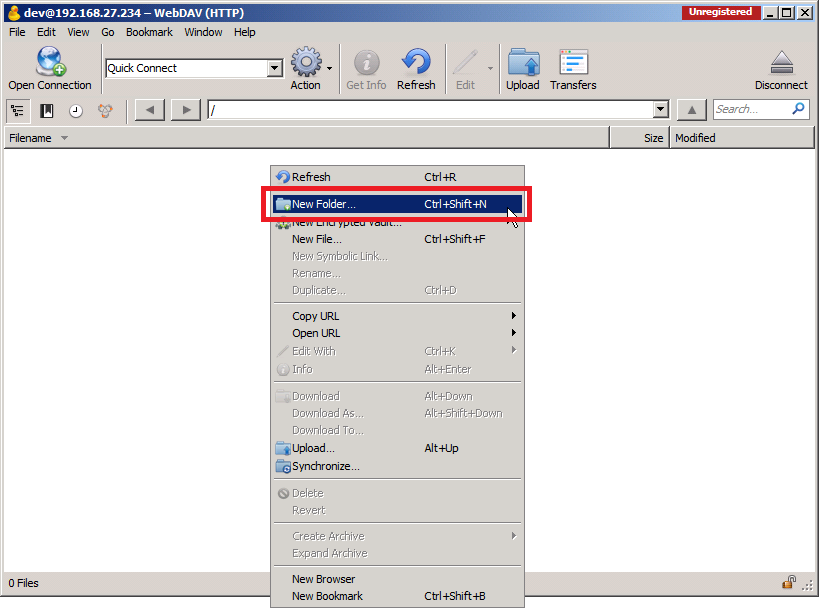
Right Click in the Cyberduck Window and select New Folder.
A dialogue box will open for you to enter a folder name.
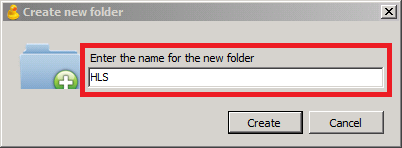
Enter a name and click Create.
You should now be back at the Cyberduck window and be able to see the folder you just created. If you get an error here that the folder was not able to be created, then you most likely have a rights issue in your Linux configuration (on the server that has WebDAV).
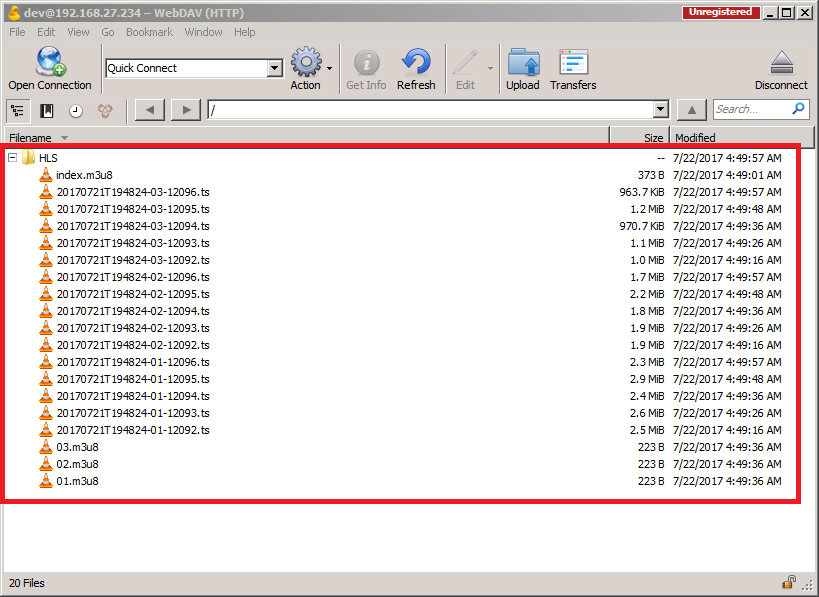
Above is a folder called HLS I created, I have already pointed my Packager to it, so when you click on it in Cyberduck you can see all of the files associated with my HLS service.
Using PotPlayer
PotPlayer is less about testing WebDAV, and more about testing the HLS output, but it is a useful test none the less. I tried this with VLC and it did't seem to connect to the WebDAV very well (well not at all actually) but PotPlayer has WebDAV menus, so it does work very well.
You can download PotPlayer from HERE: Once installed, Open PotPlayer.
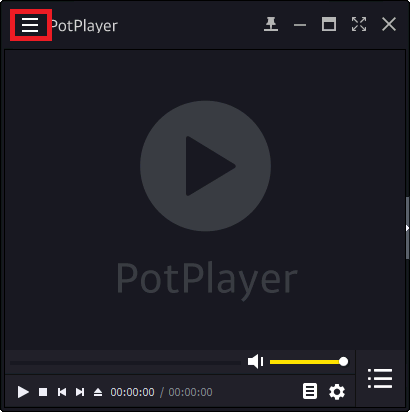
Click the three dashes in the top left of the application.
Now from the menu select Open, then Open FTP/WebDAV/HTTP…
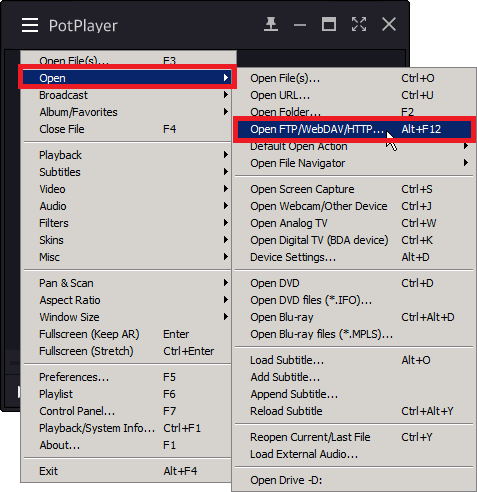
This will open the WebDAV settings page.
From here we have to enter our connection details
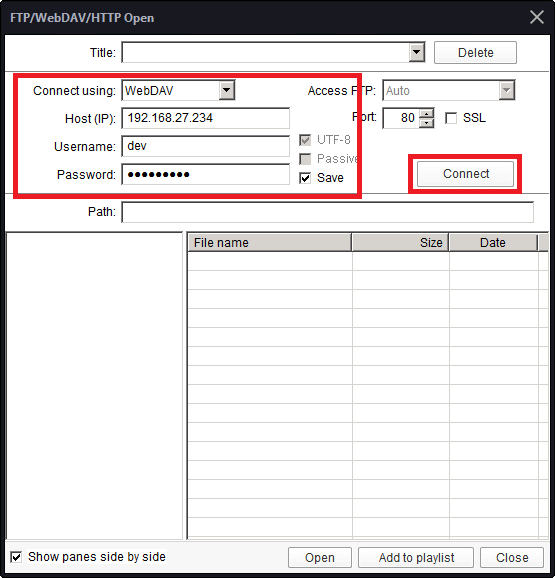
Enter the following:
Connect using: WebDAV
Host (IP): Your WebDAV Server IP
Username: dev
Password: 3nvivio_! (or whatever password you used when you configured your WebDAV server)
Click Connect.
You will now see any folders present. Click on a folder name that you are publishing too.
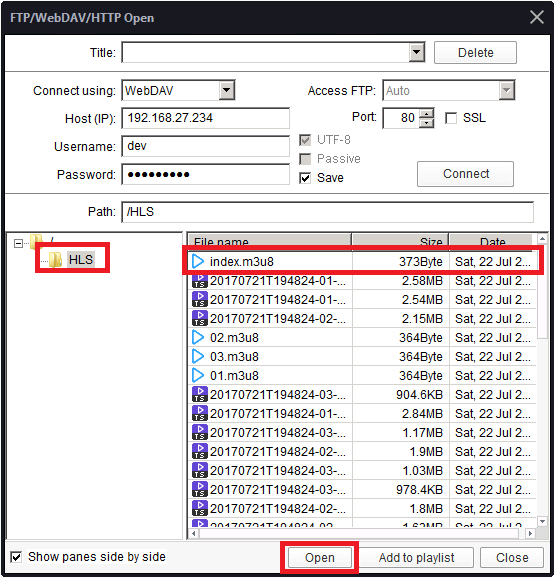
Locate the index.m3u8 file, select it and then click Open.
The HLS Stream should now be played.
