Table of Contents
Move EC2 Instance
Jun 2017
Introduction
There are a couple of reasons you might want to move your EC2 Instance. The first is that you want to host your EC2 Instance in a location closest to your users. The second is that (like me) you setup your first EC2 instance, got it all running, then realised that your server is several thousand miles away, so now you want it hosted in your region.
There are probably more reasons that that, but these are the main two that spring to mind. This tutorial shows you how to move your EC2 instance (or indeed just create a local copy that will be useful for redundancy purposes) to another zone.
Please bear in mind, if you are using the Free Tier system, that you will need enough available space (you get 30GB free) and that you will be running two instances, albeit for a short time, so this could potentially cost you a few pennies, if we we are talking about less than an hour it might not incur any charges.
Move EC2 Instance
Login to the AWS Console and navigate to your EC2 Instance.
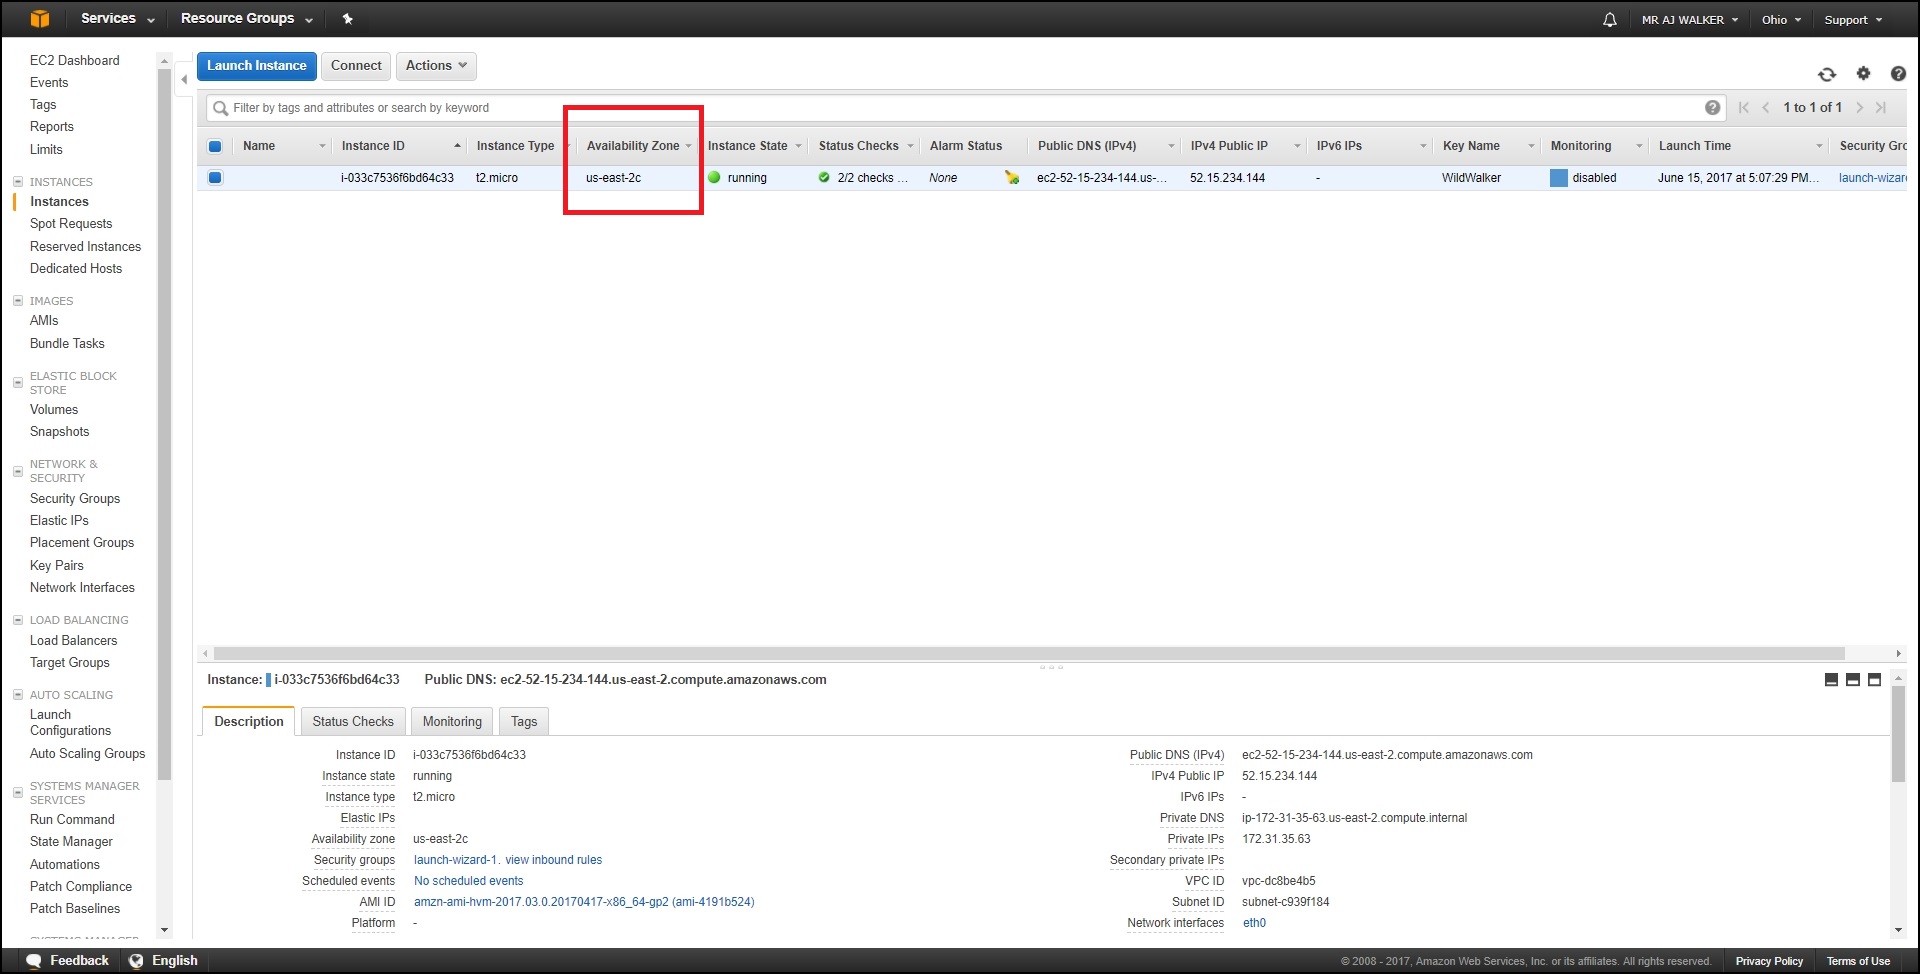
In the example above it can be see that my EC2 Instance is in the Availability Zone (AZ) us-east-2c. I am in England, so I really need a closer AZ to where I am.
The reality is that we can't move the EC2 Instance, we need to make a copy, then use that to create a new EC2 instance in a different AZ. The new EC2 Instance will be an exact copy of the original, so everything will work exactly the same as it did before, only a little faster.
Amazon Machine Image or AMI.
To create an AMI, select the Actions button.

From the pop out list select Image then Create image.
The Create Image page will open.
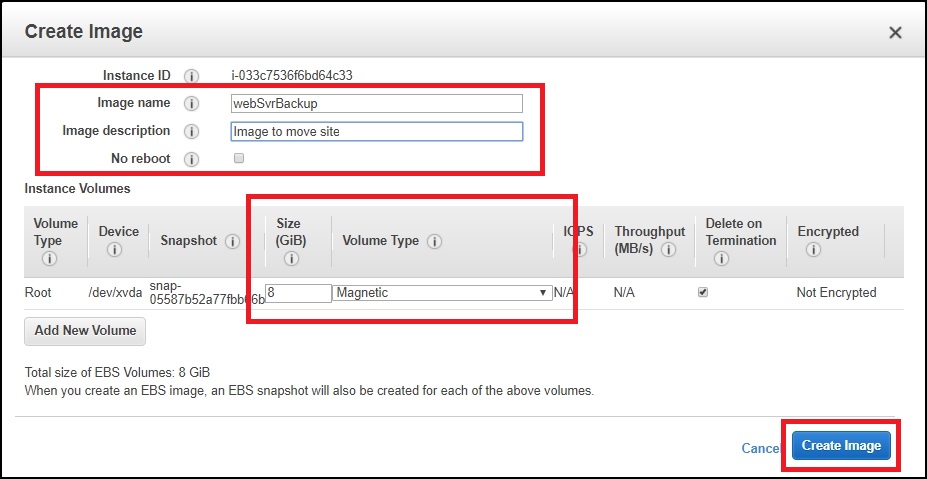
Enter the following information:
Image name: A simple name to identify the image.
Image description: A description for the image.
No Reboot: If you tick this, the Image may have issues, best to allow reboot if possible.
Size GiB: Size of storage for image (I went with the default)
Volume Type: Magnetic, don't need SSD for simple storage.
Select Create Image.
WARNING!: Now I know I go on about this, but the space you use, might not be free. Remember you get 30GB free. If you exceed that you start to pay per hour. Even if you do exceed it, you will finish this process in about 20-30 minutes, and can delete this AMI, so your costs again should be no more than a few pence, if anything at all.
When you select the Create Image button, you will see a confirmation window.

Just accept the message by selecting Close.
The AMI Status will change to Pending.

For my EC2 Instance, the AMI creation took around 5 Minutes. I have an EC2 that has an 8Gb Magnetic store, this store is about 80% full.
After the AMI Creation is complete, the status will change to available.

This is the back process complete.
Next we need to make the AMI available in our new region (AZ).

Select Actions, then Copy AMI.
The Copy AMI page will open.
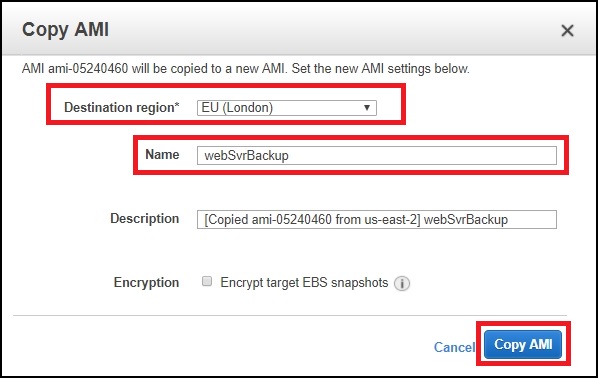
We have to make some initial choices here:
Destination Region: This is the new AZ for your EC2 Instance (I want it in London)
Name: A name to identify the copied AMI (you will need this, so make it obvious)
Select Copy AMI.
A Copy AMI Confirmation window will open.

Select Done.
This also took around 5 minutes to complete for my EC2 Instance.
Before you continue, it is very important to ensure that you are now working in the correct AZ (Availability Zone).

In the top right of the web interface, ensure you see your zone.
Before you continue, ensure that the status for the AMI is available. What you have just done is to copy the AMI you created in your original AZ, and put it in the AZ where you want the new EC2 Instance to reside.
when the AMI is available, select Actions.

From the menu, select Launch.
What launch does, it to take you through an identical process to when you create a new EC2 Instance.
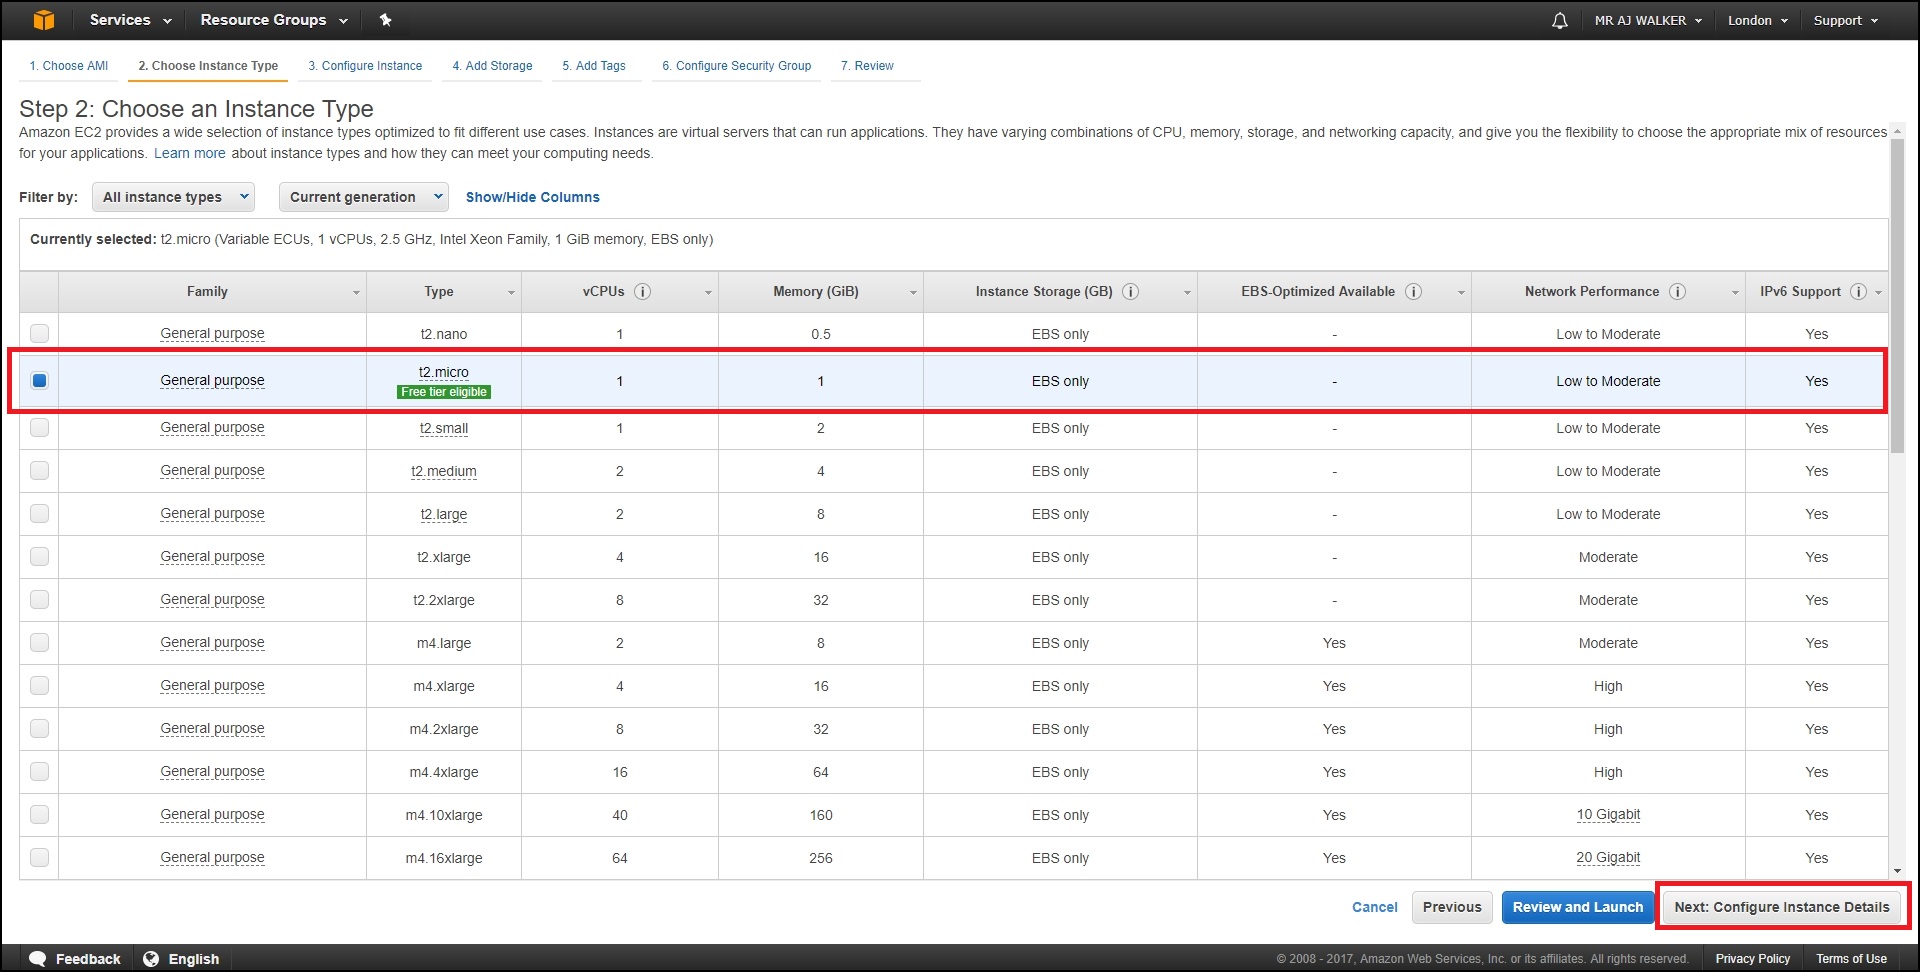
Chose an instance type, select t2micro (free tier) and then select Next: Configure Instance Details.
Configure Instance Details.
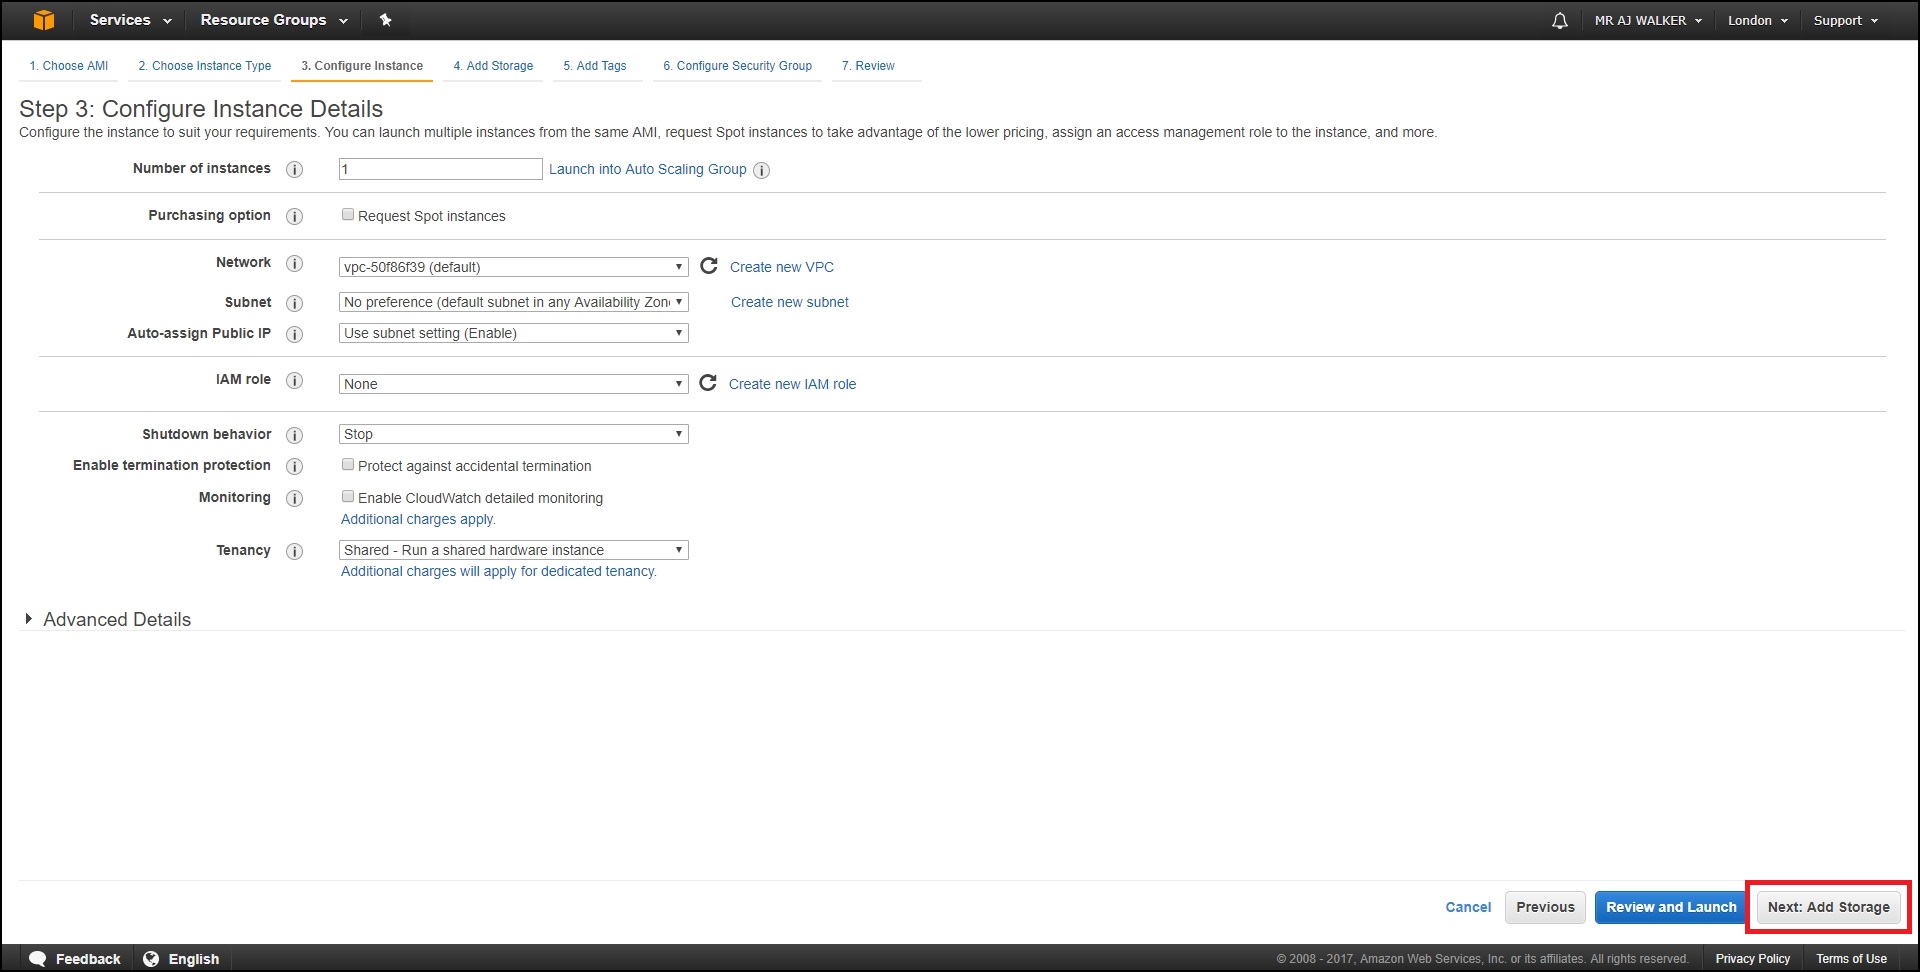
Unless you have a good reason, there are no changes required here. Select Next: Add Storage.
Add Storage.
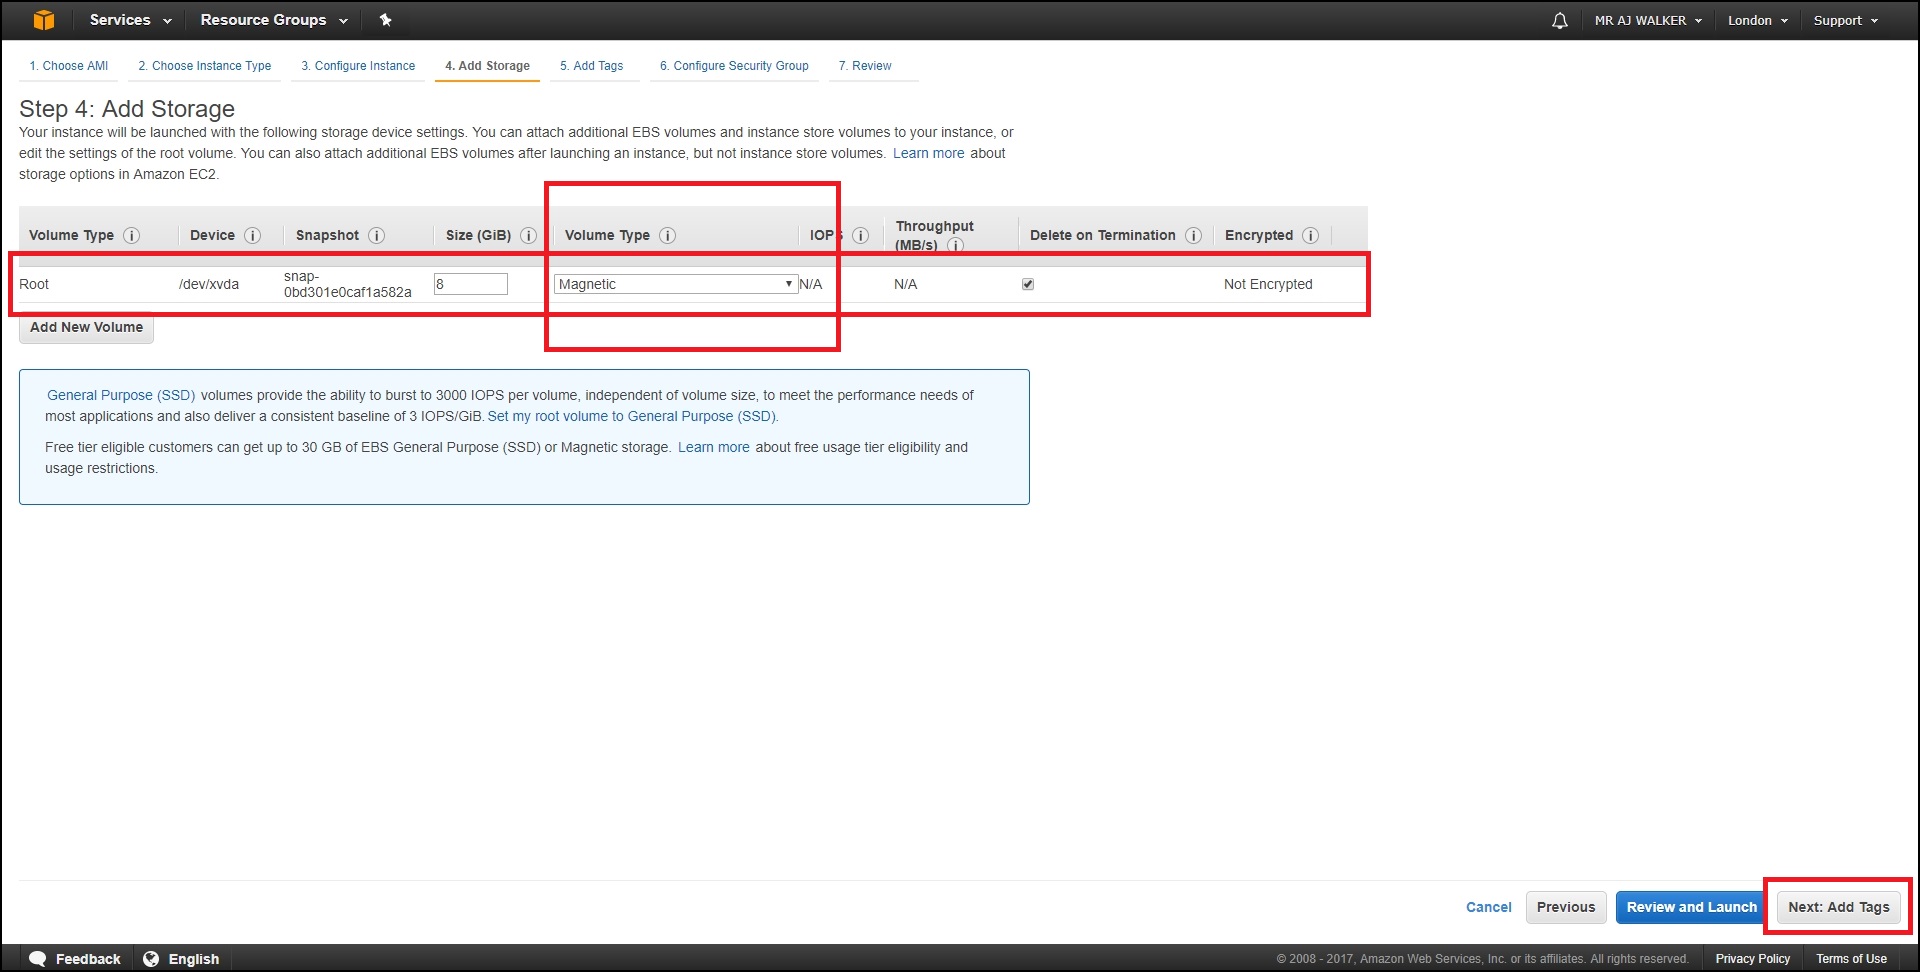
I normally accept the defaults here, but I do change from SSD to Magnetic. Select Next: Add Tags.
Add Tags.
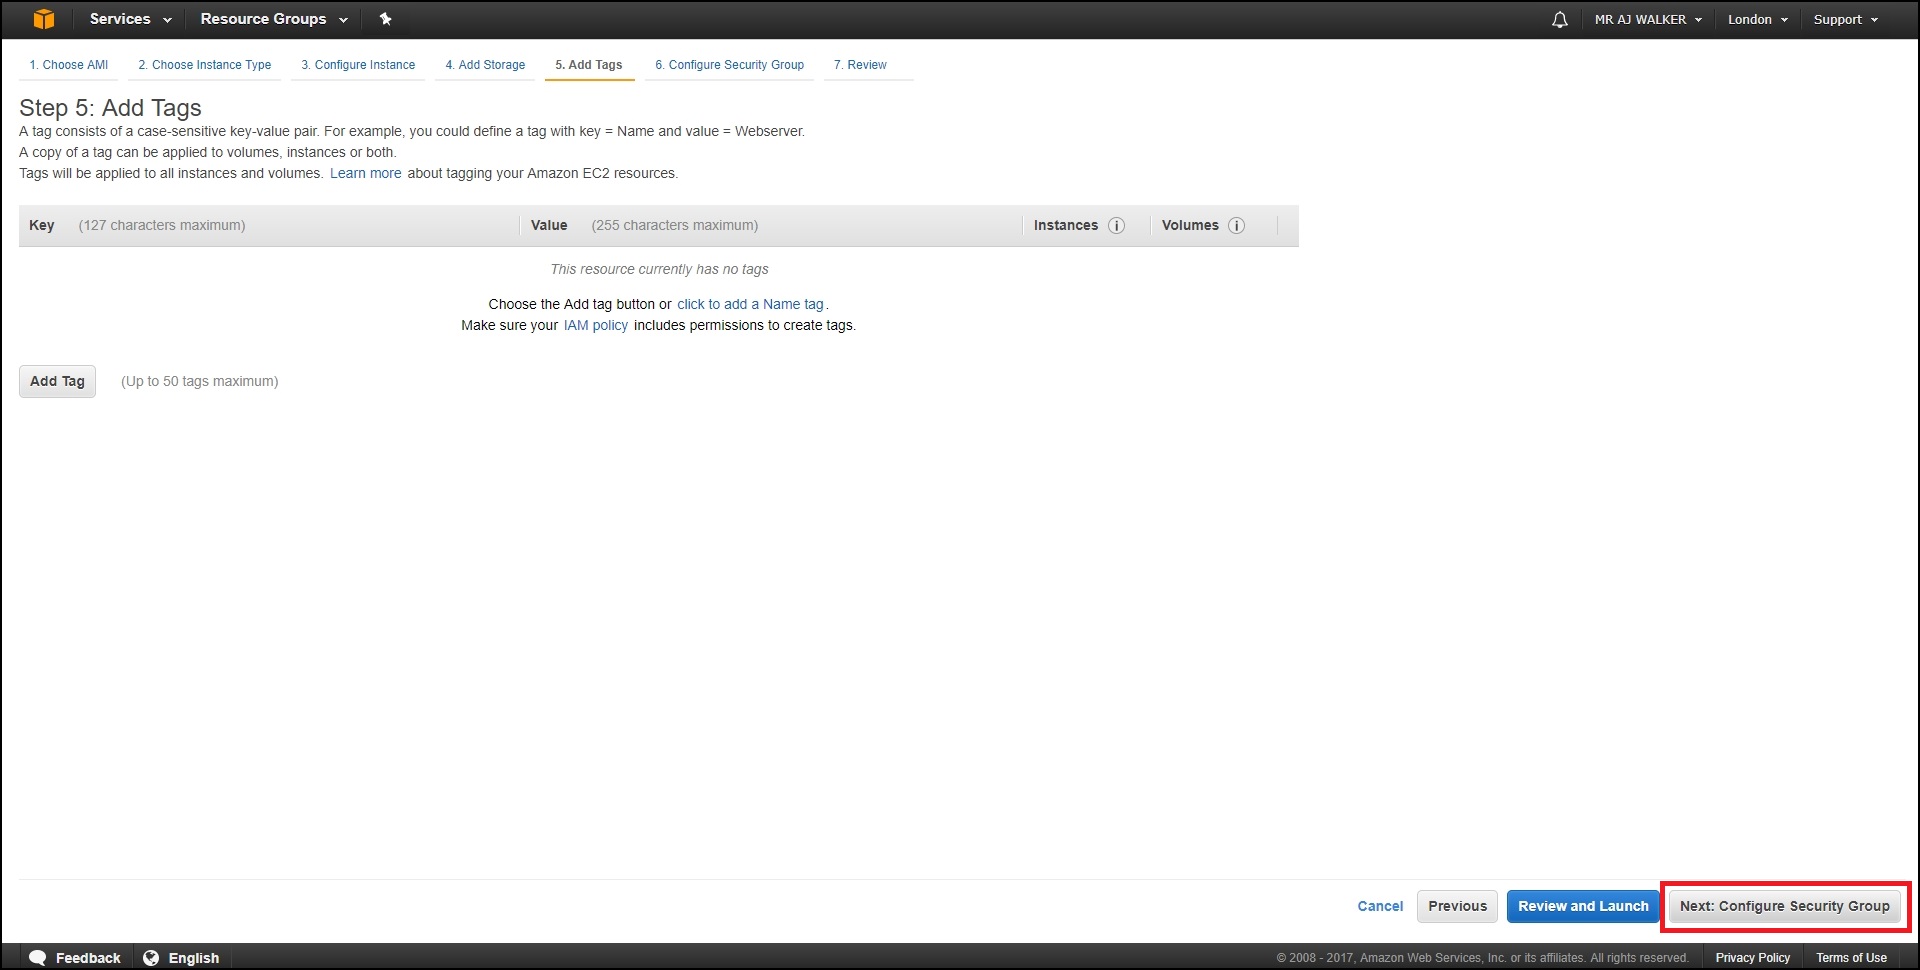
Nothing to do here, select Next:Configure Security Group.
Configure Security Group
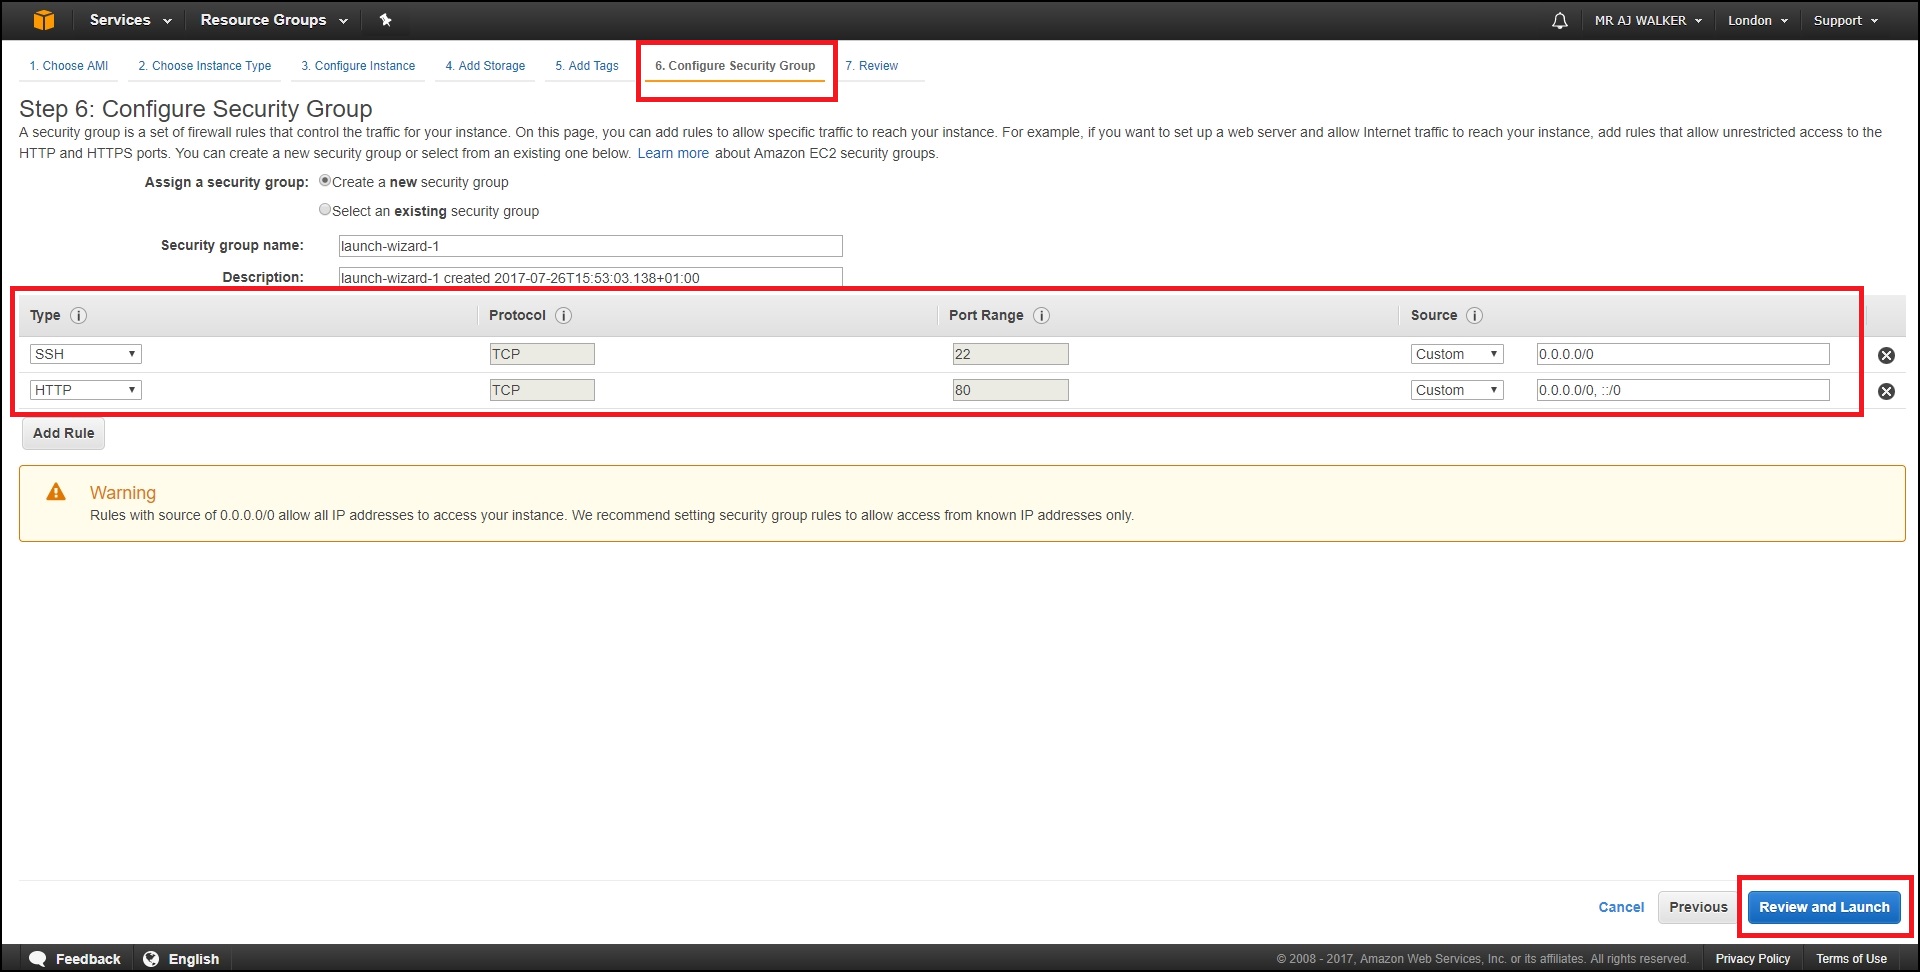
Here we have to open any ports that we were using for the instance we copied earlier. I was using port 80 as my EC2 Instance was a web server.
Add any relevant ports then select Review and Launch.
You will get a warning about storage.
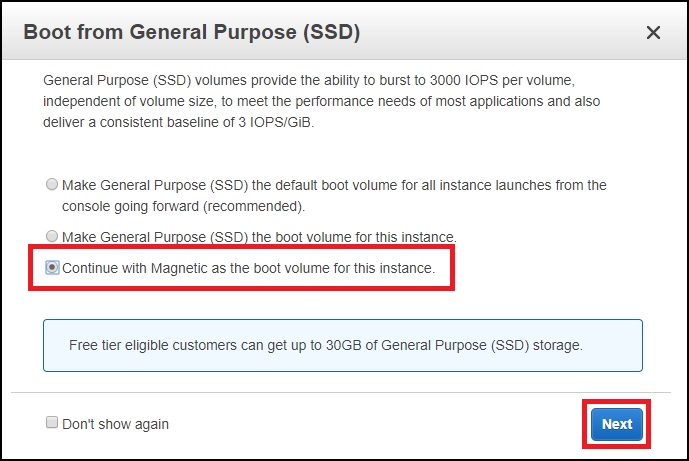
Because we selected magnetic, we see this page. I have been using magnetic for a few weeks and have not yet incurred any costs.
Select Next.
After all the settings pages you will see a confirmation page.
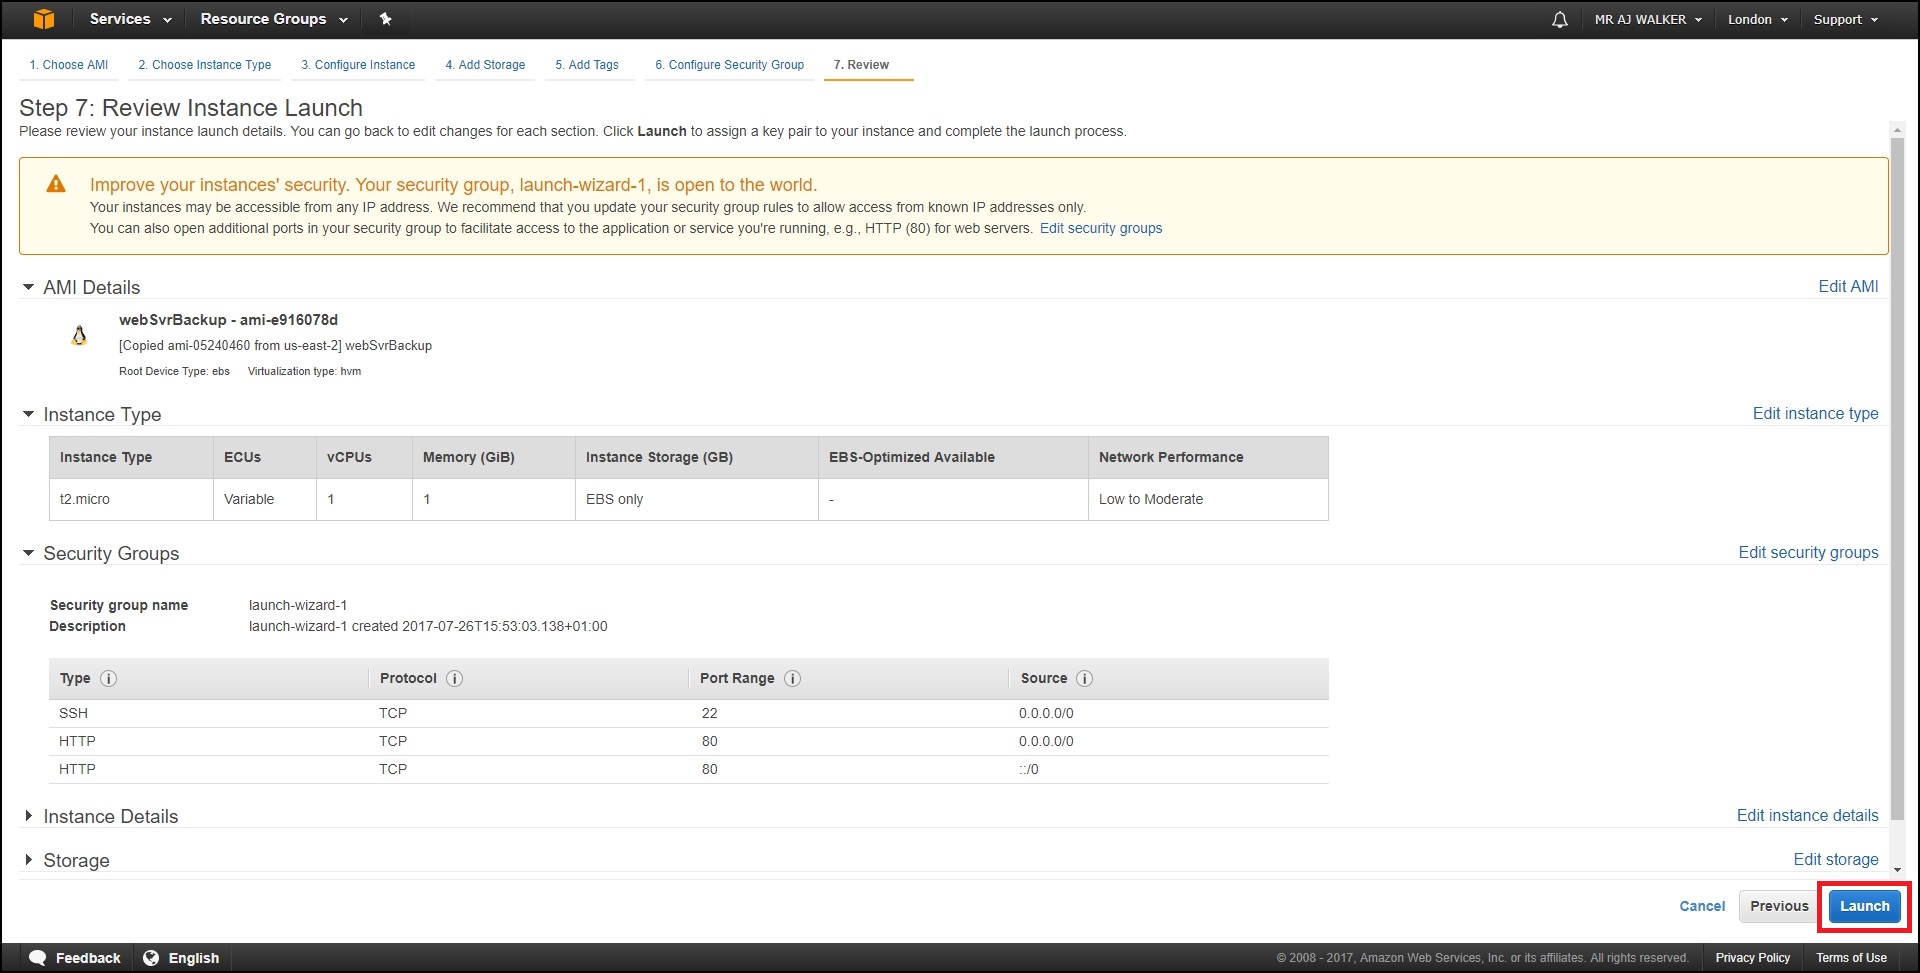
Select Launch.
Because this is a new EC2 Instance, we need to create a new Key Pair.
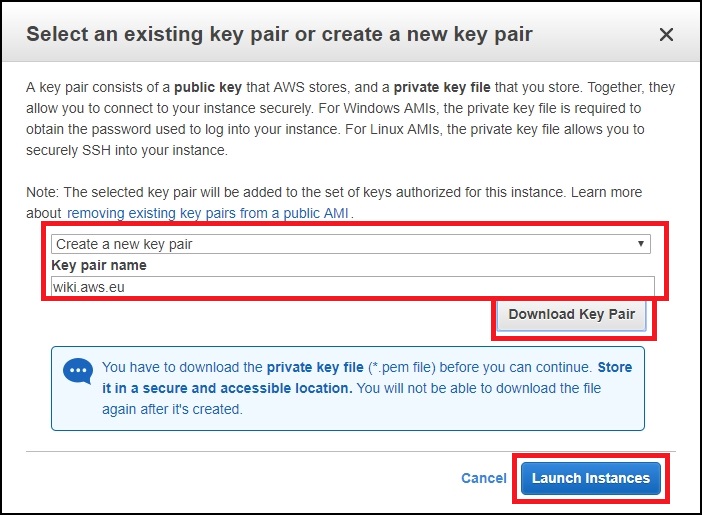
Select Create a new key pair and enter a Key pair name.
Select Download Key Pair. (Don't lose the key, you will permanently lose access to your EC2 Instance.)
Select Launch Instances.
If you check the status of your EC2 Instance, you will see the following:

The Availability Zone (AZ) has now changed to the region you selected. Your IP will also have changed, as IPs can't be moved between AZs you will have to update your DNS settings, also if you use Elastic IP Addresses, you will have to recreate new ones for this AZ.
The Original EC2 Instance
We didn't actually move the EC2 Instance, we simply made a backup, copied the backup to a new AZ and created a new EC2 Instance from that backup.
What this means is that the EC2 Instance that you originally had is still there, and if you left it running, it is still running and potentially costing you money.
From the dashboard, select the AZ where your original EC2 Instance was created (US East (Ohio) in my case.)

You can't see instances in different AZs on one page unfortunately, so if you have co-located EC2 Instances, you have to navigate between AZs.
So here we are, back at the original AZ where our original EC2 Instance is.

We have to stop this instance for two reasons. It is using a server, so this is incurring a cost, yes we could just stop it and leave it BUT, it is also consuming hard disk space. Even worse is that we are using a lot of space now because of the copy process, consider this:
Original EC2 Instance is using..8GB
The AMI we created is using…..8GB
The AMI copy is using………..8GB
The new EC2 Instance is using…8GB
Total………………………32GB
Our free allowance is 30GB, so we need to do some cleaning up.
We need to do the following:
Stop the old EC2 Instance.
Delete the old EC2 Instance.
Delete the AMI Image (Snapshot).
Delete the AMI Copy Image.
Stop the old EC2 Instance
From the console, navigate to the old EC2 Instance.

Select Actions, then Instance State then Stop.
You will see a warning page about stopping an Instance.
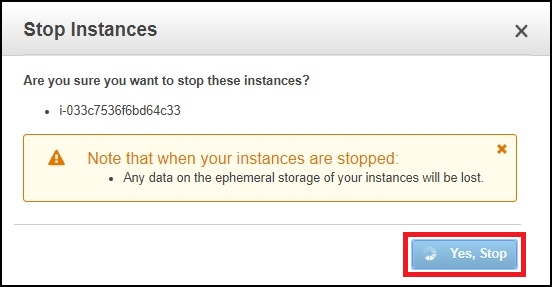
Select Yes, Stop.
It might take a minute or two, but the instance will stop.

Keep checking the console until the instance status is stopped.
Delete old EC2 Instance
To delete the old EC2 Instance, from the EC2 Console page.

Select Actions, Instance State, Terminate.
You will get a warning about terminating an instance.
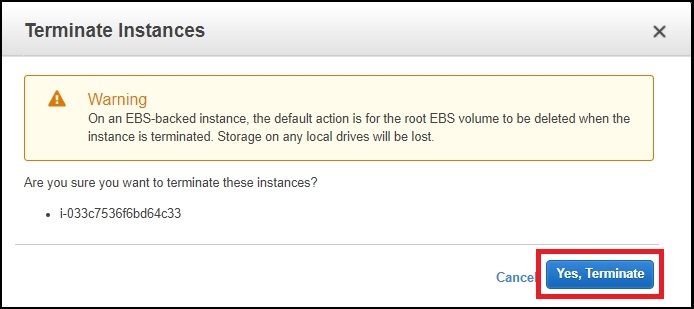
Select Yes, Terminate.
Check the status of your old EC2 to check termination is complete.

This might take a minute to two.
Delete Old AMI
Naviage back to the EC2 Console (ensure you are on your old AZ)

From the menu on the right, go down to Images and select AMIs.
Your AMI will be listed in the main page.

Select Actions, Deregister.
You will get a warning about deregistering an AMI.
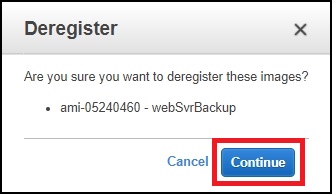
Select Continue.
Delete the AMI Image
From the EC2 Dashboard.
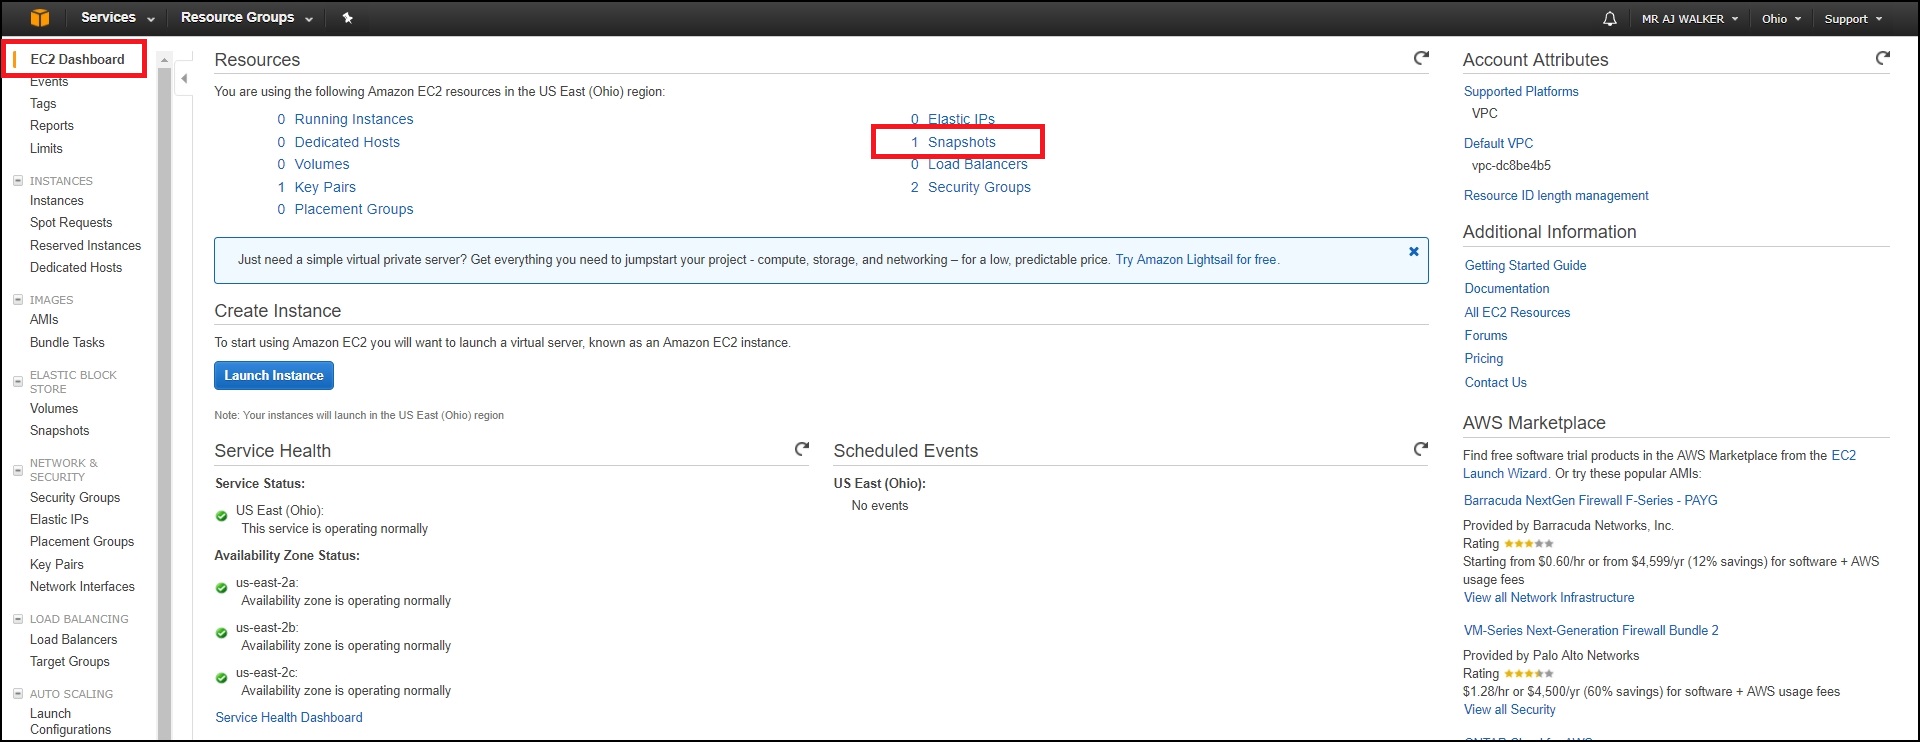
Select Snapshots.
From the Actions menu, select Delete.

If you have more than one snapshot, ensure you select the correct one.
You will see a warning about deleting a snapshot.
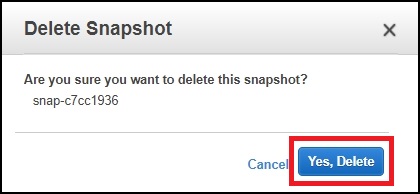
Click Yes, Delete.
Delete the AMI Copy Image
The process to delete the AMI copy image is the same as above, you just need to navigate to your new AZ (Availablility Zone) first.
From the EC2 Dashboard.

Select Snapshots.
From the Actions menu, select Delete.

If you have more than one snapshot, ensure you select the correct one.
You will see a warning about deleting a snapshot.

Click Yes, Delete.
