Table of Contents
Create VMWare VM
Some things to remember before you start
<sxh [text], gutter: false; highlight: 1-5;>
1. You must create your vSwitch and Port Groups first, or you won't be able to select them here
(you can do it later).
2. Create ISO folder on datastore and upload ISO first, you can do this later, but you must do
it before you start the VM.
</sxh>
If you are not sure what point 1 and point 2 mean, please go back to the relevant sections on this wiki to find out, it's important.
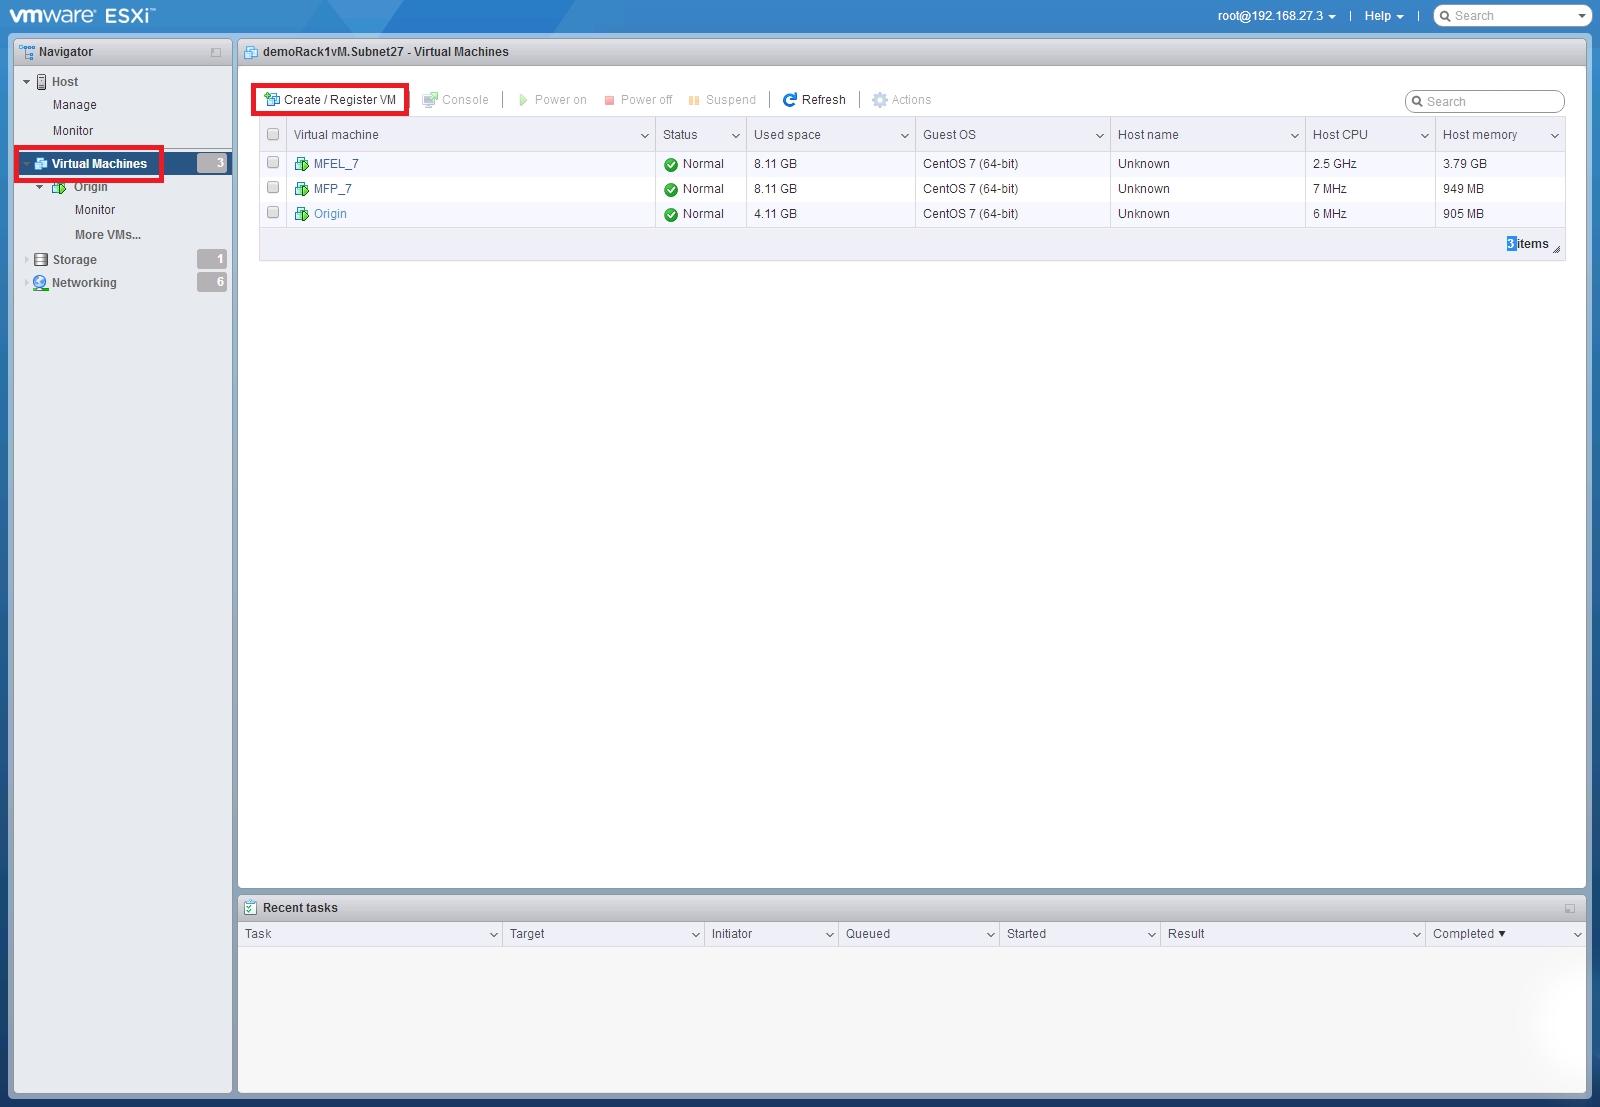
Start VM Creation
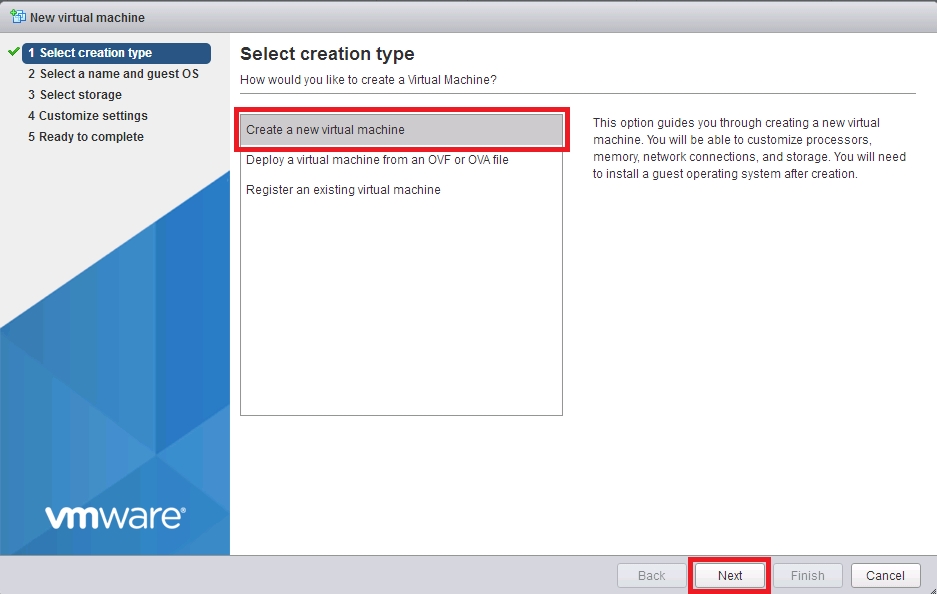
Select creation type
Select a name and guest OS
Here we must select a name for our VM, and what OS we will use.
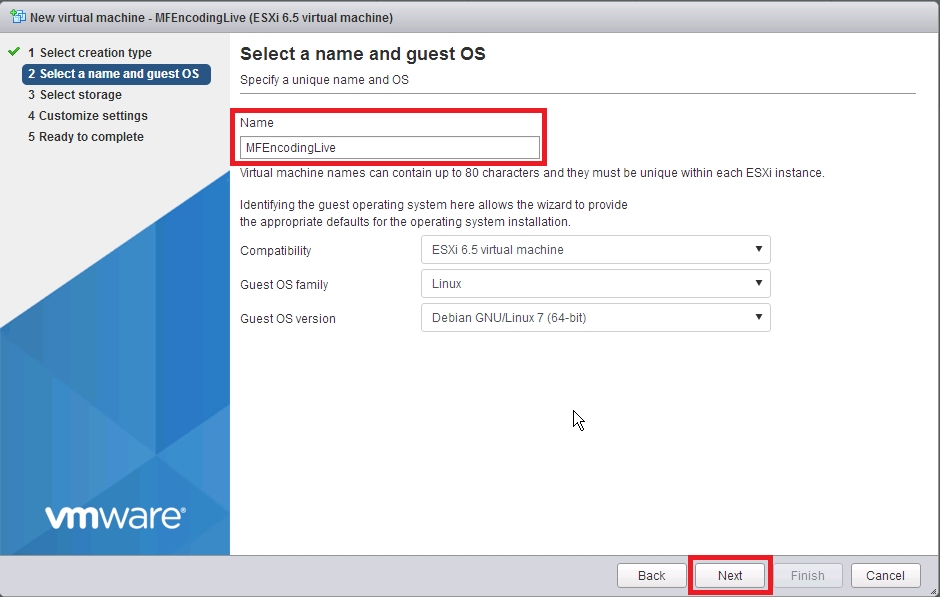
Enter the following:
Name: A name you will recognise the VM by.
Compatibility: ESXi 6.5 virtual machine (unless you are using an older or newer version).
Guest OS family: Linux (unless you need something else).
Guest OS version: (CentOS 7 (64bit).
Click Next.
Select Storage
This is where we select our datastore (you will probably only have one, especially on a smaller test system).
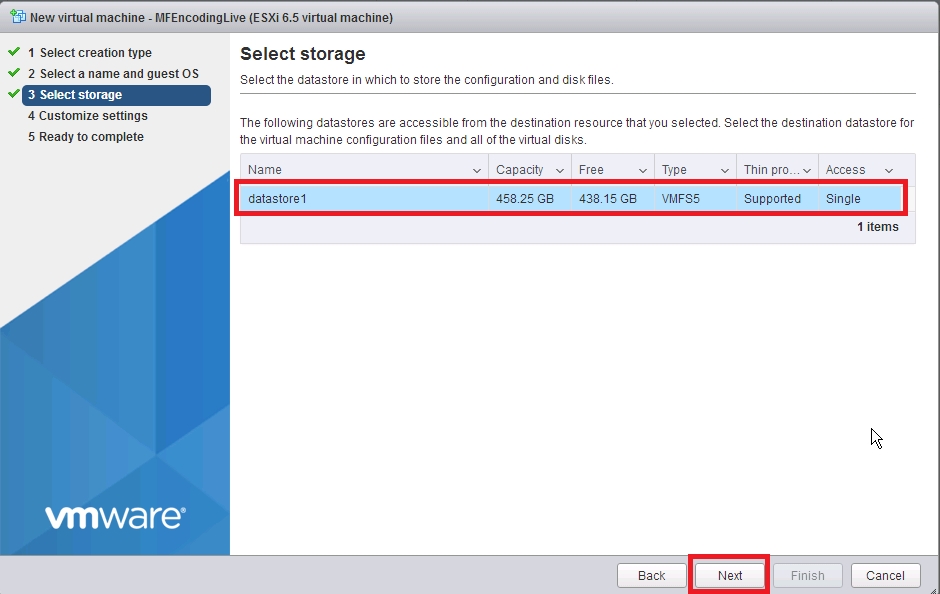
Select your datastore by clicking on it, then select Next.
Customize Settings
This is where we set the parameters for our VM such as memory, hard disk space, interfaces etc.
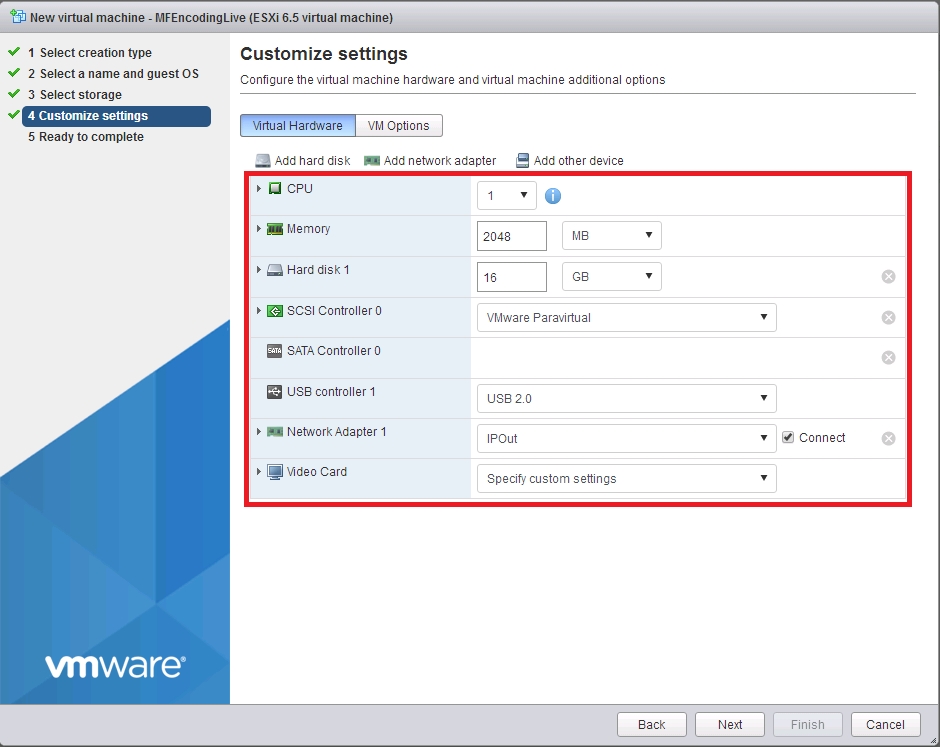
In the above example, we can see the default settings that are set when you first open this page, these are not suitable however, and we need to change most of them.
If you are setting up an MFEL, use thse settings.
CPU - Set this to 8
Memory - Set this to 8192
Hard Disk 1 - 16B (default)
SCSI Controller 0 - VMware Paravirtual (default)
Sata Controller 0 - Blank (default)
USB Controller 1 - USB 2.0 (default)
Network Adapter 1 - (the setting depends on what port groups you created)
Video Card - Specify Custom Settings (default)
Do NOT press Next yet.
Below is the settings we require.
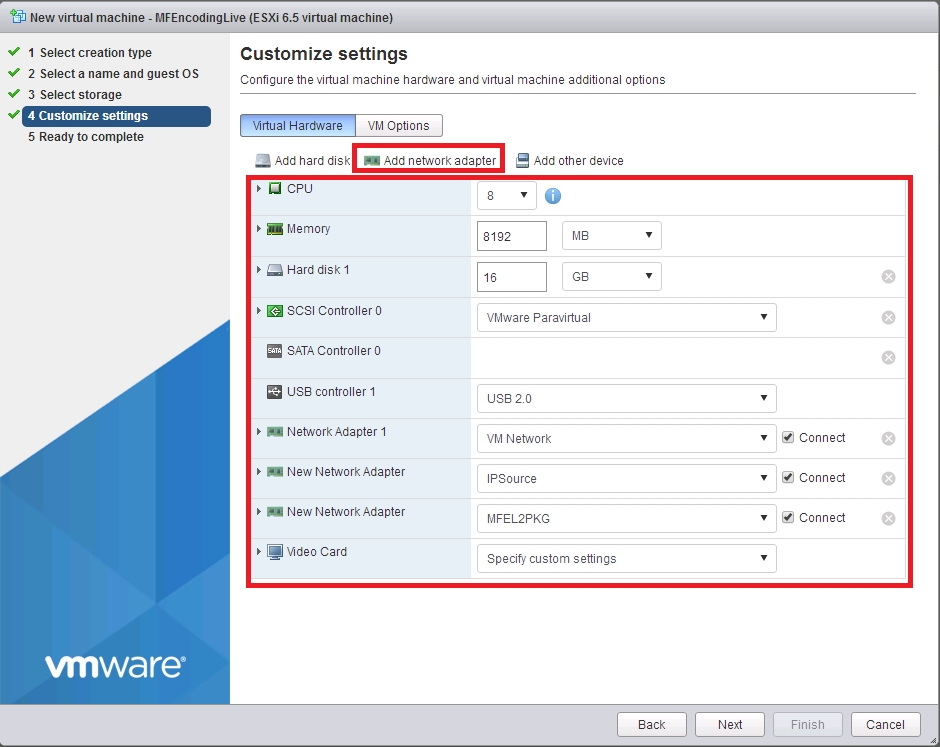
We also need to add a couple of Interfaces (depending on what you are doing). Click the Add network adapter link to keep adding adapters.
To enable us to boot up an OS, we will add a CD/DVD Drive (its a virtual one) and assign it an ISO image to boot from.
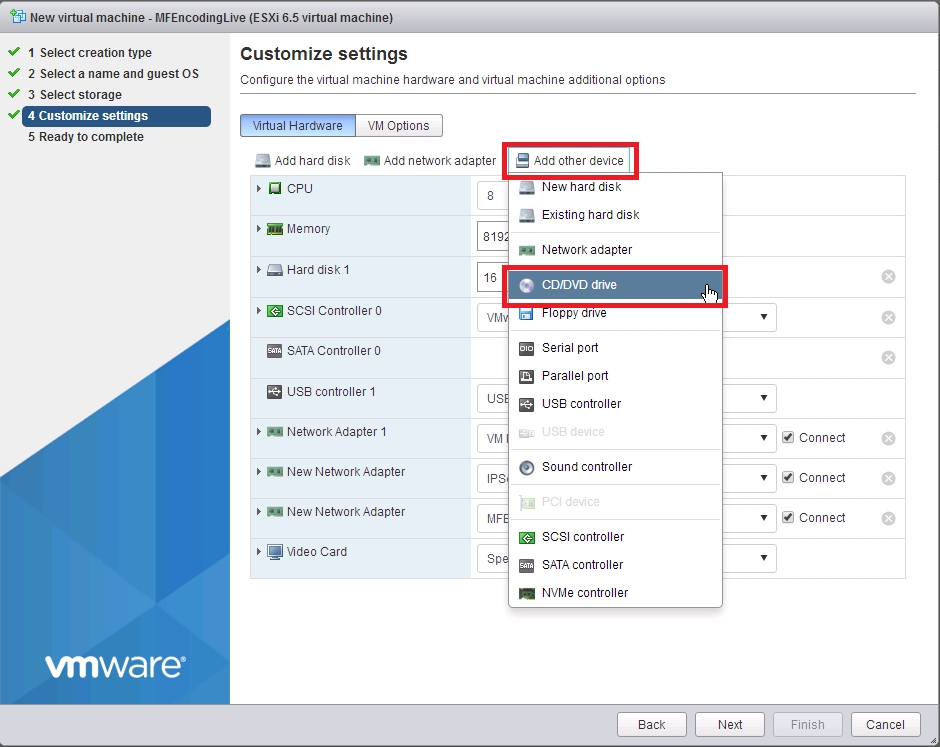
Click Add Other Device and then CD/DVD Drive.
When the CD/DVD device has been added, you will see it in the hardware list.
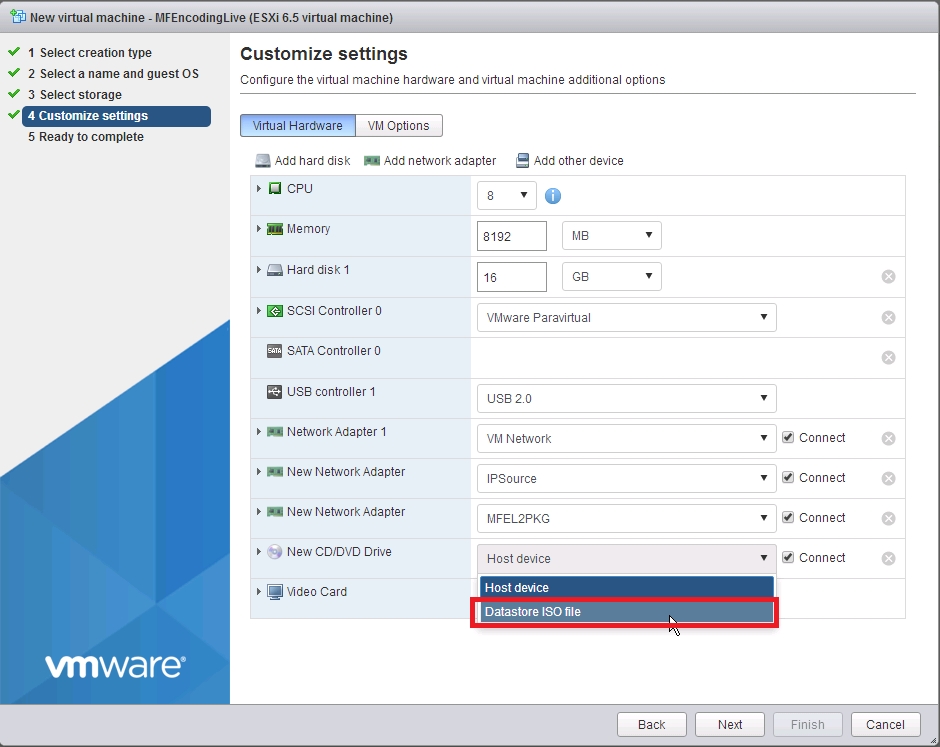
Click the device to see the options and select Datastore ISO file.
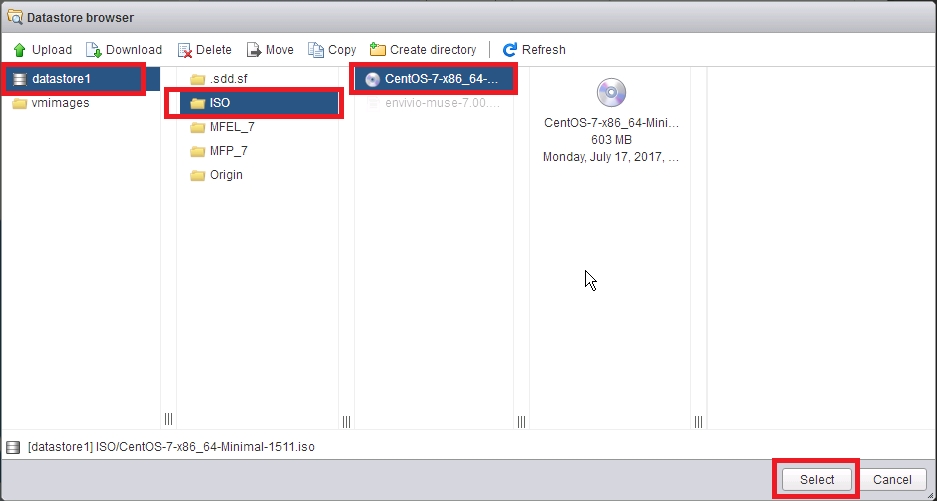
Select the datastore folder you created when installing VMWare, and the ISO file. Click Select. You can do this later if required.
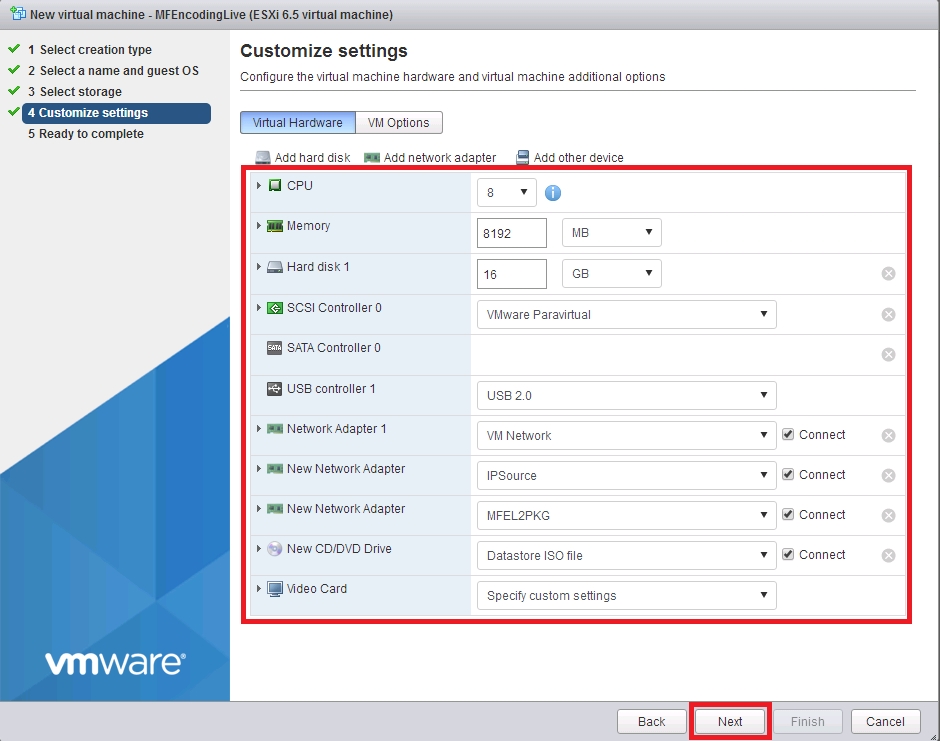
Ensure you settings match the page above.
If so click Next.
Ready to complete
The Create VM Wizard displays a confirmation page of you selected settings.
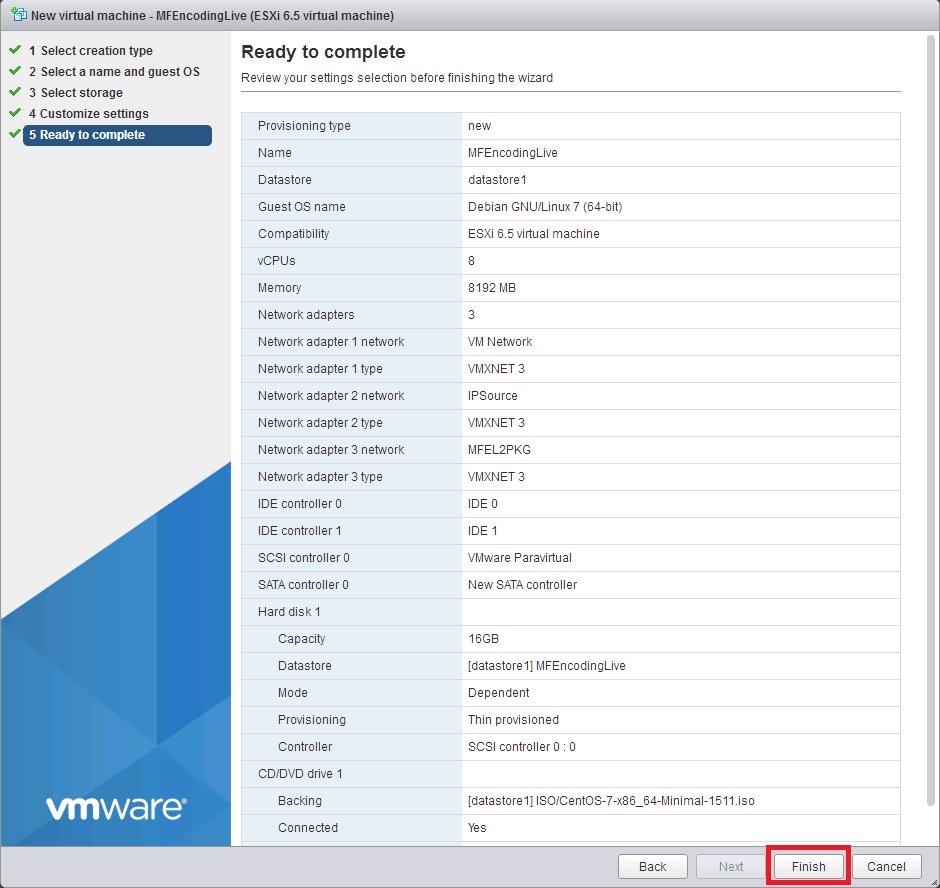
If you are happy with your settings, click Finish.
Fix a little VMWare Bug
You will now be back at the VMWare Virtual Machines page.
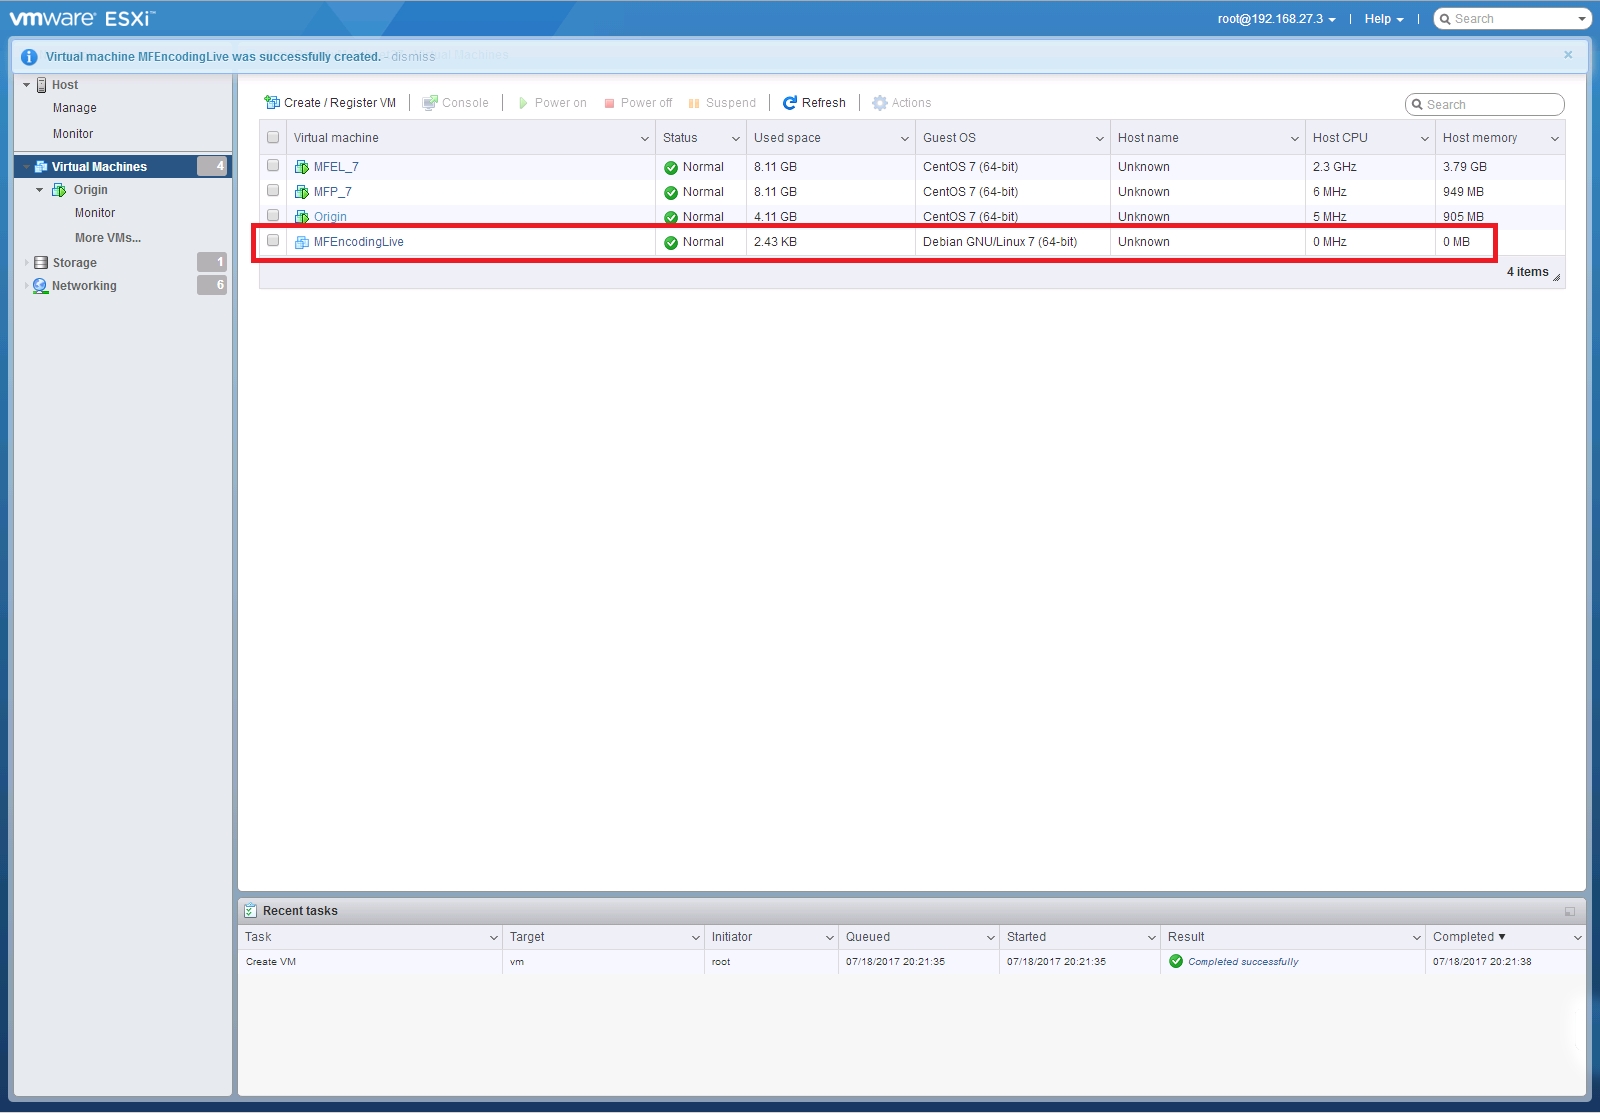
Click on your new VM name (MFEncodingLive in this example).
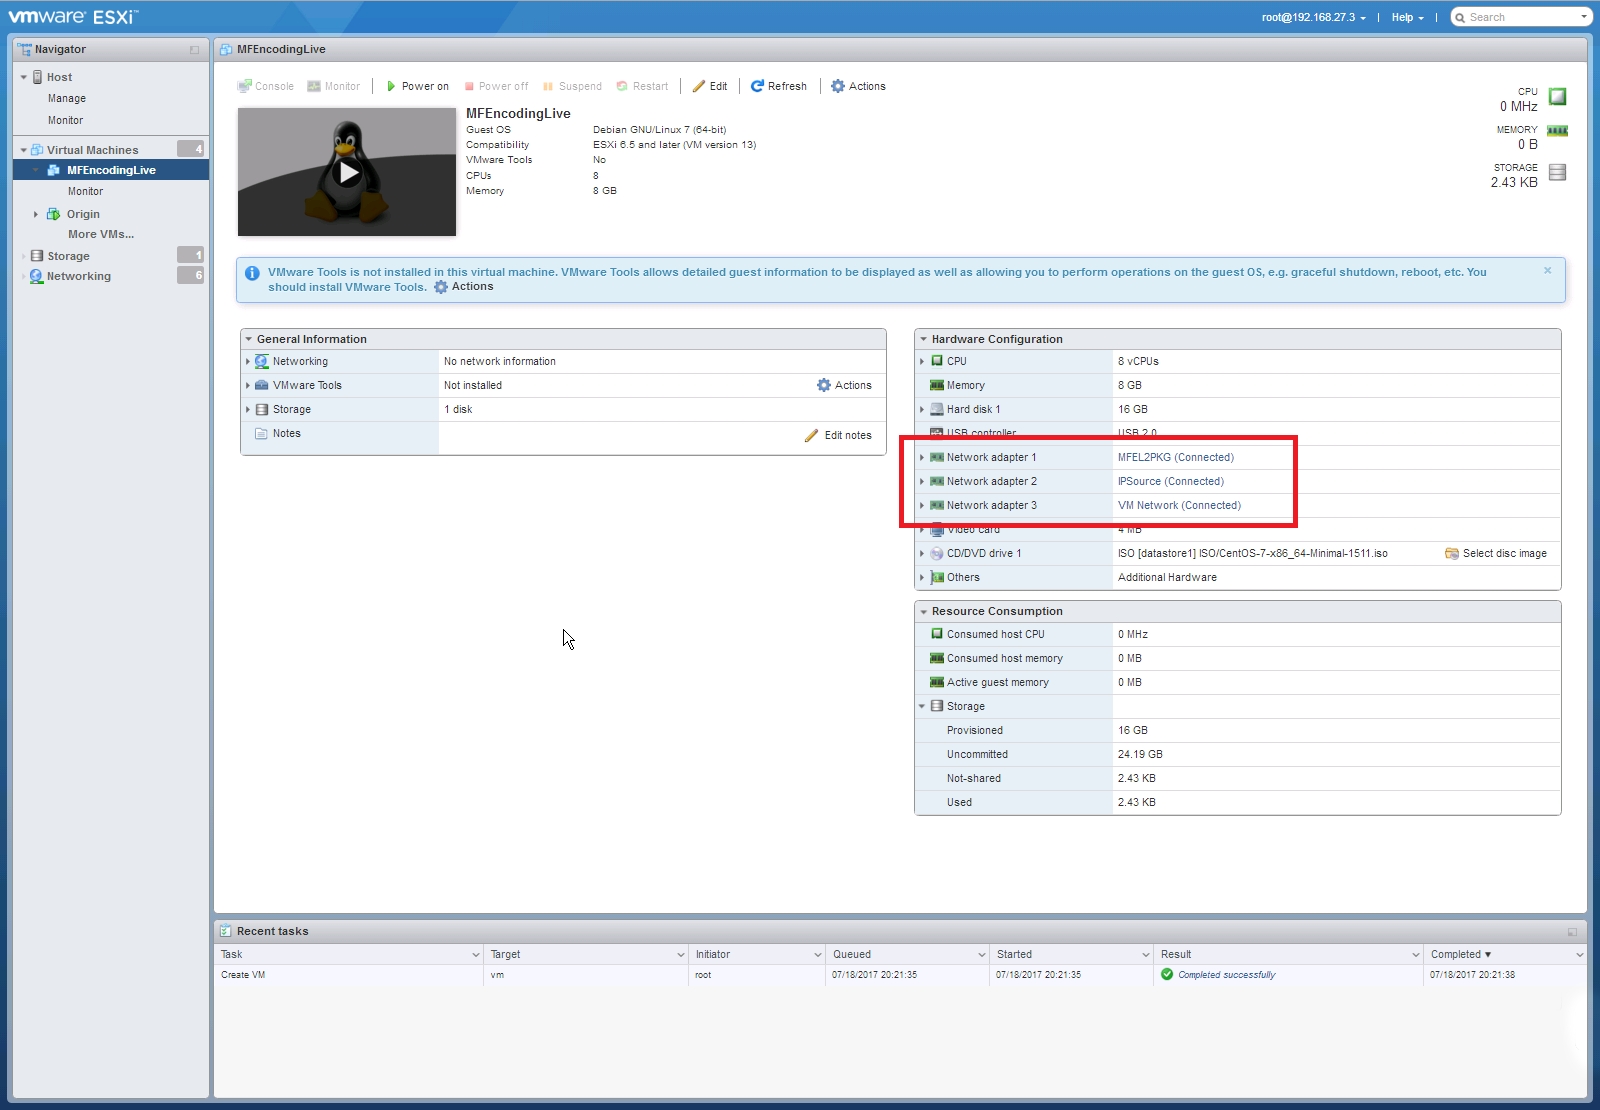
You will see the specifics of the VM listed, if you look at the interfaces, you will see the interfaces you added, but most likely the Port Groups will be wrong (it's happened to me every time so far).
Click Edit at the top of the page to go back to the editable VM settings page.
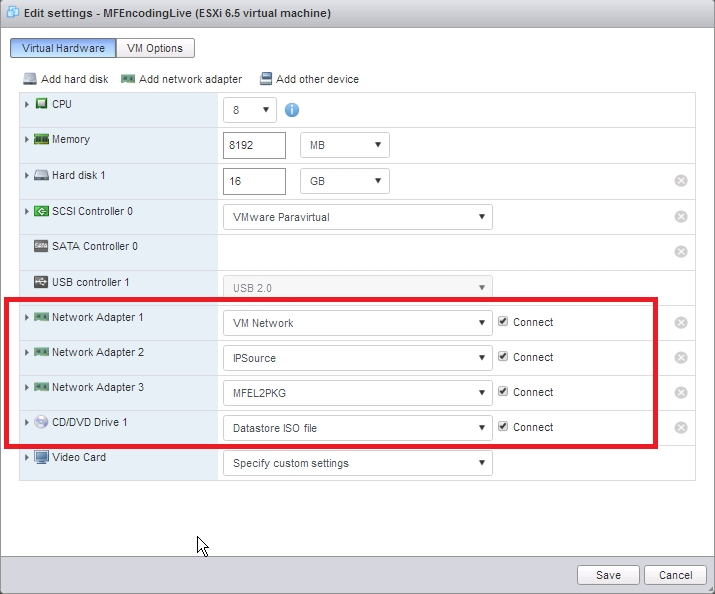
Set the correct Port Names to correspond with the appropriate Interface.
Click Save.
You will be returned to the main ESXi Virtual Machine page.
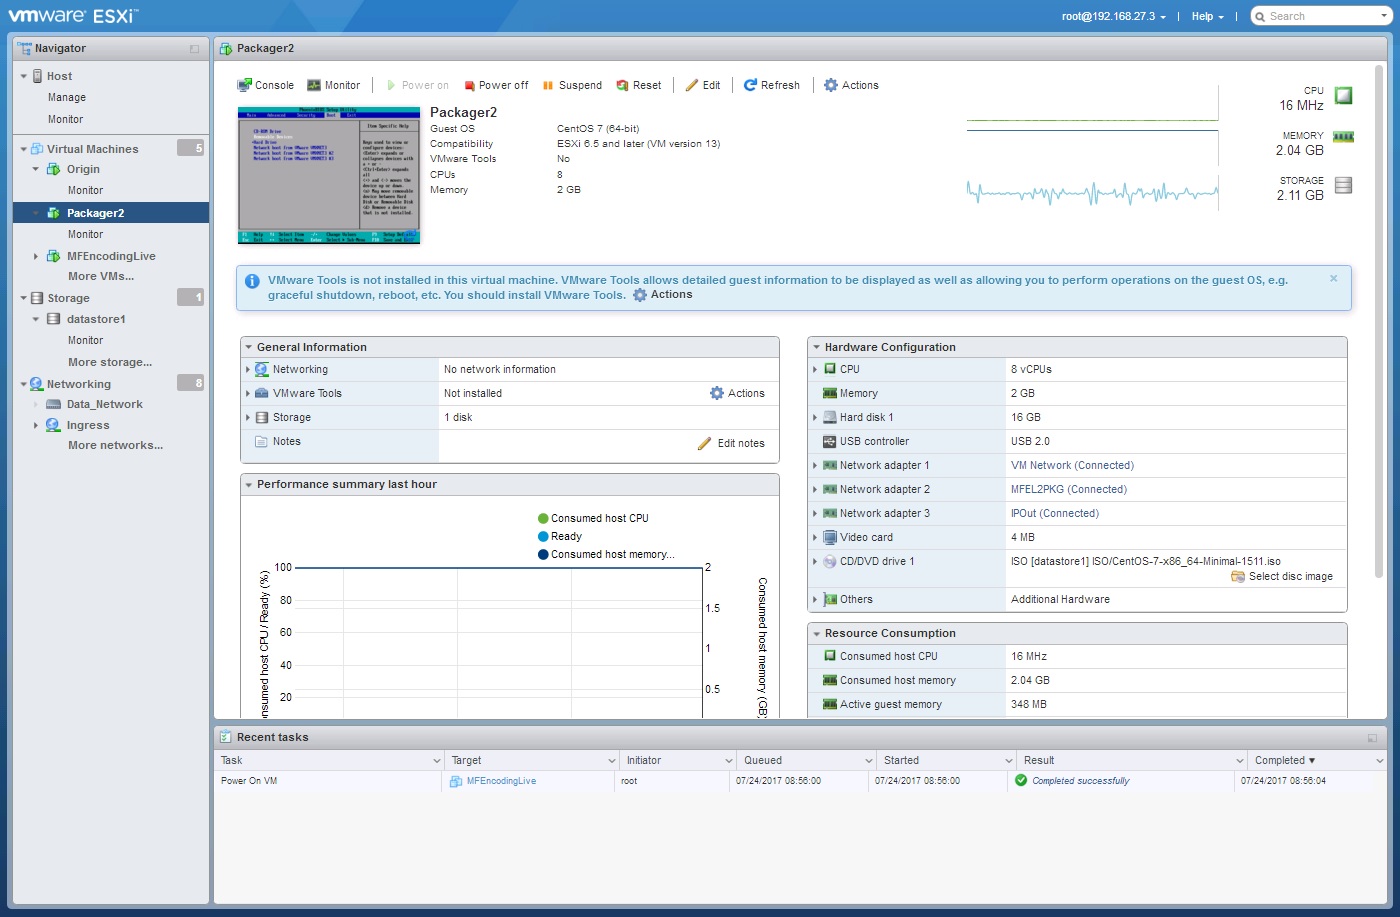
Check your VM Interface settings to confirm they are now correct.

